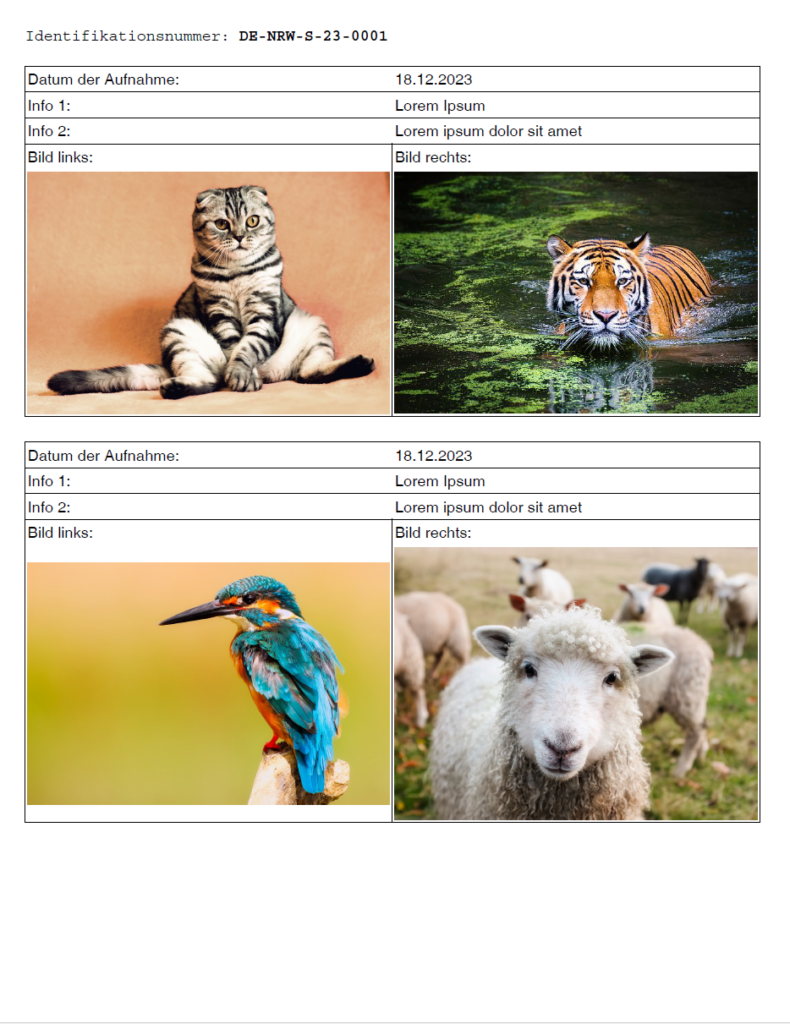
Für ein Projekt musste ich ein PDF erzeugen und habe das dann mit PDFBox umgesetzt.
Um mich in die Technik einzuarbeiten habe ich mir ein paar Bilder von Pixabay heruntergeladen, ein Projekt auf GitHub angelegt und dann schrittweise ein PDF mit Bildern erzeugt:
In my projects I use Maven as dependency managment system.
In the past I updated versions of libraries manually in pom.xml. But as projects grow, this becomes more and more annoying and time consuming. So I decided to give it a try to do this automatically.
I could not update the version of the plugins when the version information is hardcoded in the plugin section. So I used properties for the plugin versions.
API-Key: You can get an API key from OpenAI. But you need at least to pay 5$, what I did. Alternativley you can use demo as API key for limited testing.
Model-Name: Here are the OpenAI Models. gpt-3.5-turbo is default. Hint: It is not working, if there is a " "(space/blank) after the model-name.
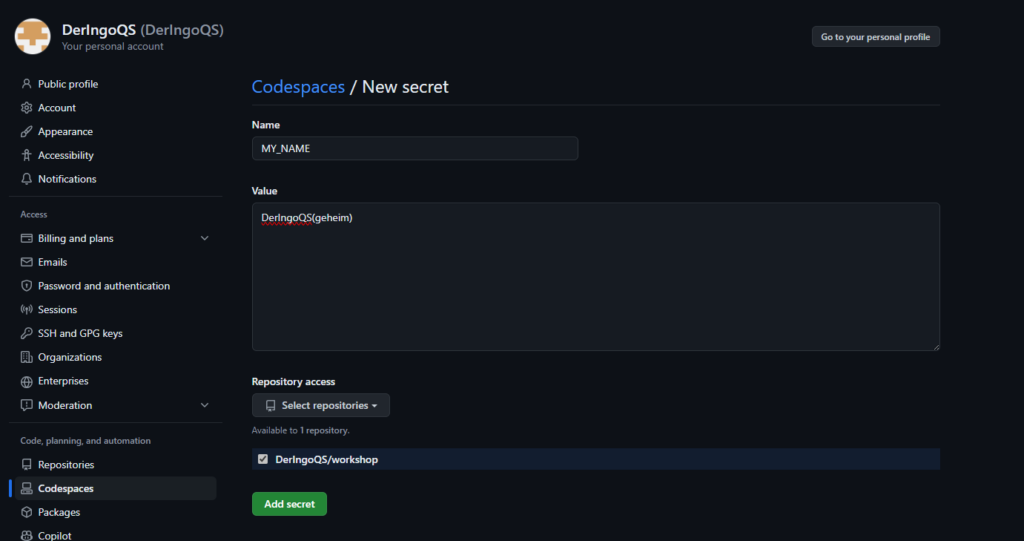
I had stored my OpenAI-API-key as GitHub secret, so the key is available as environment variable in my Codespace. Therefore I changed the configuration:
No code change needed, it works with the same code as for ChatGPT.
Everything is changed by configuration.
Antrophic Claude
Extension
./mvnw quarkus:add-extension -Dextensions='quarkus-langchain4j-anthropic'

[ERROR] ❗  Nothing installed because keyword(s) 'quarkus-langchain4j-anthropic' were not matched in the catalog.
It did not work with the maven executable. Need to add dependency manually to pom.xml, see documentation:
However, Quarkus is ignoring my resourcefriendly choice, as I can see in the Logs: "Preloading model llama3" 🤷♂️ UPDATE: For Ollama it is model-id, not model-name!
API-key: You can generate an API-key in Mistral AI Console. But you are required to have a Abonnement, which I do not have. Therefore nor API-key for me.
Model: mistral-tiny is default one
Code
Also no change.
But could not test, because I do not have an API-key.
Groq
I like Groq but unfortunately there is no LangChain4j support yet.
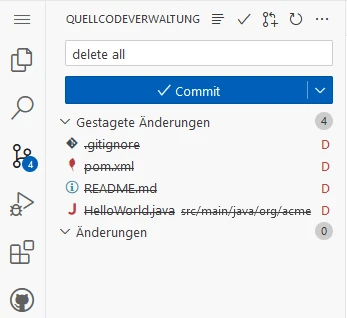
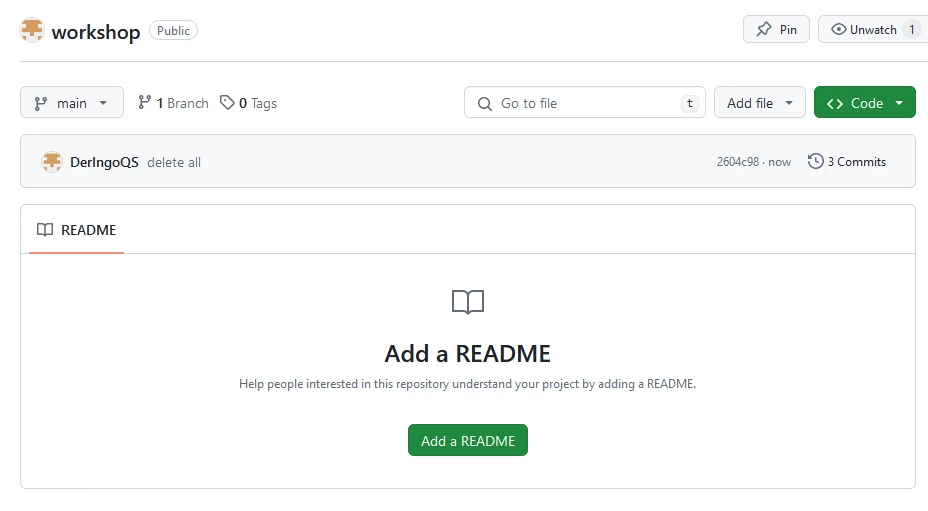
We can not just delete the workshop folder, because GIT information are inside this folder.
Workaround:
cd /workspaces/workshop/

mvn io.quarkus.platform:quarkus-maven-plugin:3.10.2:create \
    -DprojectGroupId=org.acme \
    -DprojectArtifactId=workshop

mv workshop/* .
ls -lisah workshop/
# hidden files/directory still there
mv workshop/.* .
ls -lisah workshop/
# now everthing has moved
rmdir workshop
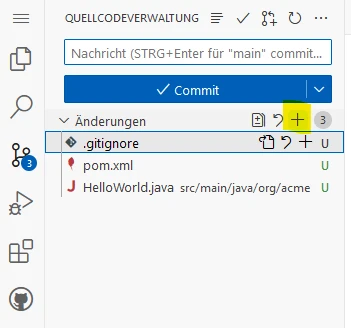
Stage, commit and push to repository:
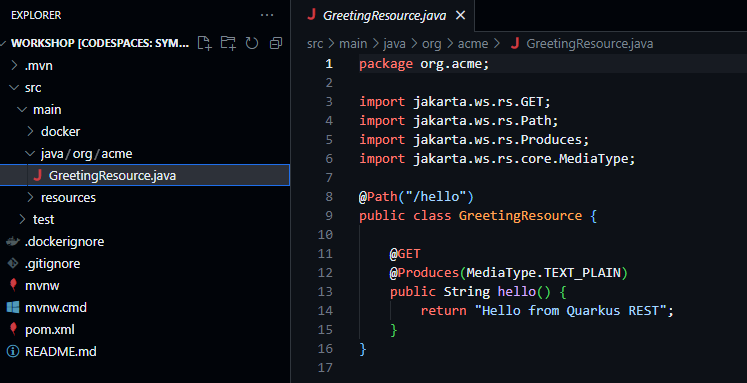
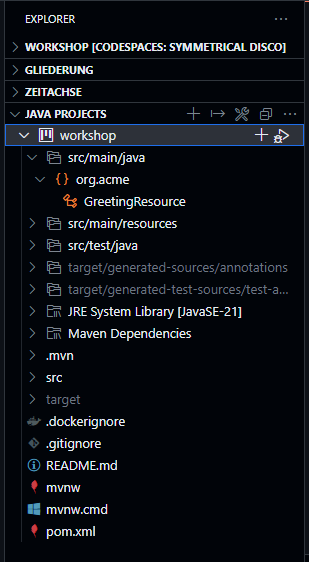
Open GreetingResource, this will force Visual Code to ask to install Extension Pack for Java:
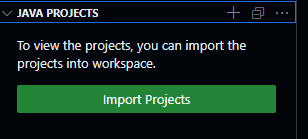
Go to Explorer → Java Projects → Import Projects
It takes a minute or two to show our workshop project:
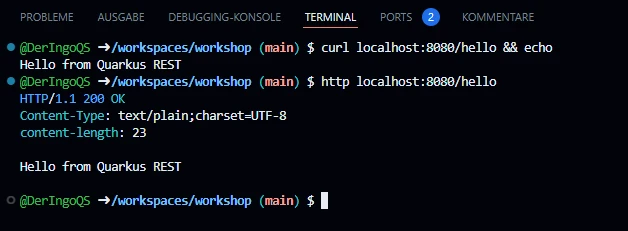
Start Quarkus
./mvnw quarkus:dev
In Ports Port 5005 is automatically added, but not Port 8080.
We need to add Port 8080 manually.
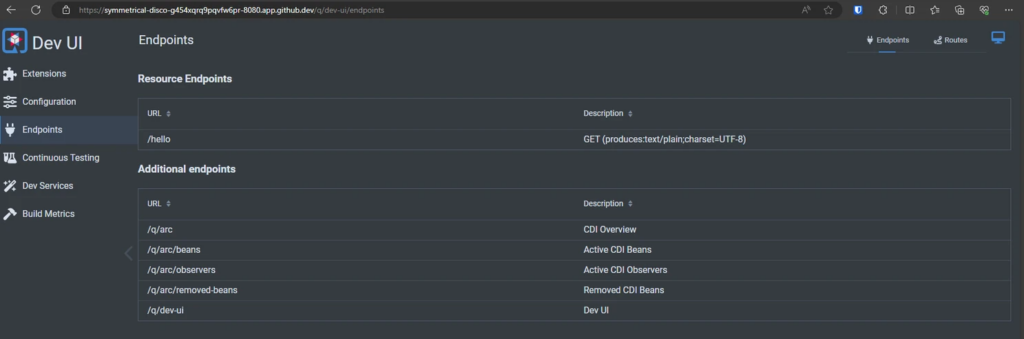
Click on the Globus Icon and Quarkus welcome page opens:
# Ich muss vermutlich nur den zweiten Befehl ausführen?
# ./mvnw install -Dnative
./mvnw package -Dnative -Dquarkus.native.container-build=true -Dquarkus.container-image.build=true
Open another terminal and see how much codespace machine is sweating:
htop
Run:
target/workshop-1.0.0-SNAPSHOT-runner
The project generation has provided a Dockerfile.native-micro in the src/main/docker directory.
# build
docker build -f src/main/docker/Dockerfile.native-micro -t deringo/workshop .

# run
docker run -i --rm -p 8080:8080 deringo/workshop
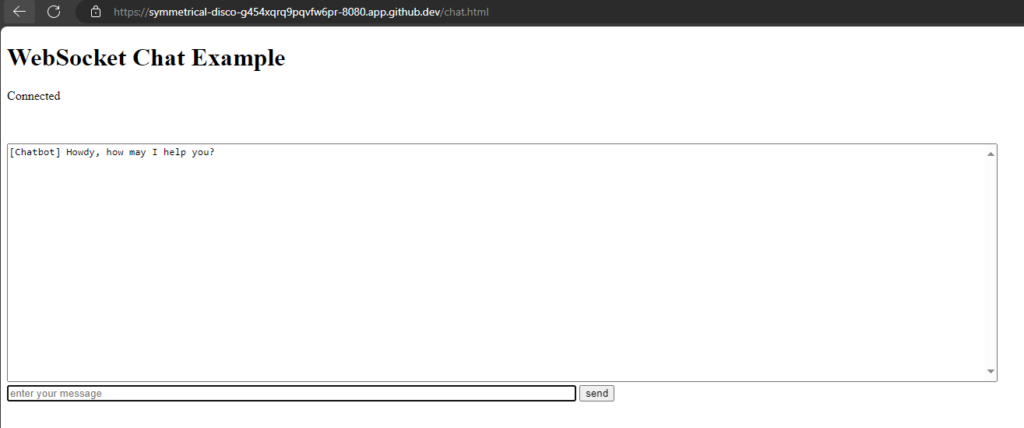
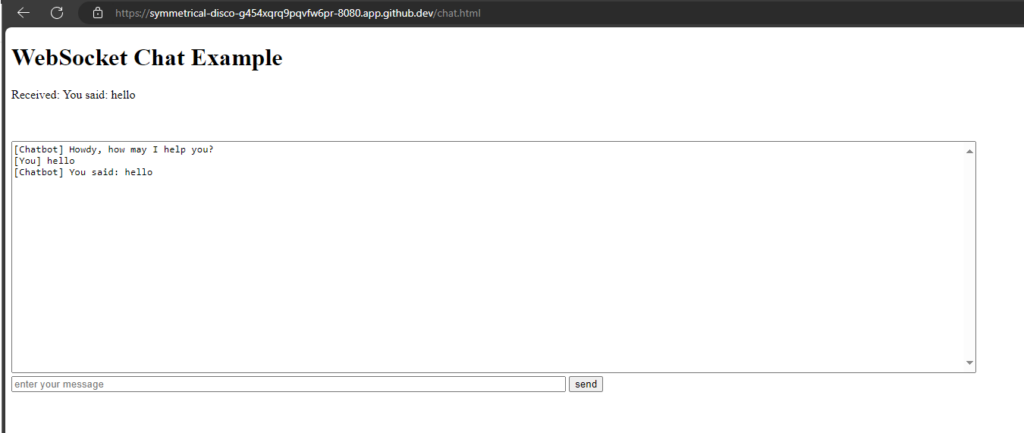
WebSockets are a protocol that provides full-duplex communication channels over a single, long-lived connection. They are designed for real-time, event-driven web applications and allow for low-latency communication between a client (typically a web browser) and a server. Here are some key points about WebSockets:
Full-Duplex Communication: Unlike HTTP, which is request-response based, WebSockets allow for two-way communication where both client and server can send and receive messages independently of each other.
Persistent Connection: WebSocket connections are persistent, meaning they remain open as long as both the client and server agree to keep the connection alive. This reduces the overhead associated with establishing new connections.
Low Latency: WebSockets are ideal for scenarios requiring real-time updates because they reduce the latency associated with polling or long-polling techniques.
Protocol: WebSockets are established by upgrading an HTTP/HTTPS connection using a WebSocket handshake, switching the protocol from HTTP to WebSocket.
Use Cases: Common use cases include live chat applications, real-time notifications, collaborative editing, online gaming, and any application requiring real-time data updates.
Node.js in Codespace
I want to test WebSockets with Node.js in GitHub Codespace.
# install LTS
nvm install --lts
Installing latest LTS version.
Now using node v20.14.0 (npm v10.7.0)


# check version
nvm ls


# check node version
node --version
v20.14.0
Some npm commands
# Show installed Nodes
nvm ls
# Show available versions
nvm ls-remote
# Install latest version
nvm install node
# Install LTS version
nvm install --lts
# Install a specific version (list available -> example 16.20.2)
nvm install 16.20.2
# Use a specific version
nvm use 16.20.2
# Show npm version
npm --version
Simple Website with Node.js
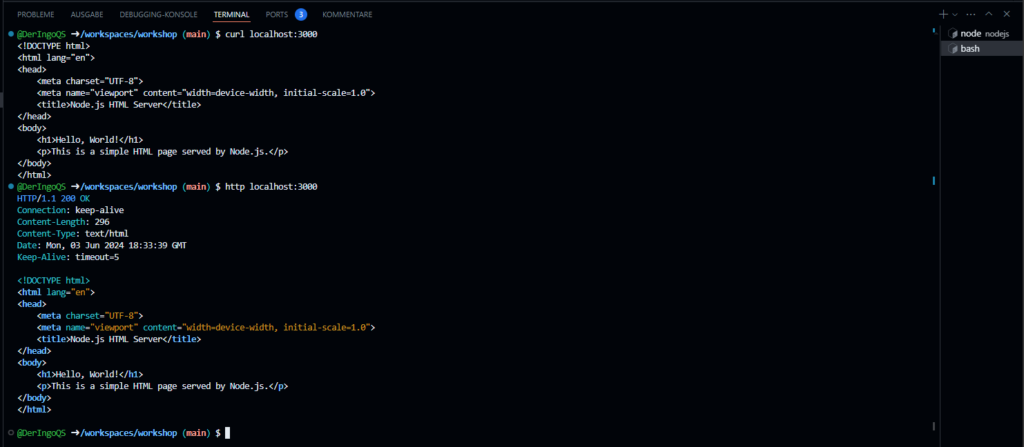
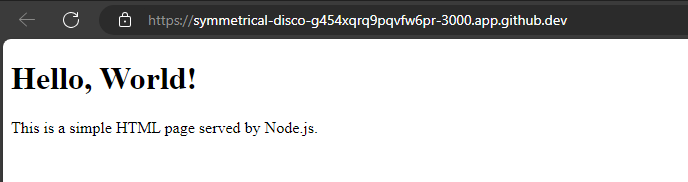
To serve an HTML page using Node.js, we can use the built-in http module.
Create an HTML file
<!DOCTYPE html>
<html lang="en">
<head>
    <meta charset="UTF-8">
    <meta name="viewport" content="width=device-width, initial-scale=1.0">
    <title>Node.js HTML Server</title>
</head>
<body>
    <h1>Hello, World!</h1>
    <p>This is a simple HTML page served by Node.js.</p>
</body>
</html>
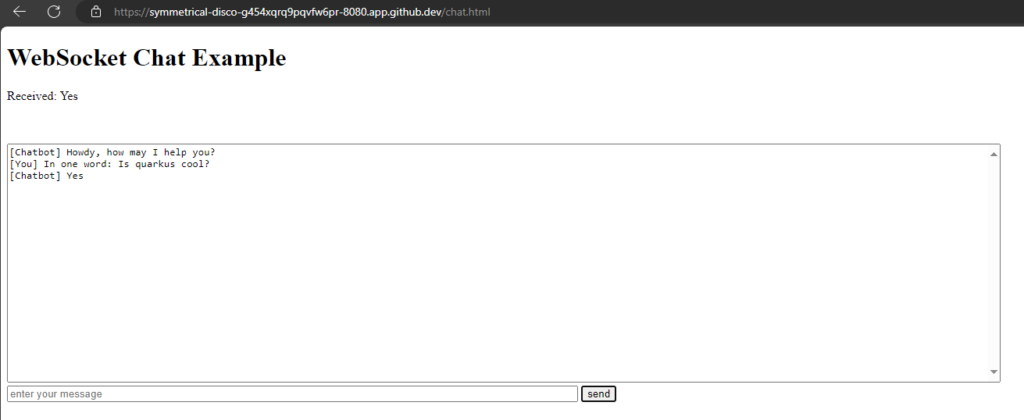
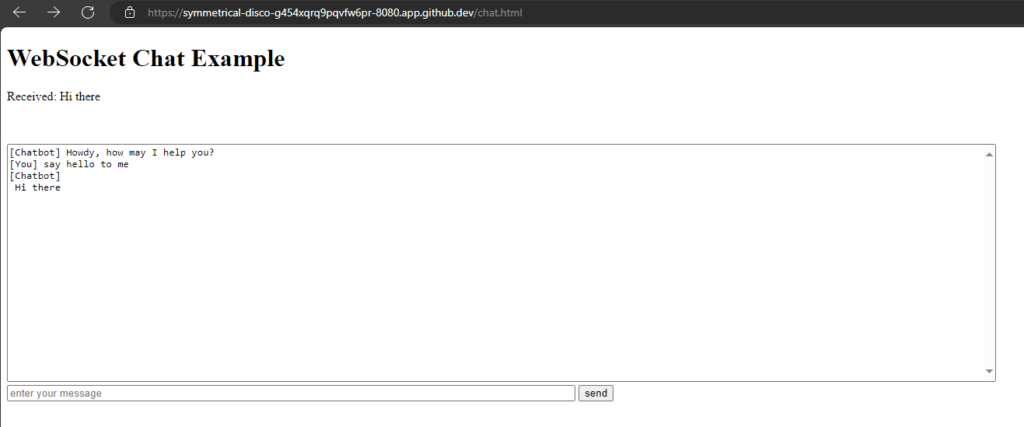
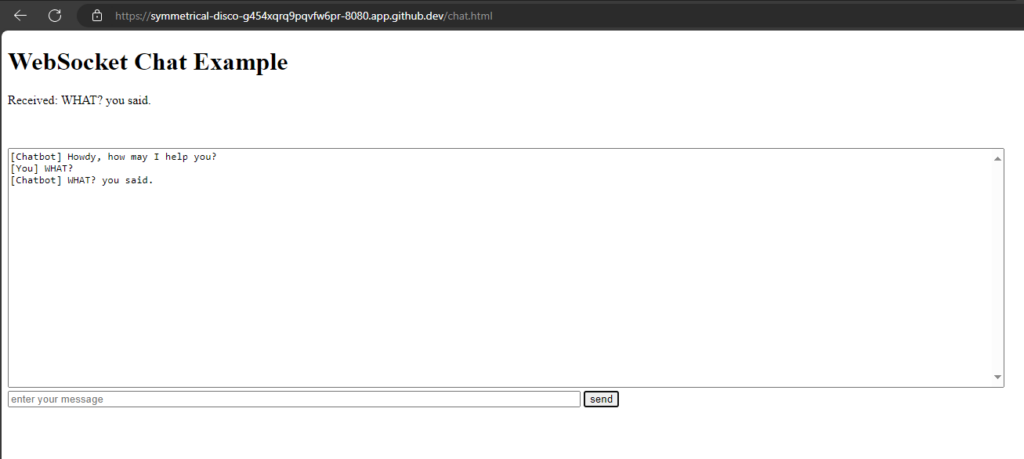
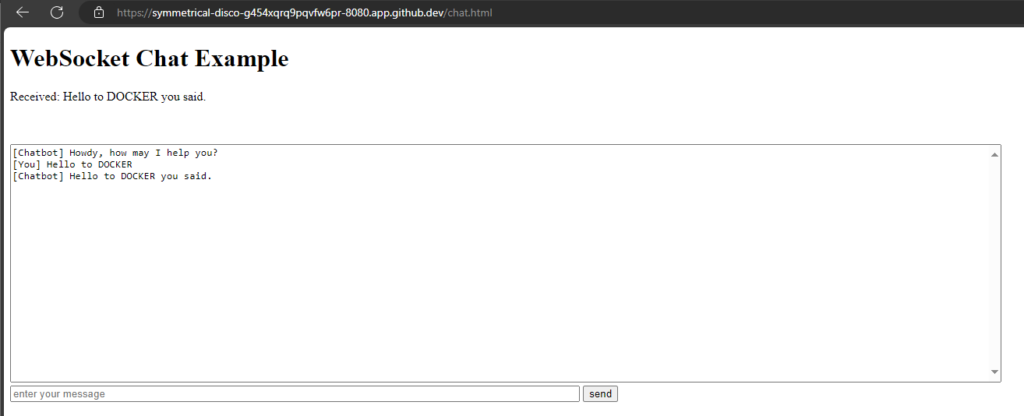
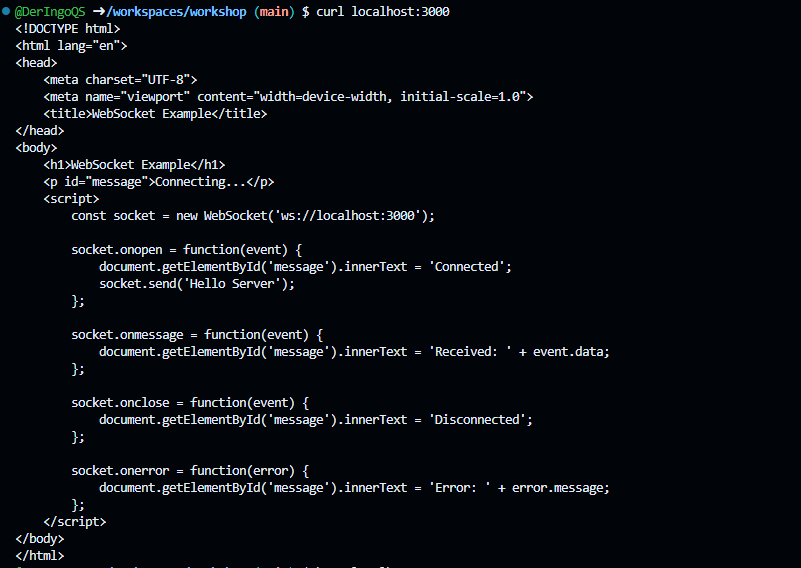
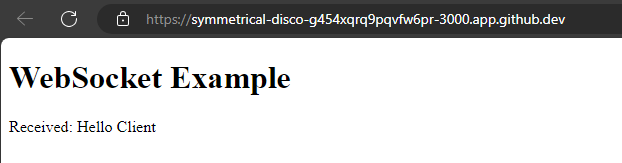
To create a Node.js server that provides both an HTTP server for serving an HTML page and a WebSocket server for real-time communication, we can use the ws library for WebSockets.
When setting up a WebSocket connection from the client-side script within the HTML file, the WebSocket URL must match the address and port where the WebSocket server is running. This URL should include the WebSocket protocol (ws:// or wss:// for secure connections)
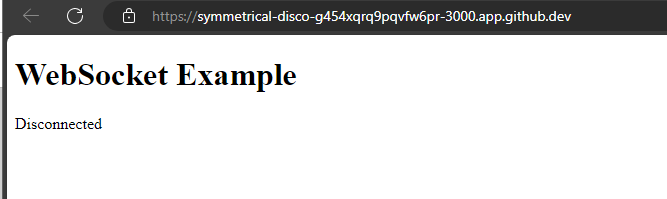
Adjustment:
const socket = new WebSocket('wss://symmetrical-disco-g454xqrq9pqvfw6pr-3000.app.github.dev/:3000');
OK, this works, so make it a little more dynamic:
const socket = new WebSocket('wss://' + location.host + '/:3000');
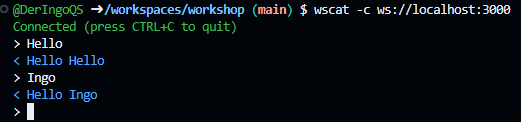
Test WebSocket from terminal
Unfortunately, curl and httpie do not natively support WebSocket protocols. To test WebSocket connections using command-line we can use wscat, which is specifically designed for WebSocket communication.
I was on JCON 2024 and beside other interesting talks I heard one talk about cloud-based IDEs, and I wanted to try out, if GitHub Codespaces could work for me.
Explore the evolving landscape of cloud-based integrated development environments (IDEs), focusing on Gitpod, GitHub codespaces and Devpod. Compare and contrast these cloud IDEs with traditional counterparts, emphasizing the role of container technology, specifically the devcontainer specification. The discussion includes advances, existing limitations, and the potential for developing polyglot, container-based distributed applications. A live demo illustrates the rapid setup and coding process across various languages and frameworks, showcasing testing capabilities and seamless deployment to Kubernetes. Discover how custom additions enhance flexibility. Additionally, uncover the impact of cloud IDEs on teaching and team projects, ensuring consistent development setups for enhanced efficiency and streamlined processes.
[EN] Codespaces, Gitpod, Devpod ... what cloud and container-based IDEs can do for you by Matthias Haeussler (Novatec Consulting GmbH)
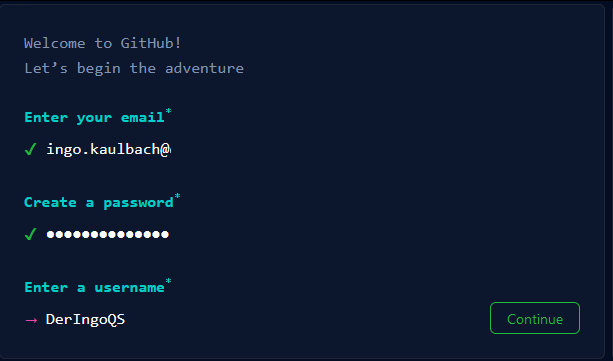
Create GitHub Account
Go to GitHub and create an account. Free plan is suitable.
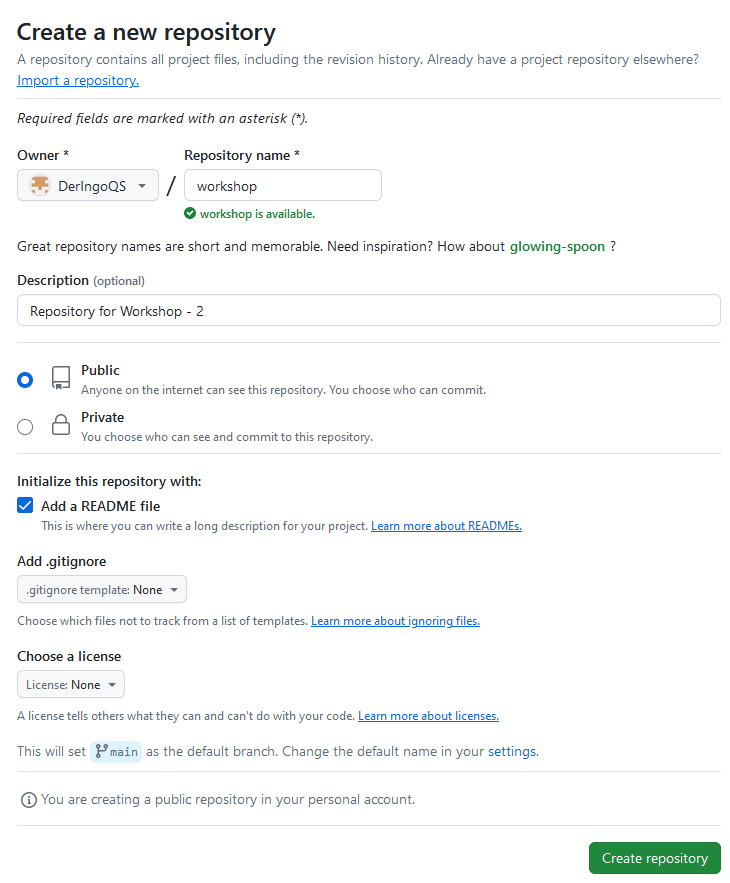
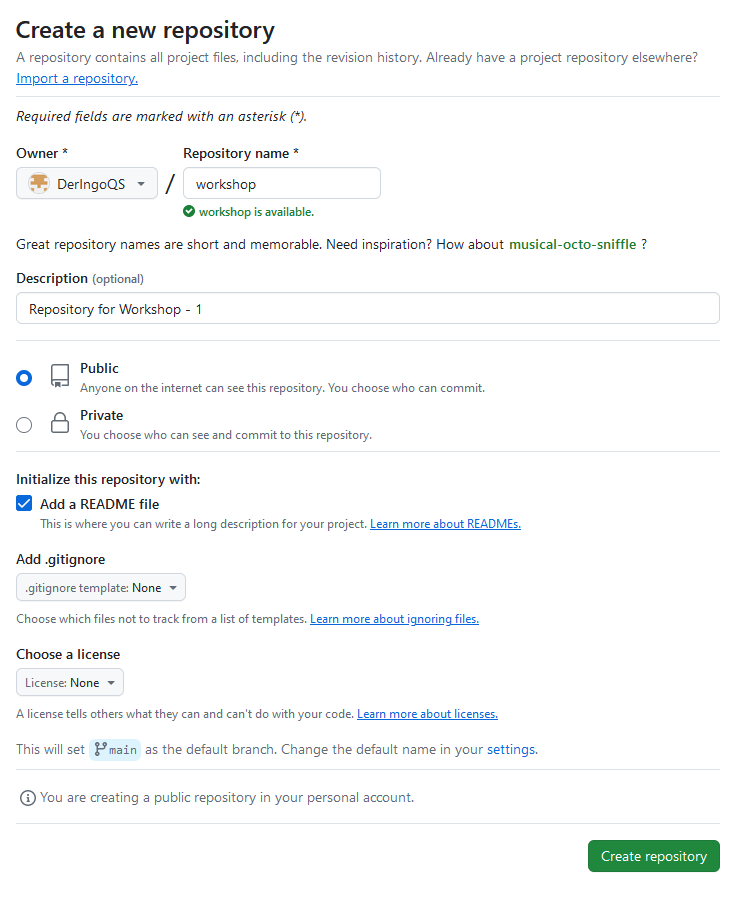
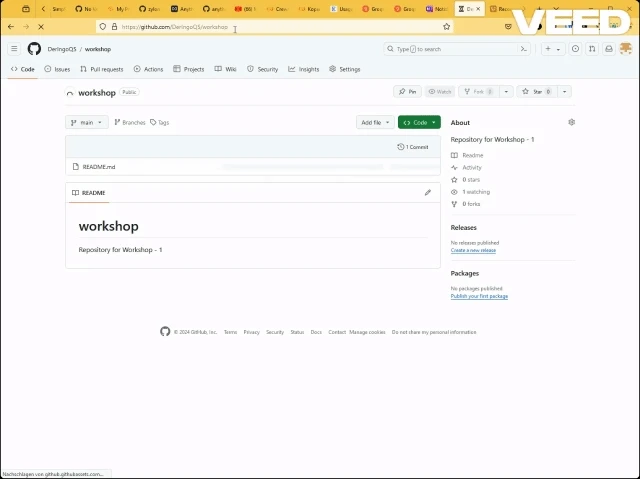
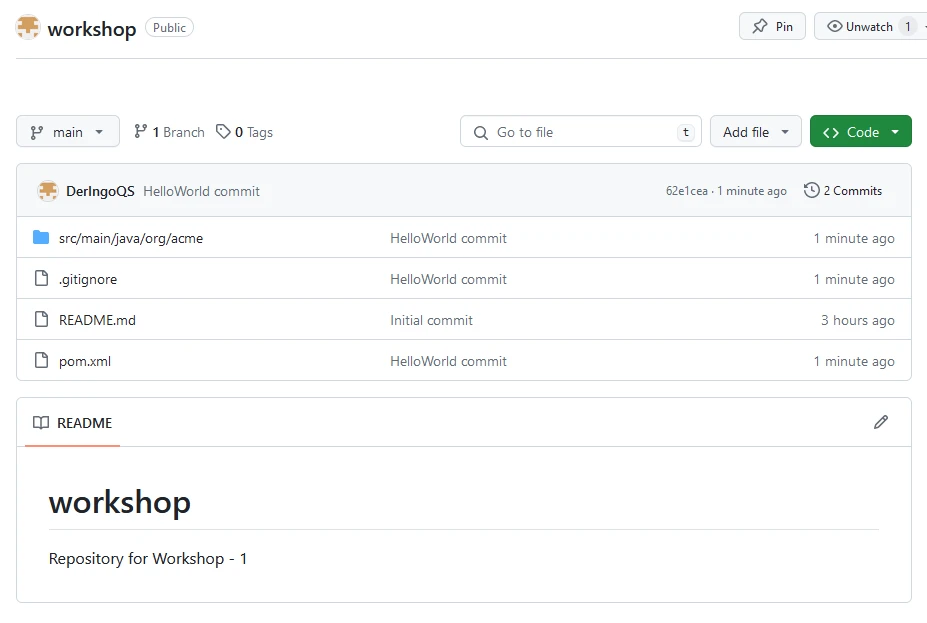
Create Repository
Create a new repository with name “workshop”. Add a README file.
Create Codespace
TODO: funktioniert das GIF?
Change Keyboard Layout to German: In the lower right corner click on “Layout: US” and enter “German” in the upcoming window.
TODO: Ich hätte gerne die Sprache von Visual Code auf Englisch umgestellt. Wie?
Work in the Terminal
Copy & Paste
Type something into the terminal. Mark it with your mouse. One Right Click to copy into Clipboard. Another Right Click to paste from Clipboard.
Timezone
Set Timzone to Europe -> Berlin
sudo dpkg-reconfigure tzdata
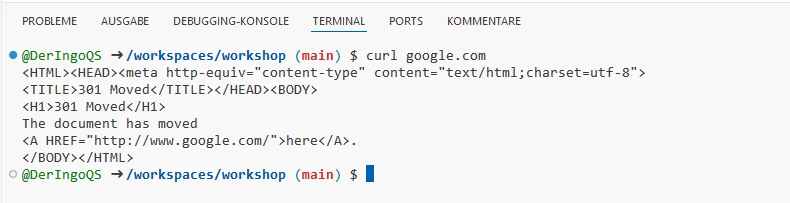
Internet
Do we have access to the Internet? Let’s try with curl:
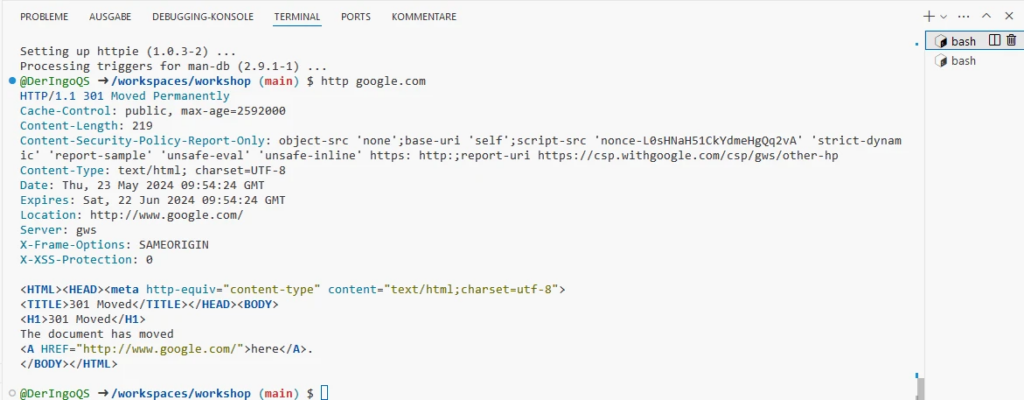
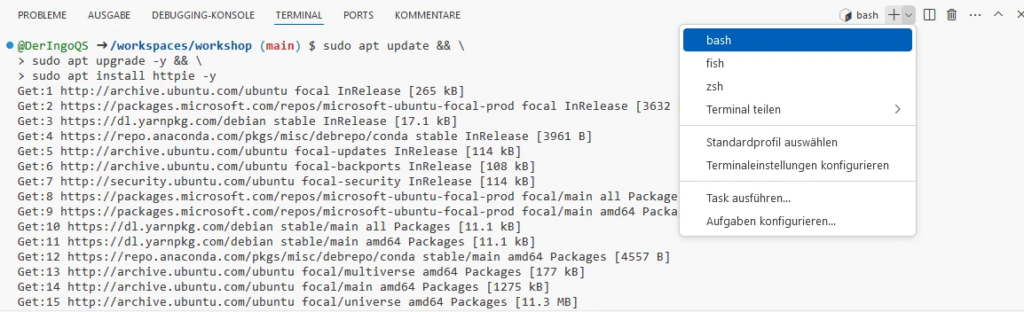
This will take a few minutes. Meanwhile we can work in another Terminal window. Later we come back and test HTTPie:
http google.com
Additional Terminal window
Open a second Terminal with bash:
VIM
ls -lisah
touch test.sh
ls -lisah
vim test.sh
chmod +x test.sh
./test.sh
name=Ingo
echo "My name is $name"
echo "But here I am: $(whoami)"
Python
Do we have Python in our Codespace? Which version(s)?
python3 --version
python --version
vim hello_world.py
python hello_world.py
# Print "Hello World" to the console
print("Hello World")
Docker
docker --version
docker-compose --version
docker run hello-world
Apache HTTPD
docker run -p 8888:80 httpd
Open in Browser:
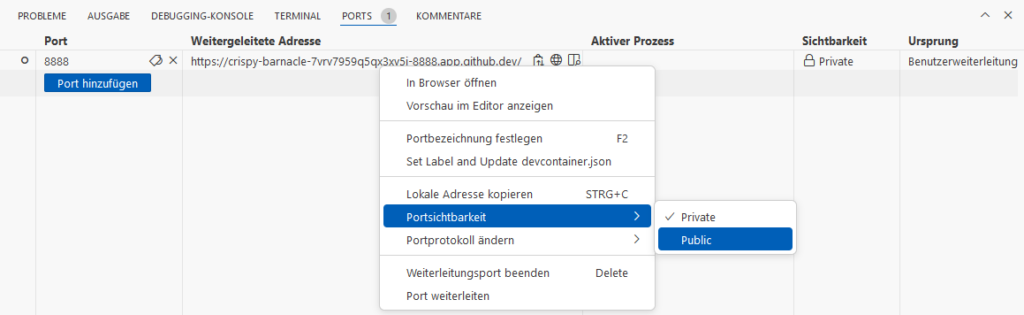
Find all open Ports in the Ports-Tab:
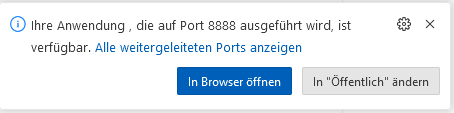
Normally Port 8888 should be listed here. We need to add Port, just enter 8888:
Open Website just with a click on the Globus-Icon.
When we try to open the address in another browser, we will see a GitHub-Login. When we login with another GitHub-Account, we will get a 404-error. Because the page is Private. Switch to Public:
Now we can access the page in another brower.
At the end we can shutdown HTTPD with <STRG>+<C> in Terminal window. It should automatically disapear in the Ports-Tab. If not, you can remove it manually.
Microsoft Edge - Caching problem
Open the Public page in MS Edge. Make the page Private again. Try to open in a new browser, won’t work. Reload (the Public loaded) page in MS Edge: You can still see the site! This is a cached version and we need to force MS Edge to reload from server.
Open Developer Tools (F12 or <STRG>+<SHIFT>+<I>), then you can Right Click on the reload button to have additional options:
Java
java --version
vim HelloWorld.java
javac HelloWorld.java
java HelloWorld
rm -f HelloWorld*
class HelloWorld {
  public static void main(String args[]) {
      System.out.println("Hello World");
  }
}
Run Java Source as Shell Scripts
type -a java
# java is /home/codespace/java/current/bin/java
# java is /usr/local/sdkman/candidates/java/current/bin/java

vim HelloWorld.sh
chmod +x HelloWorld.sh
./HelloWorld.sh
rm HelloWorld.sh
#!/home/codespace/java/current/bin/java --source 21

class HelloWorld {
  public static void main(String args[]) {
      System.out.println("Hello World");
  }
}
Maven
Start
We create a new pom.xml from scratch. We need a template. We will take “The Basics”-one from the Apache Maven POM Reference page.
I want to login from one Linux server to another Linux server without the need to enter a password.
Create SSH keys
# Login to server 1
ssh-keygen
Output:
Generating public/private rsa key pair.
Enter file in which to save the key (/home/'USERNAME'/.ssh/id_rsa):
Enter passphrase (empty for no passphrase):
Enter same passphrase again:
Your identification has been saved in /home/'USERNAME'/.ssh/id_rsa
Your public key has been saved in /home/'USERNAME'/.ssh/id_rsa.pub
The key fingerprint is:
SHA256:27U2nApZQLSwS1UVh2Lw4aDM/B9/gR0Uum1ppRrqjpg 'USERNAME'@server1
The key\'s randomart image is:
+---[RSA 3072]----+
|    +o+ .o       |
| + . Bo+o .      |
|  = o.*...       |
|   o + o .       |
|    + o S   .    |
|     . X * +     |
| .    * @ O      |
|E . .. B * .     |
| ..+..o o        |
+----[SHA256]-----+
The utility will prompt to select a location for the keys that will be generated. By default, the keys will be stored in the ~/.ssh directory within user’s home directory. The private key will be called id_rsa and the associated public key will be called id_rsa.pub.
Now we have a private and public key that we can use to authenticate.
Now we SHOULD connect to server2 without the need to enter a password.
Failing - But why?
Unluckily in my case I still have to enter a password. But why?
# Login to server 2
ssh server2ip
Password:

# check auth.log
less /var/log/auth.log
...
rexec line 15: Deprecated option RSAAuthentication
...

# check sshd_config
less /etc/ssh/sshd_config
...
RSAAuthentication no
...
So in my case the RSA-Authentication has been disabled. As the default is enabled by purpose, this has been done by purpose. Unfortunatly I am not the admin or manager of the server, so I can not change this settings.
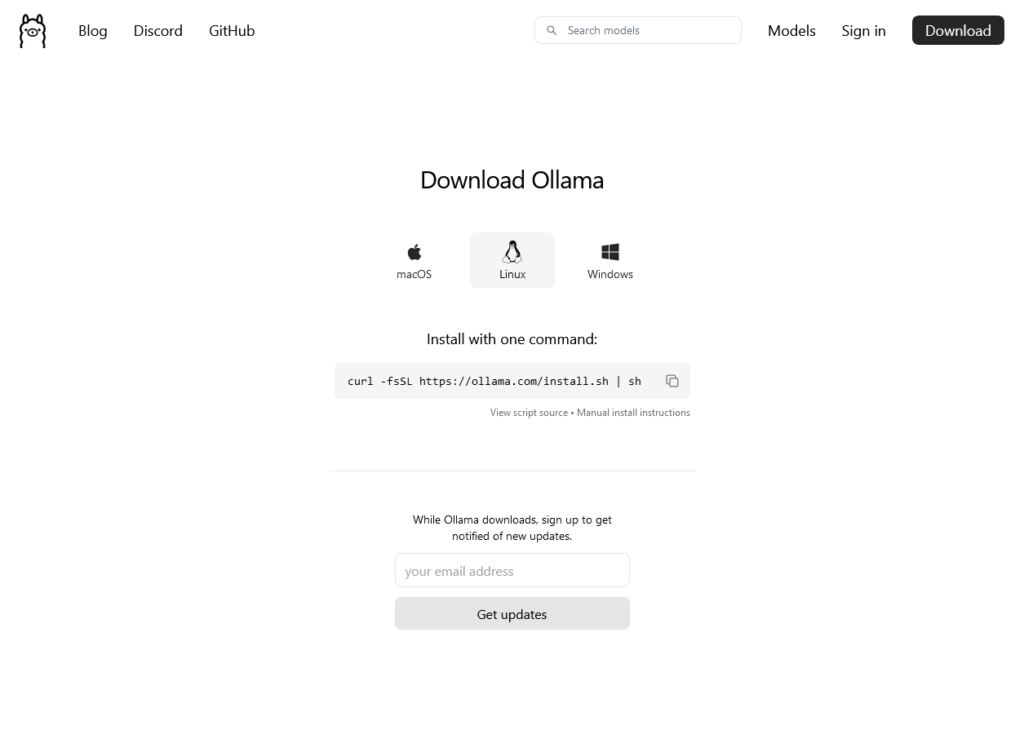
For my last post about PrivateGPT I need to install Ollama on my machine.
The Ollama page itself is very simple and so is the instruction to install in Linux (WSL):
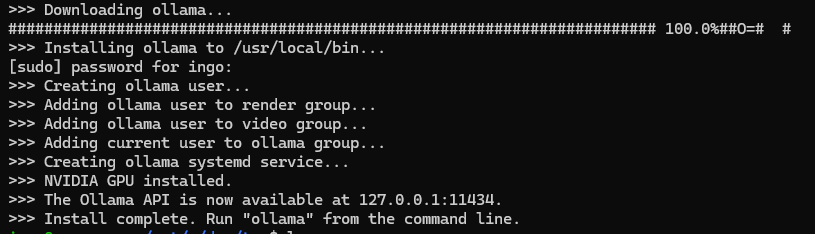
curl -fsSL https://ollama.com/install.sh | sh
ollama serve

Couldn't find '/home/ingo/.ollama/id_ed25519'. Generating new private key.
Your new public key is:

ssh-ed25519 AAAAC3NzaC1lZDI1NTE5AAAAIGgHcpiQqs4qOUu1f2tyjs9hfiseDnPfujpFj9nV3RVt
Ollama is bound to localhost:11434. So Ollama is only available from localhost or 127.0.0.1, but not from other IPs, like from inside a docker container.
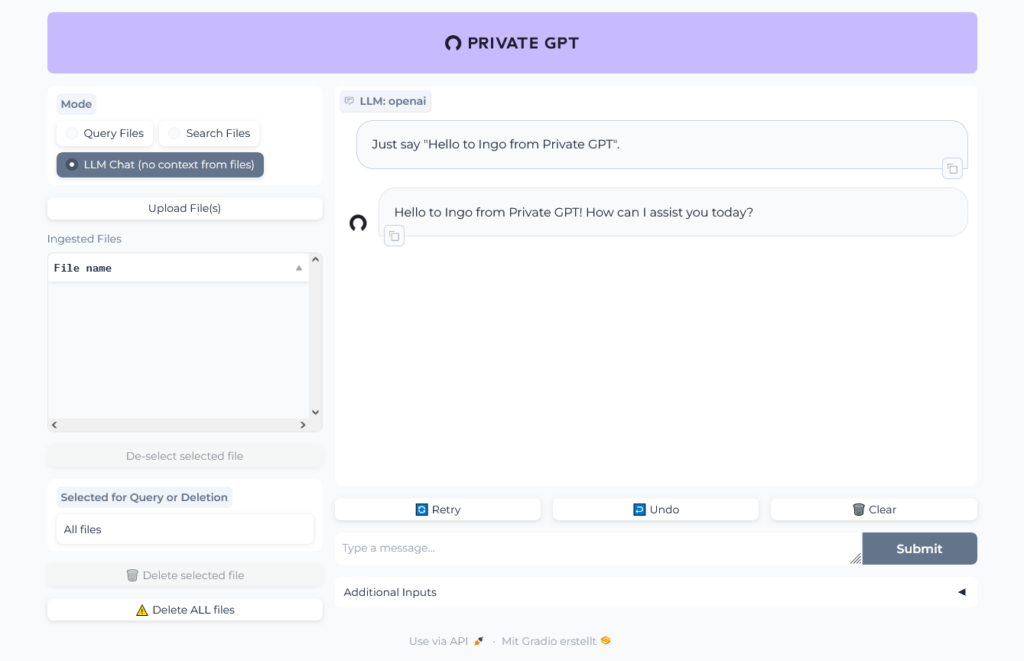
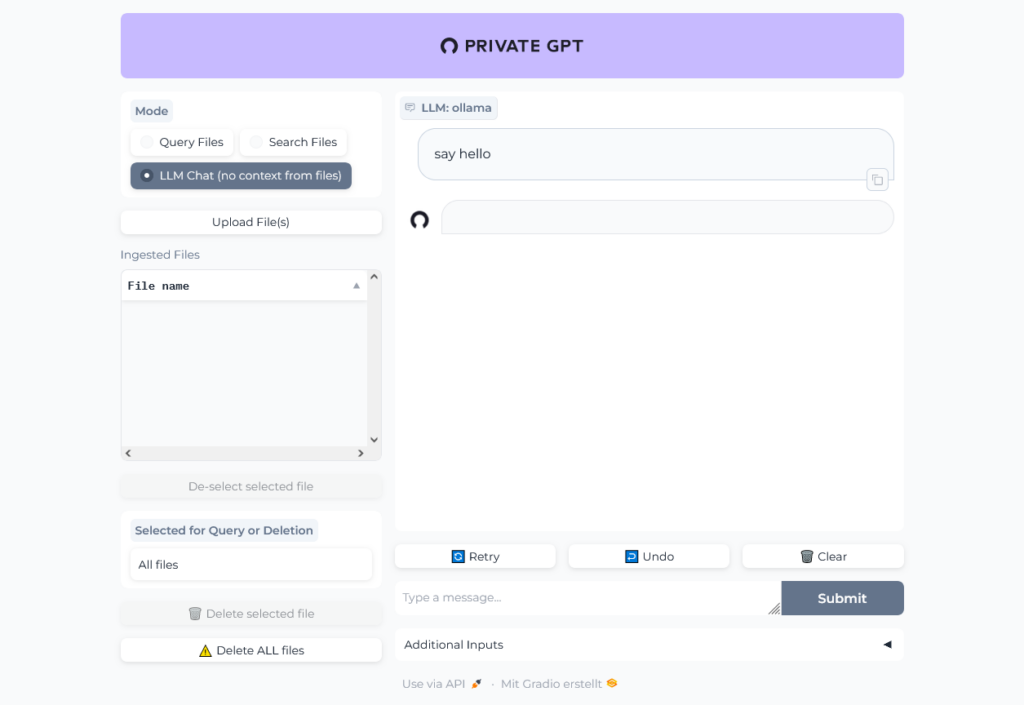
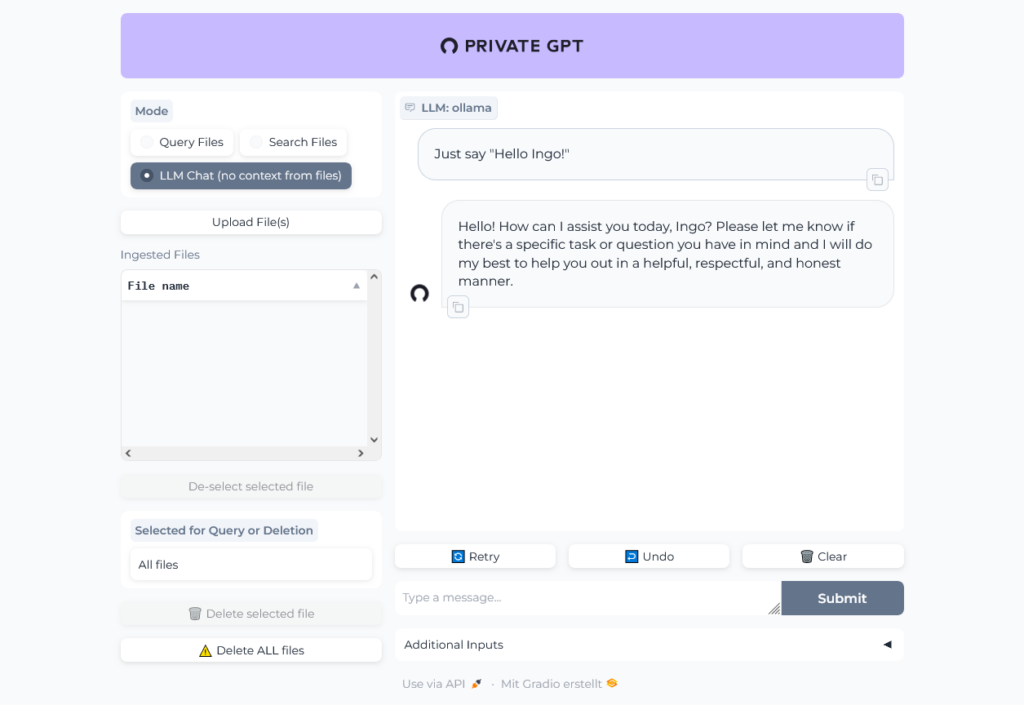
To start with an easier example, I will use PrivateGPT with OpenAI/ChatGPT as AI. Of course therefore the chat will not be private, what is the main reason to use PrivateGPT, but it is a good start to bring things up and running and in a next step add a local AI.
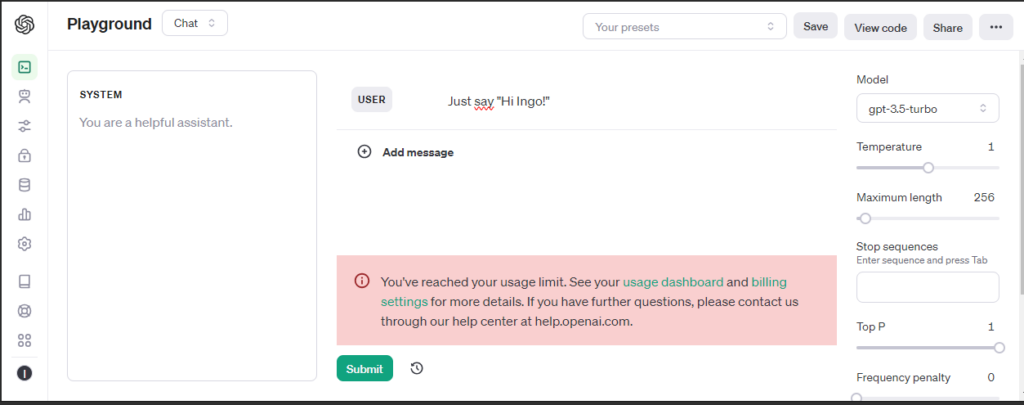
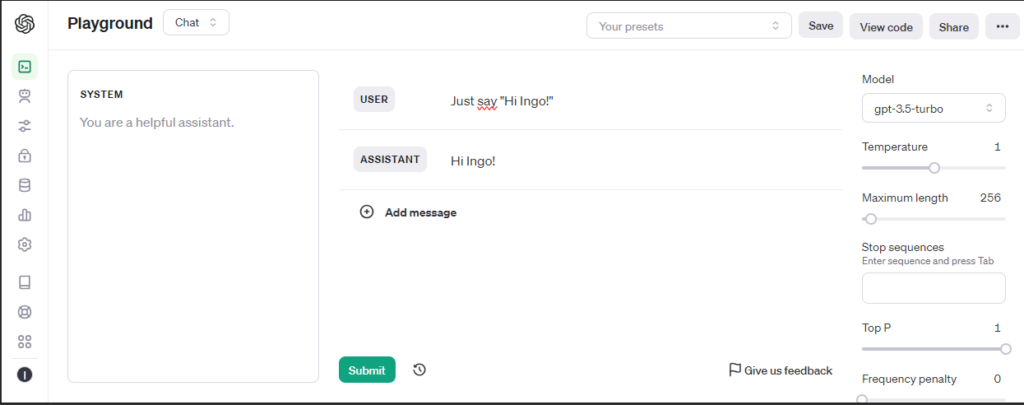
OpenAI API key
To use ChatGPT we need an OpenAI API key. The key itself is free, but I needed to charge my account with 5$ to get it working.
For testing a Playground is available.
Before funding my account:
After funding my account with the minimum of 5$:
Docker
The OpenAI API key is stored in a file .env, that provides its content to docker compose as environment variables.
In docker-compose we set the API key and profile: openai as environment for our Docker container:
In Docker image we configure installation for openai:
RUN poetry install --extras "ui llms-openai vector-stores-qdrant embeddings-openai"
PrivateGPT will download Language Model files during its setup, so we provide a mounted volume for this model files and execute the setup at the start of the container and not at image build:
volumes:
	- ../models/cache:/app/privateGPT/models/cache
command: /bin/bash -c "poetry run python scripts/setup && make run"
Here are the complete files, you can also find them on my GitHub:
# Use the specified Python base image
FROM python:3.11-slim

# Set the working directory in the container
WORKDIR /app

# Install necessary packages
RUN apt-get update && apt-get install -y \
    git \
    build-essential

# Clone the private repository
RUN git clone https://github.com/imartinez/privateGPT

WORKDIR /app/privateGPT

# Install poetry
RUN pip install poetry

# Lock and install dependencies using poetry
RUN poetry lock
RUN poetry install --extras "ui llms-openai vector-stores-qdrant embeddings-openai"
Open http://localhost:8001 in your browser to open Private GPT and run a simple test:
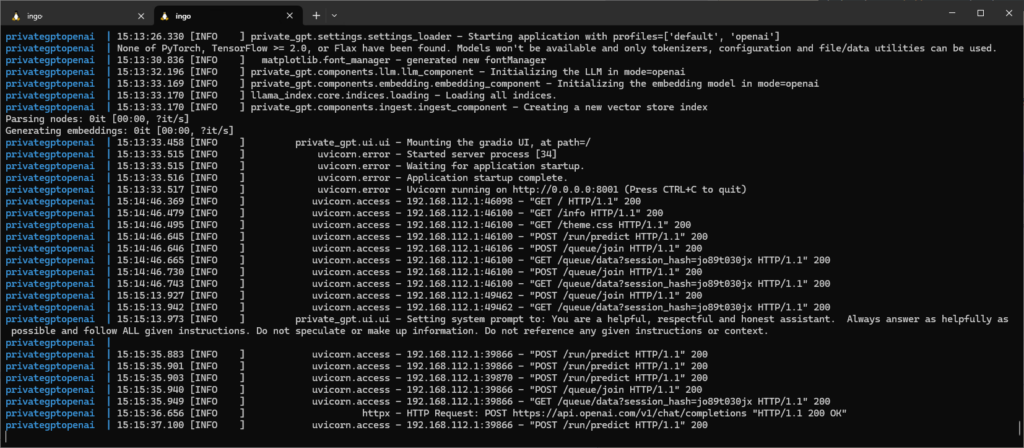
Have a look at the logs to see that there is communication with OpenAI servers:
Chat with document
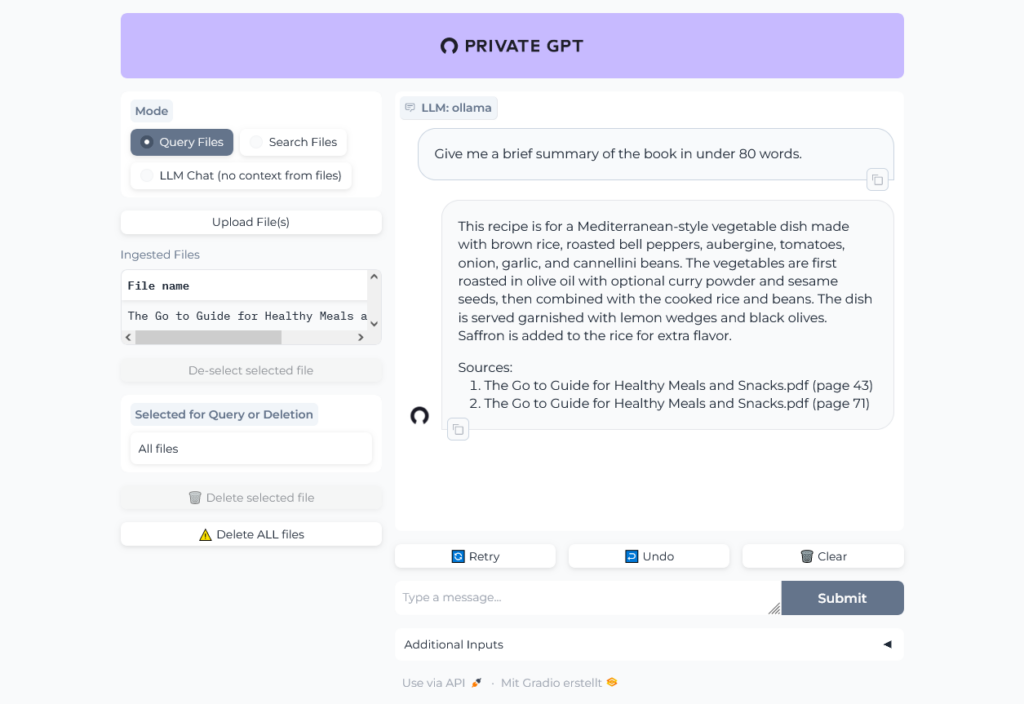
To "chat" with a document we first need a public available one, because right now we are using ChatGPT where we must not upload internal project documents.
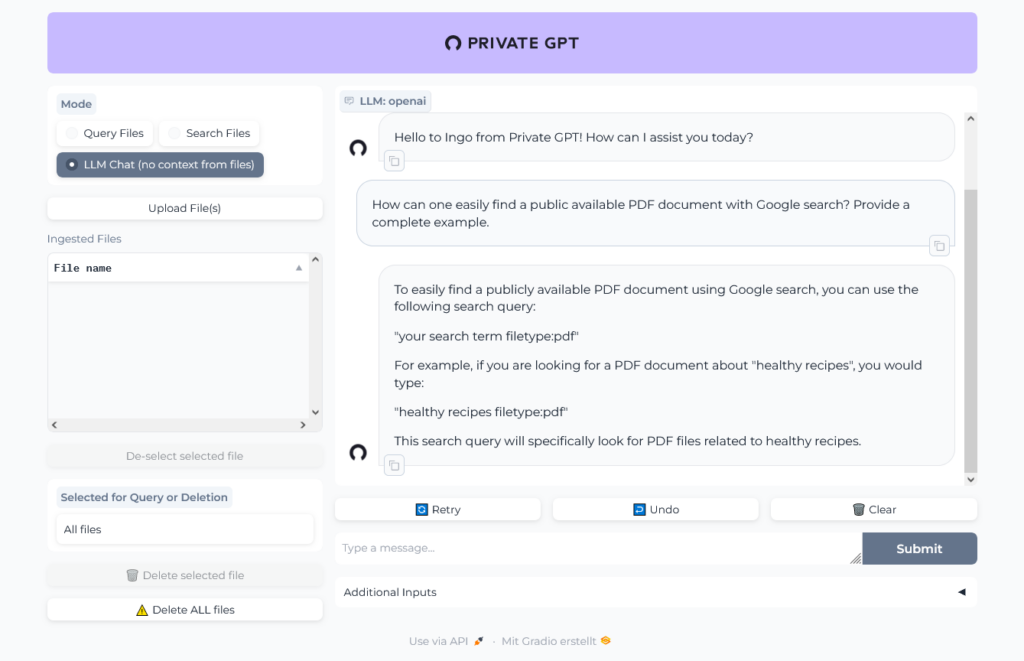
So first ask PrivateGPT/ChatGPT to help us to find a document:
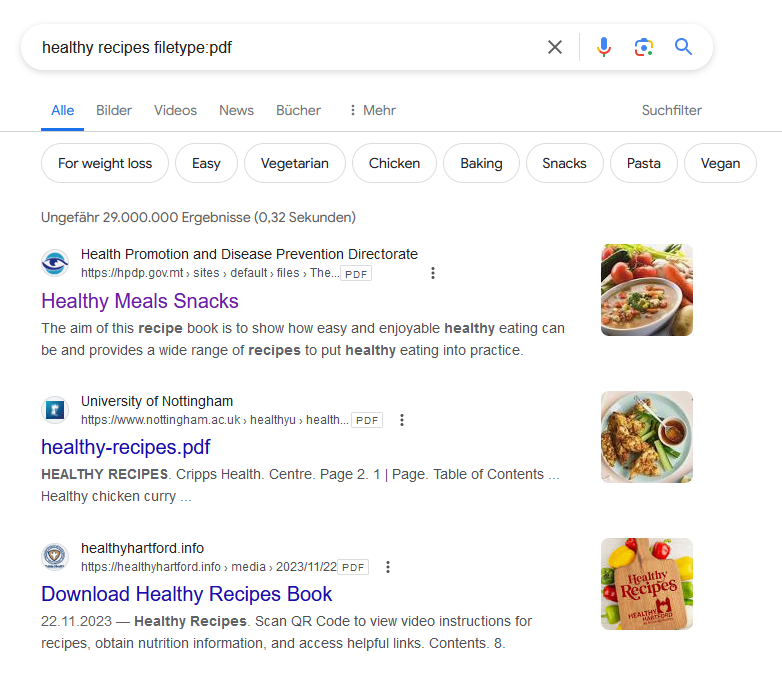
Working fine, we could easily find and download a PDF:
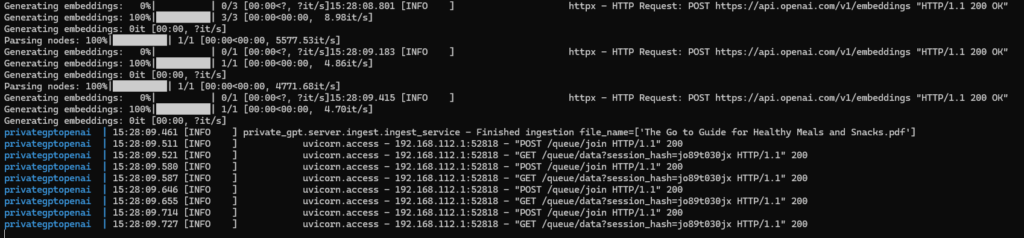
The upload of the PDF (The Go to Guide for Healthy Meals and Snacks.pdf) with 160 pages in 24 MB into PrivateGPT took nearly two minutes. In the logs we can see, that the file was uploaded to ChatGPT:
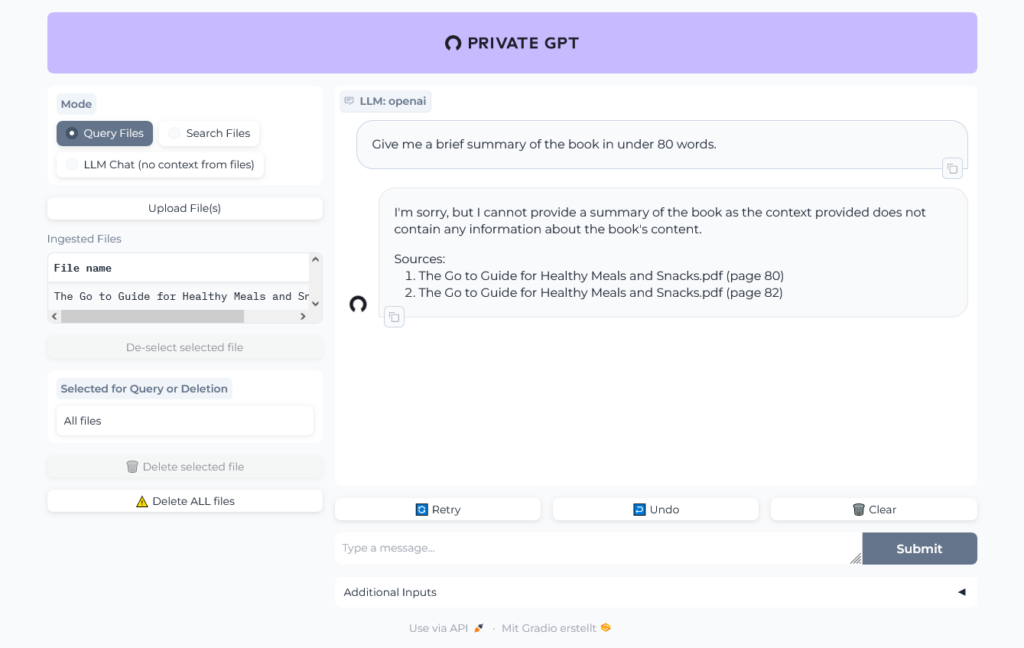
Let's chat with the book:
Uh, was that question too hard? Give it another try:
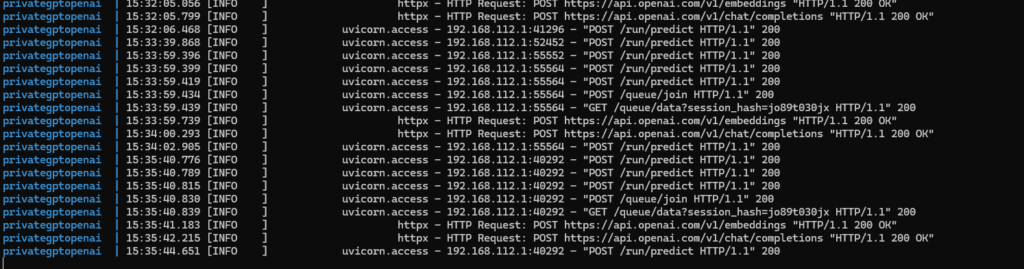
OK, sounds better. In the logs we can see the traffic to OpenAI:
Local, Ollama-powered setup
Now we want to go private, baby.
Copy configuration to a new folder, can be found in GitHub.
In docker-compose we change the profile to ollama:
    environment:
      - PGPT_PROFILES=ollama
In Docker image we configure installation for ollama:
RUN poetry install --extras "ui llms-ollama embeddings-ollama vector-stores-qdrant"
As before we can build the image, start the container and watch the logs:
I did not use the large ~24MB file I tried with ChatGPT, but a much smaller one ~297 KB I randomly found in the internet. It is written in german, but it seems, like Ollama understands german.
Well, then I tried the 24 MB file and ... it worked pretty well, the result of the first question was even better than the result from ChatGPT!
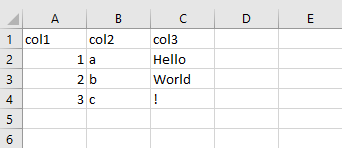
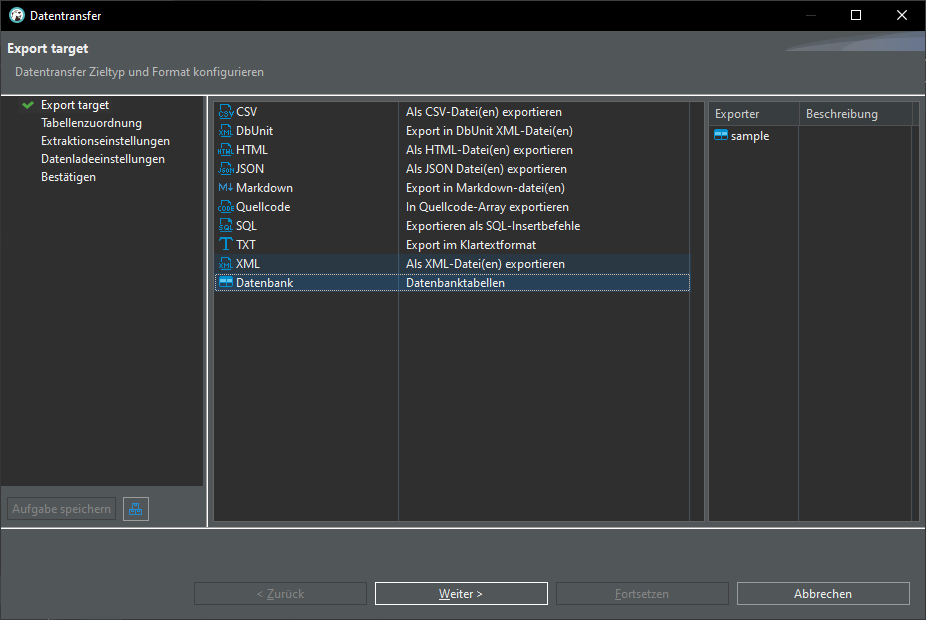
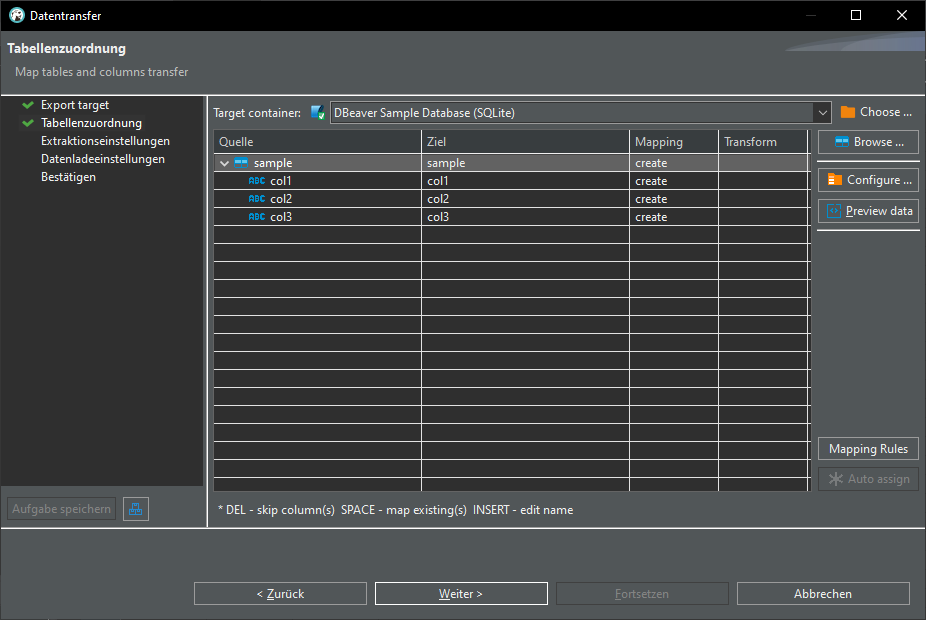
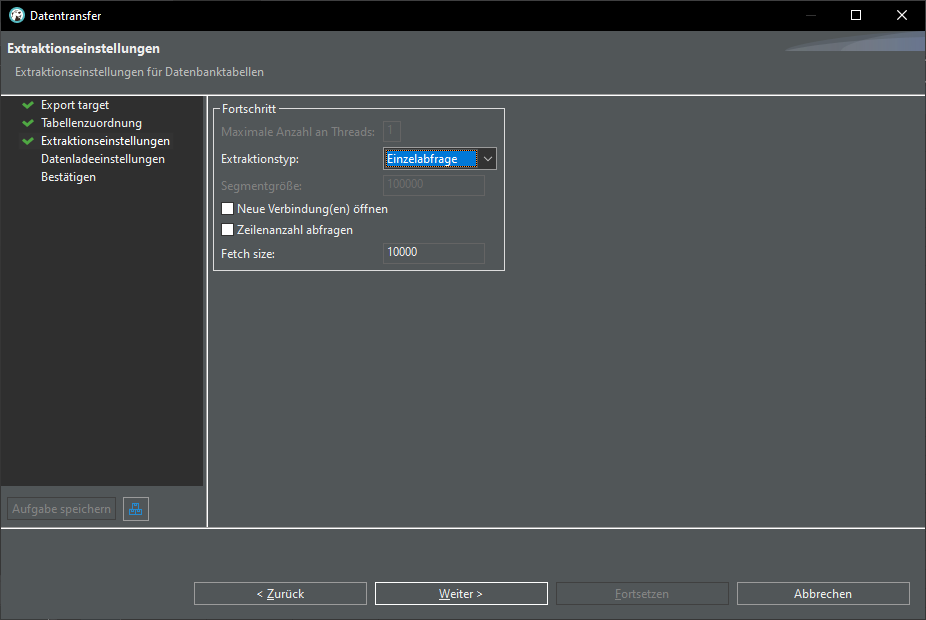
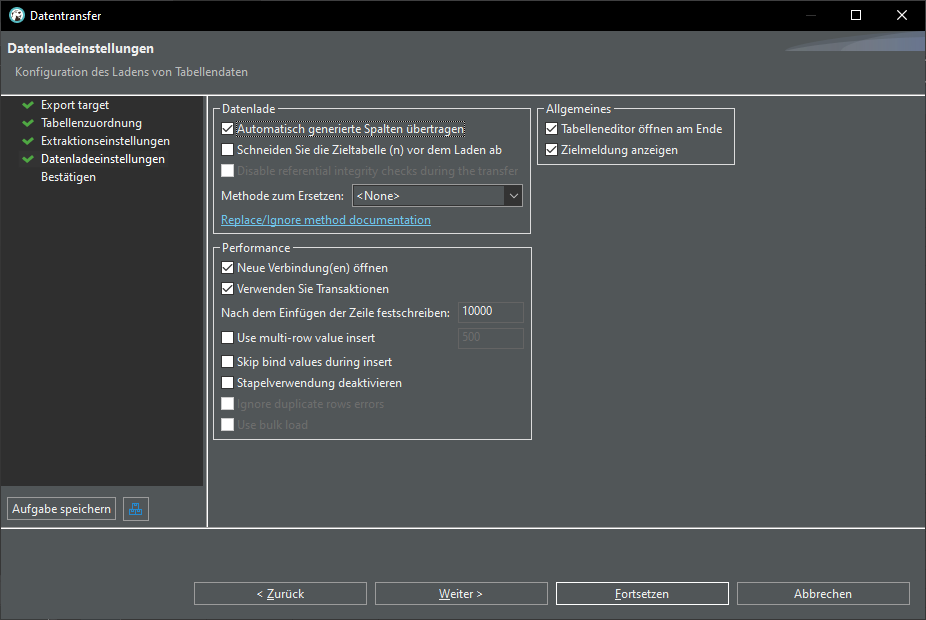
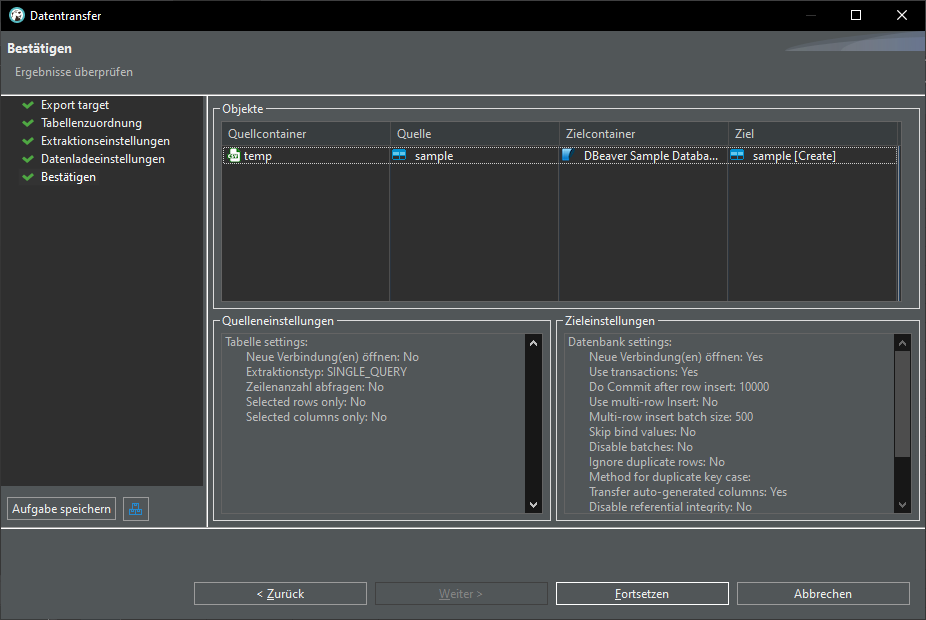
There are many ways to work with data, here is a quick walkthrough how to transfer data from an Excel file into a database.
Excel-File -> CSV-File -> DBeaver -> PostgreSQL
Excel file
We have a simple Excel file:
with a simple sample data structure:
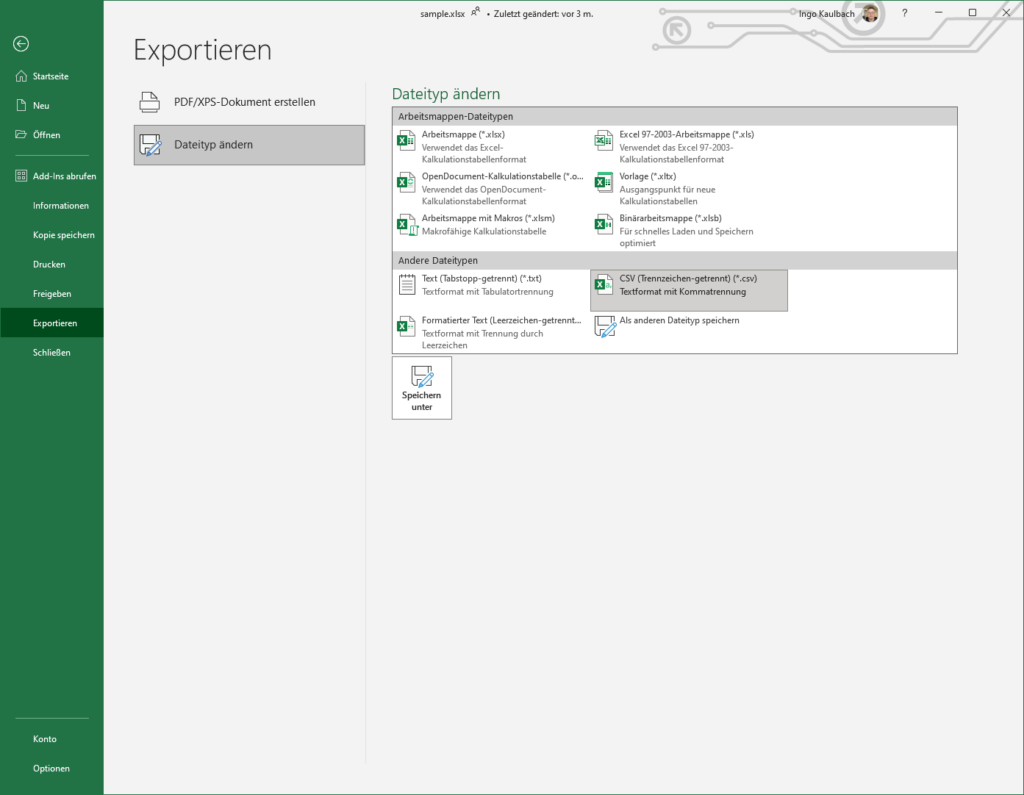
Excel file conversion
We need to convert the Excel file into a .csv (Comma Seperated Values) file.
Just open the file -> Datei -> Exportieren > Dateityp ändern -> CSV and save as sample.csv
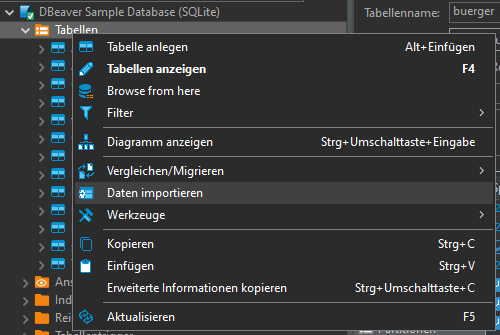
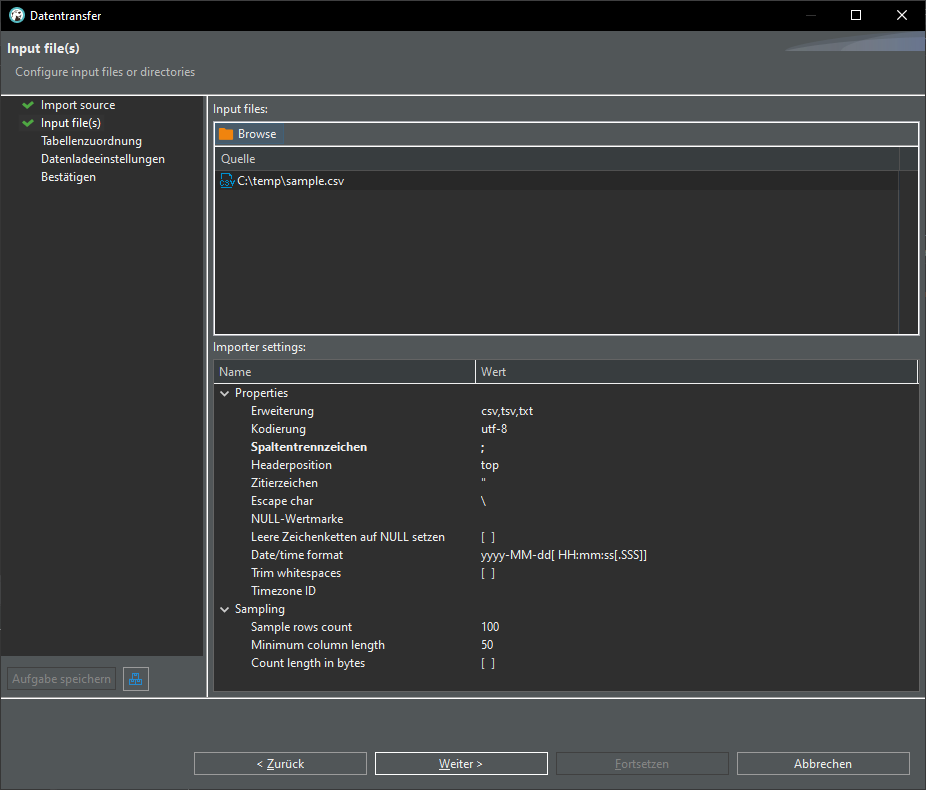
Import from CSV
In DBeaver:
Open Database connection -> database -> schema -> Rightclick -> Data import:
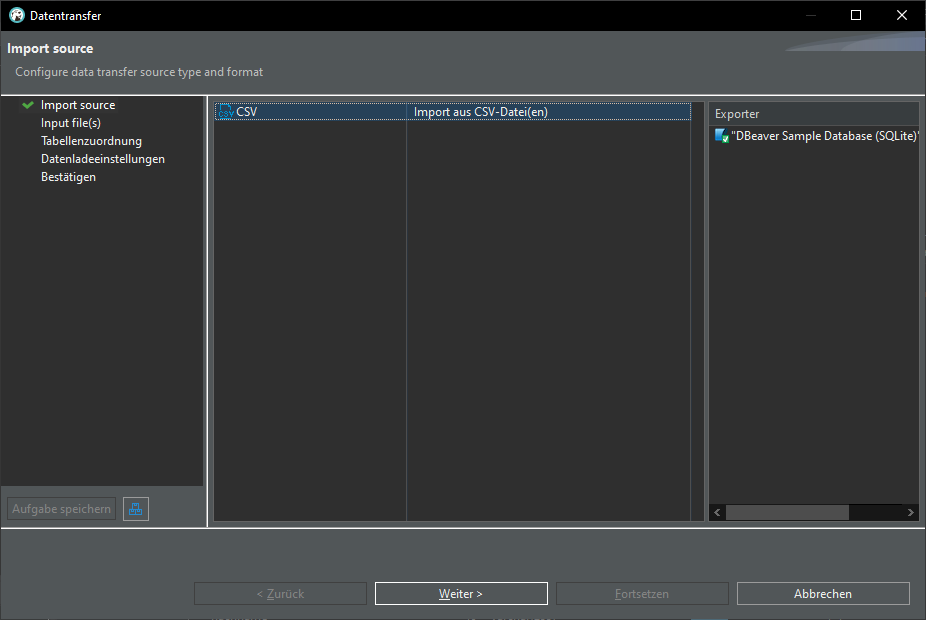
Import from CSV:
Change delimiter (Spaltentrennzeichen) from , to ;
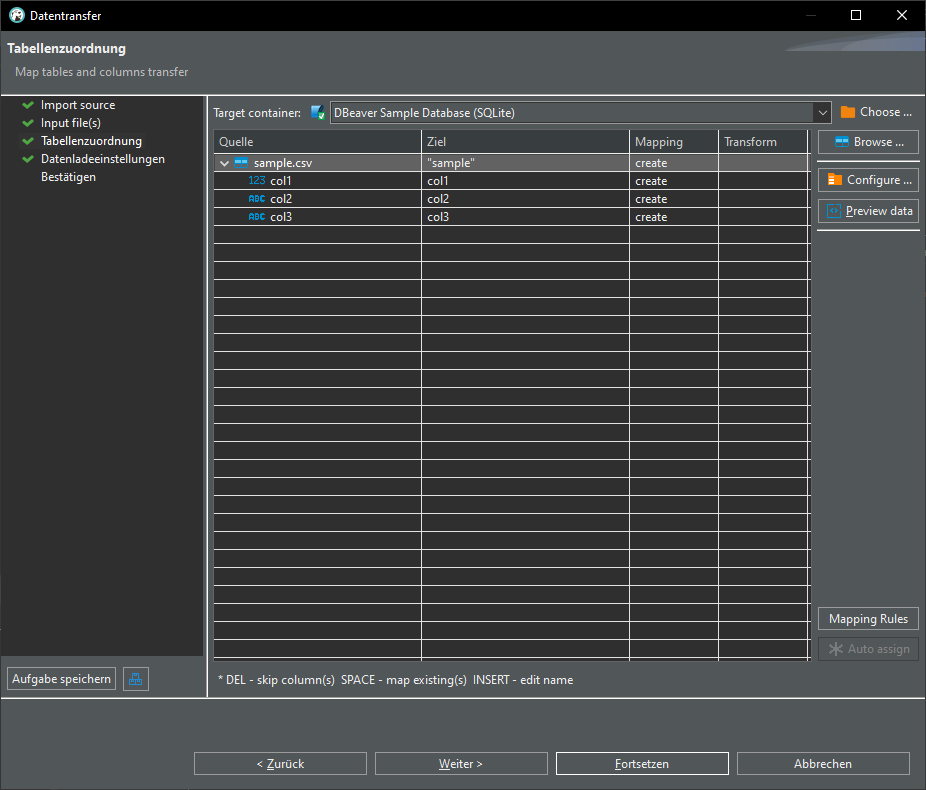
click "Auto assign", change target to "sample"
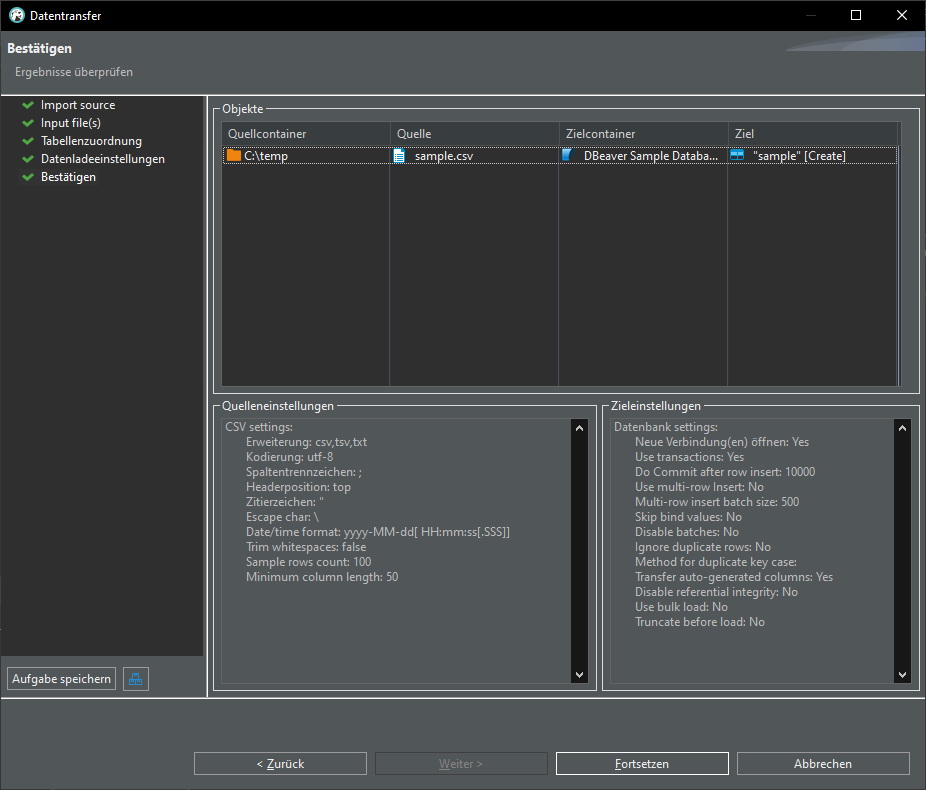
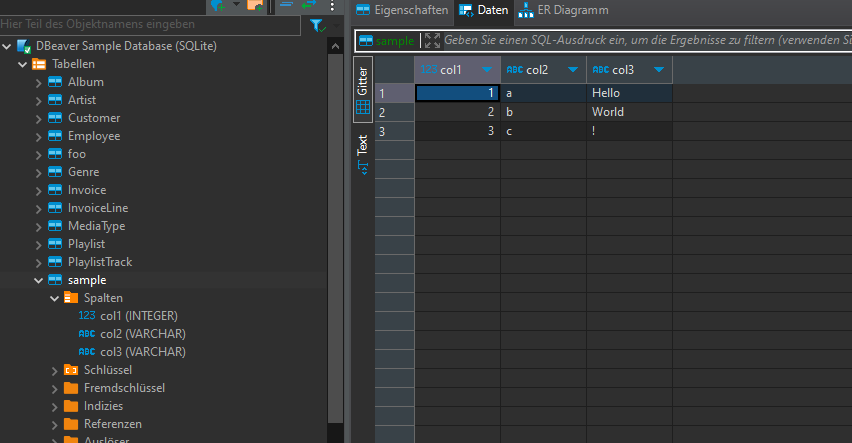
TADA! We have a new table "sample" in our database:
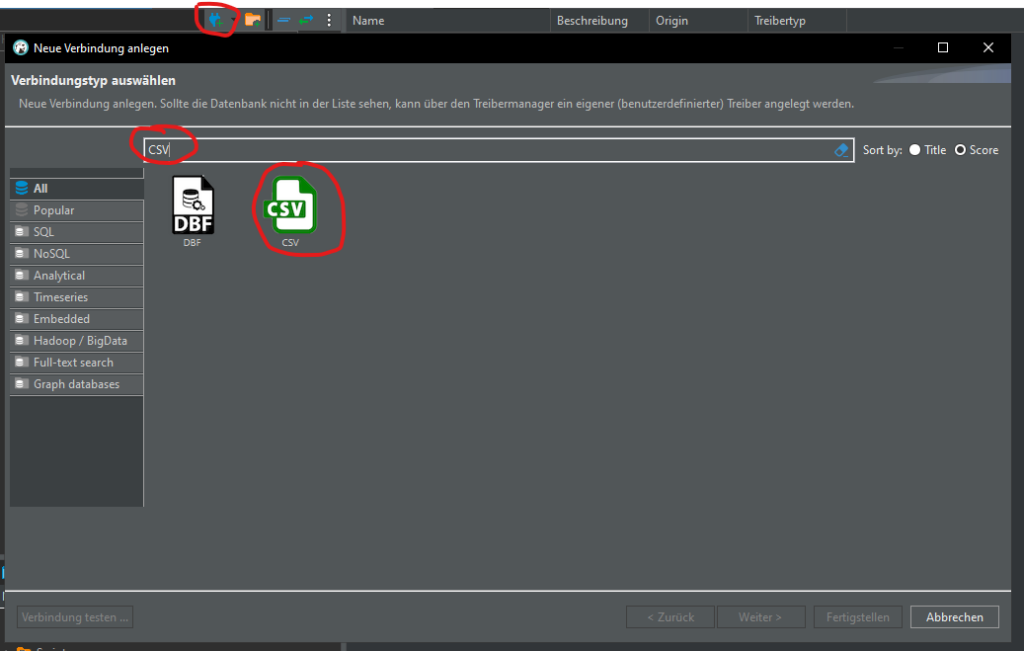
Create CSV connection
Let's try another way. Delete table "sample" and create a connection to the CSV file:
Click Browse… and select the folder where your csv file is that you saved from Excel. You’re selecting a folder here, not a file. The connection will load ALL csv files in that folder. Click Finish.
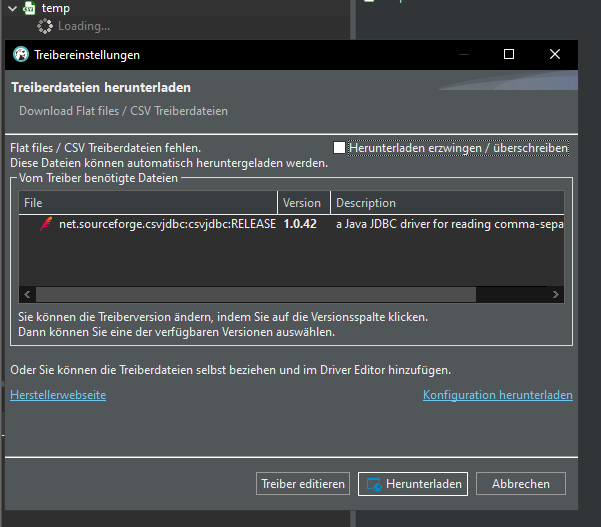
Download the driver, if using for the very first time:
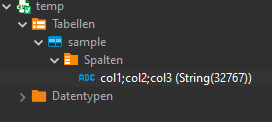
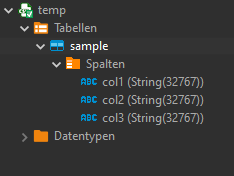
You will now see a new connection; this connection is set up exactly like a regular connection. Each csv file in your folder will be set up as a table with columns.
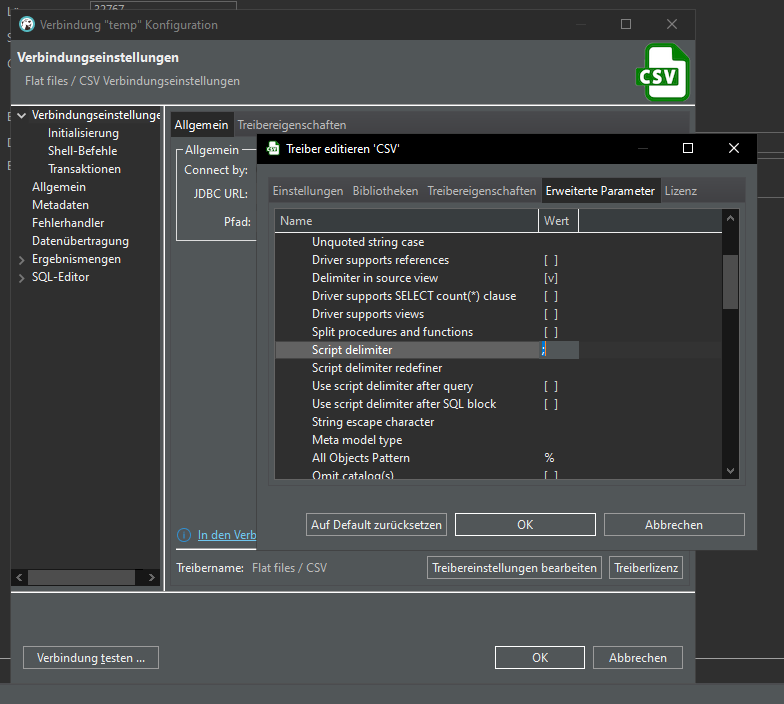
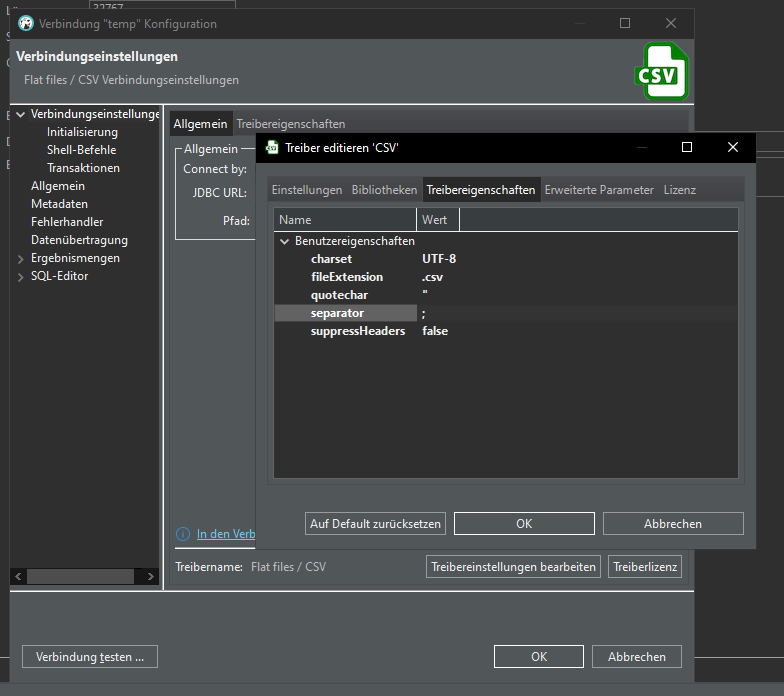
But there is a problem with the columns, it's just one, not three:
Doublecheck delimiter, but it is already set to ;
Ah, in driver details we have to set the separator from , to ;
Looks better now:
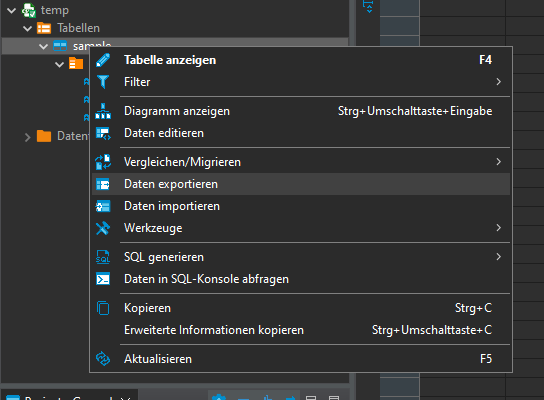
Export CSV data into database:
Once again we have our sample table in our database: