Categories
AI Development Java

GPTs with Quarkus

We will use LangChain within Quarkus to connect to some GPTs. Quarkus uses the LangChain4j library.

Quarkus LangChain Extensions

What extensions Quarkus provides?

./mvnw quarkus:list-extensions | grep langchain
[INFO]   quarkus-langchain4j-azure-openai                   LangChain4j Azure OpenAI
[INFO]   quarkus-langchain4j-chroma                         LangChain4j Chroma
[INFO]   quarkus-langchain4j-core                           LangChain4j
[INFO]   quarkus-langchain4j-easy-rag                       LangChain4j Easy RAG
[INFO]   quarkus-langchain4j-hugging-face                   LangChain4j Hugging Face
[INFO]   quarkus-langchain4j-milvus                         LangChain4j Milvus embedding store
[INFO]   quarkus-langchain4j-mistral-ai                     LangChain4j Mistral AI
[INFO]   quarkus-langchain4j-ollama                         LangChain4j Ollama
[INFO]   quarkus-langchain4j-openai                         LangChain4j OpenAI
[INFO]   quarkus-langchain4j-pgvector                       Quarkus LangChain4j pgvector embedding store
[INFO]   quarkus-langchain4j-pinecone                       LangChain4j Pinecone embedding store
[INFO]   quarkus-langchain4j-redis                          LangChain4j Redis embedding store

Chat window

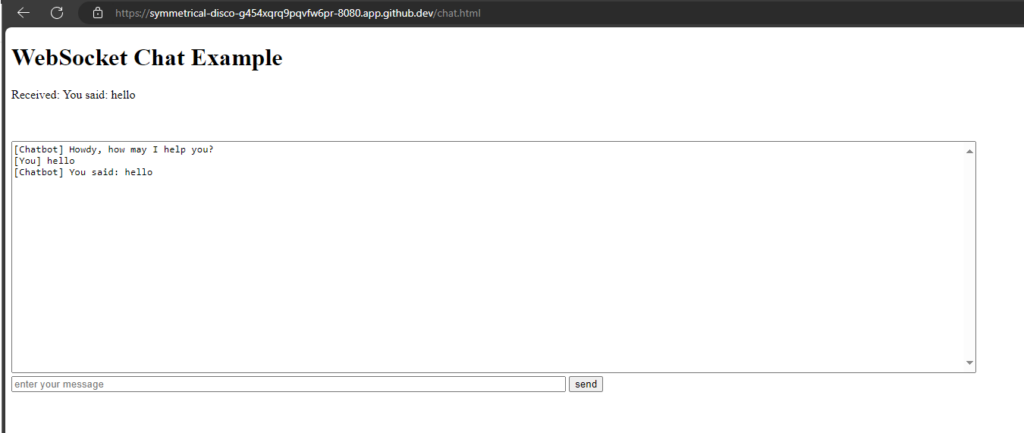
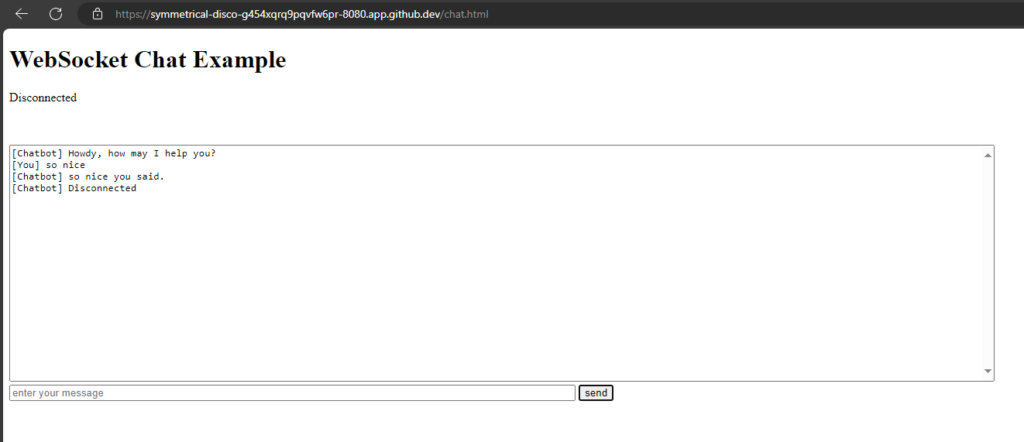
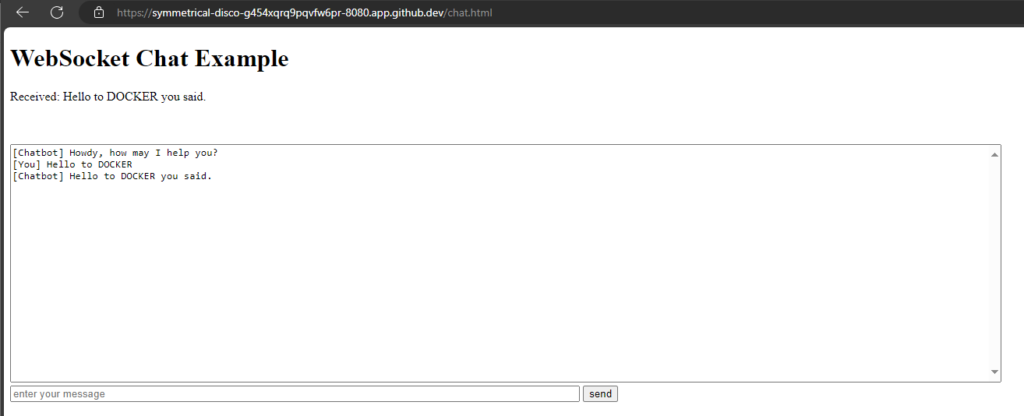
We will reuse our chat window from the last post,

src/main/resources/META-INF/resources/chat.html:

<!DOCTYPE html>
<html lang="en">
<head>
    <meta charset="UTF-8">
    <meta name="viewport" content="width=device-width, initial-scale=1.0">
    <title>WebSocket Chat Example</title>
    <style>
        #chat {
            resize: none;
            overflow: hidden;
            min-width: 70%;
            min-height: 300px;
            max-height: 300px;
            overflow-y: scroll;
        }
        #msg {
            min-width: 40%;
        }
    </style>
</head>
<body>
    <h1>WebSocket Chat Example</h1>
    <p id="message">Connecting...</p>
    <br/>
    <div class="container">
        <br/>
        <div class="row">
            <textarea id="chat"></textarea>
        </div>
        <div class="row">
            <input id="msg" type="text" placeholder="enter your message">
            <button id="send" type="button" disabled>send</button>
        </div>
    
    </div>

    <script src="https://cdnjs.cloudflare.com/ajax/libs/jquery/3.7.1/jquery.min.js"></script>
    <script>
        var connected = false;
        var socket;

        $( document ).ready(function() {
            connect();
            $("#send").click(sendMessage);

            $("#name").keypress(function(event){
                if(event.keyCode == 13 || event.which == 13) {
                    connect();
                }
            });

            $("#msg").keypress(function(event) {
                if(event.keyCode == 13 || event.which == 13) {
                    sendMessage();
                }
            });

            $("#chat").change(function() {
                scrollToBottom();
            });

            $("#name").focus();
        });

        var connect = function() {
            if (! connected) {
                socket = new WebSocket('wss://' + location.host + '/chatsocket');
                socket.onopen = function(m) {
                    connected = true;
                    console.log("Connected to the web socket");
                    $("#send").attr("disabled", false);
                    $("#connect").attr("disabled", true);
                    $("#name").attr("disabled", true);
                    $("#chat").append("[Chatbot] Howdy, how may I help you? \n");
                    $("#msg").focus();
                    $("#message").text('Connected');
                };
                socket.onmessage = function(m) {
                    console.log("Got message: " + m.data);
                    $("#message").text('Received: ' + m.data);
                    $("#chat").append("[Chatbot] " + m.data + "\n");
                    scrollToBottom();
                };
                socket.onclose = function(event) {
                    console.log("Disconnected");
                    $("#message").text('Disconnected');
                    $("#chat").append("[Chatbot] Disconnected" + "\n");
                    scrollToBottom();
                };
                socket.onerror = function(error) {
                    console.log("Error: " + error.message);
                    $("#message").text('Error: ' + error.message);
                    $("#chat").append("[Chatbot] Error: " + error.message + "\n");
                    scrollToBottom();
                };
            }
        };

        var sendMessage = function() {
            if (connected) {
                var value = $("#msg").val();
                console.log("Sending " + value);
                $("#chat").append("[You] " + value + "\n")
                socket.send(value);
                $("#msg").val("");
            }
        };

        var scrollToBottom = function () {
            $('#chat').scrollTop($('#chat')[0].scrollHeight);
        };

    </script>
</body>
</html>
package org.acme;

import io.quarkus.websockets.next.OnTextMessage;
import io.quarkus.websockets.next.WebSocket;
import jakarta.inject.Inject;

@WebSocket(path = "/chatsocket")
public class ChatSocket {
    @Inject
    ChatService chatService;

    @OnTextMessage
    public String onMessage(String userMessage){
        return chatService.chat(userMessage);
    }
}
package org.acme;

import io.quarkus.runtime.StartupEvent;
import jakarta.enterprise.context.ApplicationScoped;
import jakarta.enterprise.event.Observes;

@ApplicationScoped
public class ChatService {
    protected void startup(@Observes StartupEvent event) { 
        System.out.println("Startuuuuuuuuuup event");
    }

    public String chat(String message) {
        return message + " you said.";
    }
}
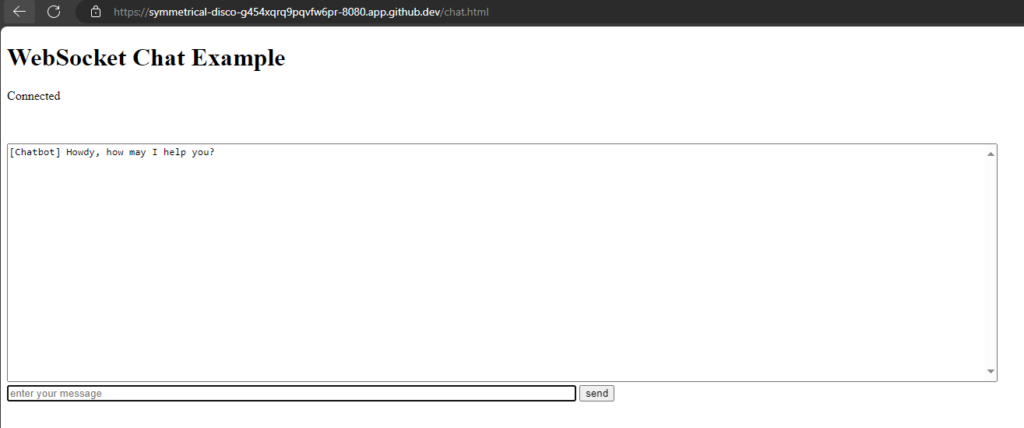
ChatGPT

Extension

./mvnw quarkus:add-extension -Dextensions='quarkus-langchain4j-openai'

Configuration

quarkus.langchain4j.openai.api-key=<OPEN_API_KEY> 
quarkus.langchain4j.openai.chat-model.model-name=gpt-3.5-turbo

API-Key: You can get an API key from OpenAI. But you need at least to pay 5$, what I did. Alternativley you can use demo as API key for limited testing.

Model-Name: Here are the OpenAI Models. gpt-3.5-turbo is default.
Hint: It is not working, if there is a " "(space/blank) after the model-name.

I had stored my OpenAI-API-key as GitHub secret, so the key is available as environment variable in my Codespace. Therefore I changed the configuration:

quarkus.langchain4j.openai.api-key=${OPEN_API_KEY:demo} 
quarkus.langchain4j.openai.chat-model.model-name=gpt-4o

Code

package org.acme;

import io.quarkiverse.langchain4j.RegisterAiService; 

@RegisterAiService 
public interface Assistant { 
    String chat(String message); 
}

Use this Assistant instead of the ChatService:

package org.acme;

import io.quarkus.websockets.next.OnTextMessage;
import io.quarkus.websockets.next.WebSocket;
import jakarta.inject.Inject;

@WebSocket(path = "/chatsocket")
public class ChatSocket {
    @Inject
    Assistant assistant;

    @OnTextMessage
    public String onMessage(String userMessage){
        return assistant.chat(userMessage);
    }
}
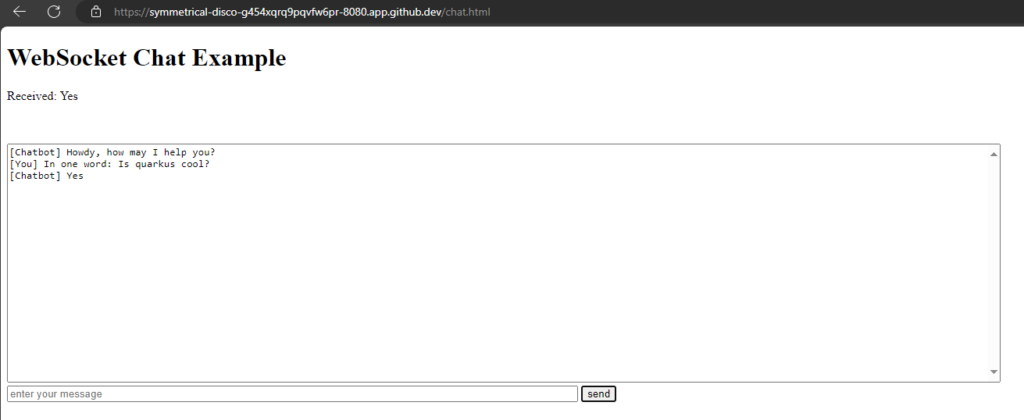
Hugging Face

Extension

./mvnw quarkus:add-extension -Dextensions='quarkus-langchain4j-hugging-face'

Configuration

quarkus.langchain4j.chat-model.provider=huggingface

quarkus.langchain4j.huggingface.api-key=${HUGGINGFACE_API_KEY:nokey}
quarkus.langchain4j.huggingface.chat-model.model-id=KingNish/OpenGPT-4o

Provider: Now we have two models configured, we need to specify which provider to use (huggingface)

API-Key: Get free API-Key from Hugging Face:
Login -> Settings -> Access Tokens -> Generate (Type: 'Read')

Model: Search on the Hugging Face website, I randomly took KingNish/OpenGPT-4o

Code

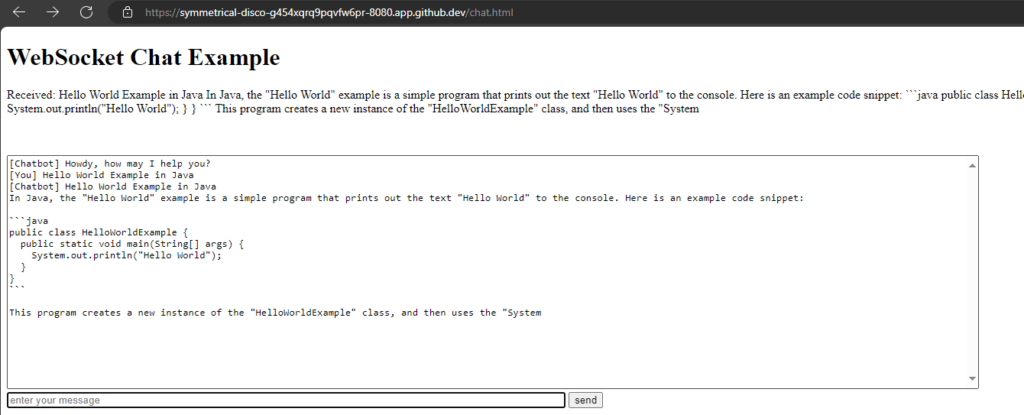
No code change needed, it works with the same code as for ChatGPT.

Everything is changed by configuration.
Antrophic Claude

Extension

./mvnw quarkus:add-extension -Dextensions='quarkus-langchain4j-anthropic'

[ERROR] ❗  Nothing installed because keyword(s) 'quarkus-langchain4j-anthropic' were not matched in the catalog.

It did not work with the maven executable. Need to add dependency manually to pom.xml, see documentation:

<dependency>
    <groupId>io.quarkiverse.langchain4j</groupId>
    <artifactId>quarkus-langchain4j-anthropic</artifactId>
    <version>0.15.1</version>
</dependency>

Configuration

quarkus.langchain4j.chat-model.provider=anthropic

quarkus.langchain4j.anthropic.api-key=${ANTHROPIC_API_KEY:no key}
quarkus.langchain4j.anthropic.chat-model.model-name=claude-3-haiku-20240307

API-Key: Login to Antropic Console and get an API key for free.

Model: Select one from documentation.

Code

No code change needed, it works with the same code as for ChatGPT.

But did not work:

org.jboss.resteasy.reactive.ClientWebApplicationException: Received: 'Bad Request, status code 400' when invoking: Rest Client method: 'io.quarkiverse.langchain4j.anthropic.AnthropicRestApi#createMessage'

Quarkus terminal logging

Without API-key I got a status code 401.

Ollama

Prerequisites

Ollama has to be installed. See this post or Ollama Homepage.

curl -fsSL https://ollama.com/install.sh | sh
export OLLAMA_HOST=0.0.0.0:11434
ollama serve
ollama pull moondream

ollama --version
ollama version is 0.1.41

Extension

./mvnw quarkus:add-extension -Dextensions='quarkus-langchain4j-ollama'

Configuration

quarkus.langchain4j.chat-model.provider=ollama

quarkus.langchain4j.ollama.chat-model.model-id=moondream
quarkus.langchain4j.ollama.timeout=120s

Model: I choose moondream, because it is the smallest one (829MB).

Models can be found on the GitHub page or on Ollama library.

However, Quarkus is ignoring my resourcefriendly choice, as I can see in the Logs: "Preloading model llama3" 🤷‍♂️
UPDATE: For Ollama it is model-id, not model-name!

Code

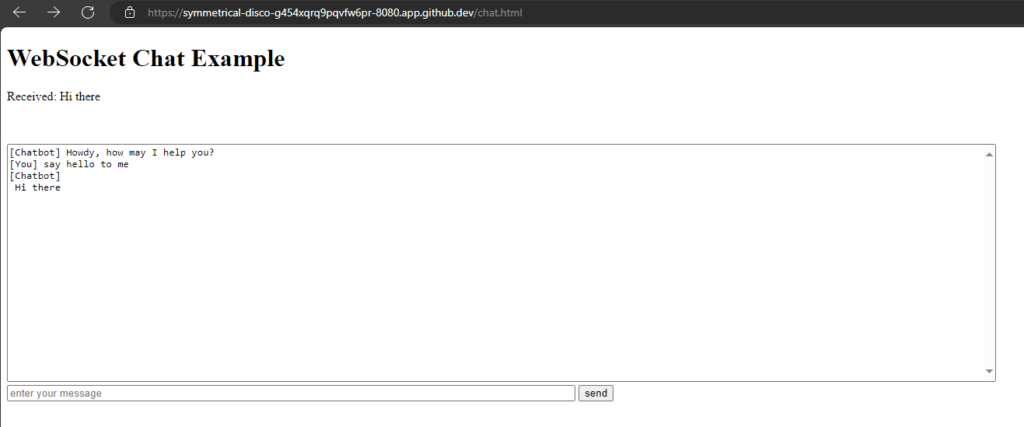
Also no change.
Mistral

Extension

./mvnw quarkus:add-extension -Dextensions='quarkus-langchain4j-mistral'

Configuration

quarkus.langchain4j.chat-model.provider=mistralai

quarkus.langchain4j.mistralai.api-key=${MISTRALAI_API_KEY:no key}
quarkus.langchain4j.mistralai.chat-model.model-name=mistral-tiny

API-key: You can generate an API-key in Mistral AI Console. But you are required to have a Abonnement, which I do not have. Therefore nor API-key for me.

Model: mistral-tiny is default one

Code

Also no change.

But could not test, because I do not have an API-key.

Groq

I like Groq but unfortunately there is no LangChain4j support yet.

The Python LangChain project has already implemented Groq.
Categories
Development Java

Quarkus in Codespace

Set up Quarkus in Codespace environment

Setup

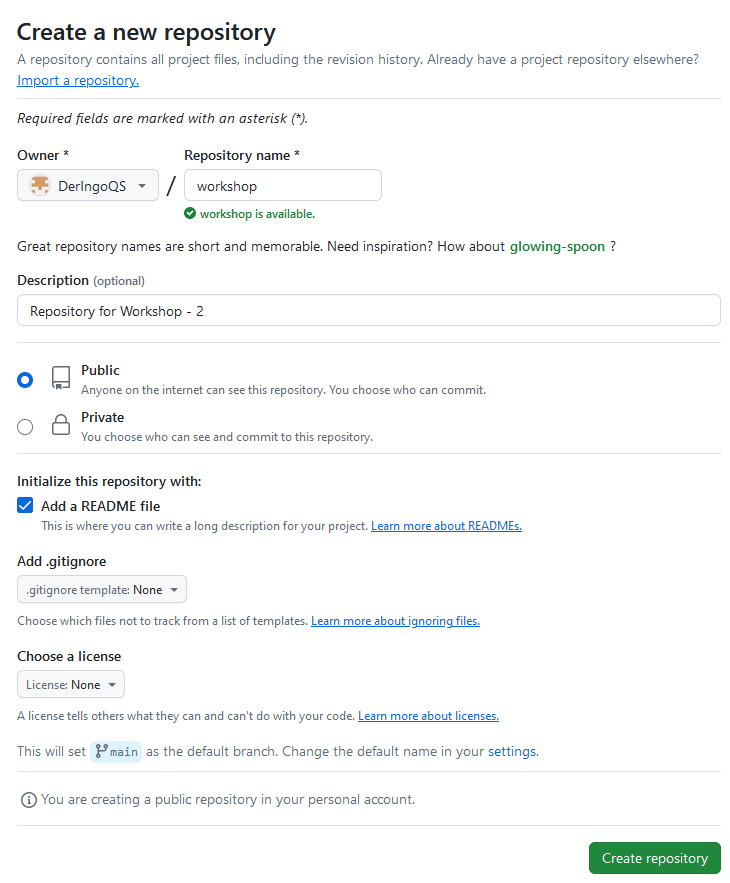
Create a repository “workshop”:

Open codespace and setup Linux in Terminal:

sudo apt update && \
sudo apt upgrade -y && \
sudo apt install httpie -y

Setup Quarkus Project

Quarkus Homepage

Getting started → 4. Bootstrapping the project → Maven

copy and change ArtifactId to workshop

cd ..
# pwd -> /workspaces
mvn io.quarkus.platform:quarkus-maven-plugin:3.10.2:create \
    -DprojectGroupId=org.acme \
    -DprojectArtifactId=workshop

We can not just delete the workshop folder, because GIT information are inside this folder.

Workaround:

cd /workspaces/workshop/

mvn io.quarkus.platform:quarkus-maven-plugin:3.10.2:create \
    -DprojectGroupId=org.acme \
    -DprojectArtifactId=workshop

mv workshop/* .
ls -lisah workshop/
# hidden files/directory still there
mv workshop/.* .
ls -lisah workshop/
# now everthing has moved
rmdir workshop

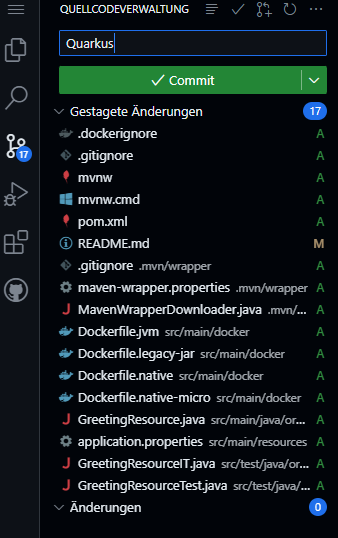
Stage, commit and push to repository:

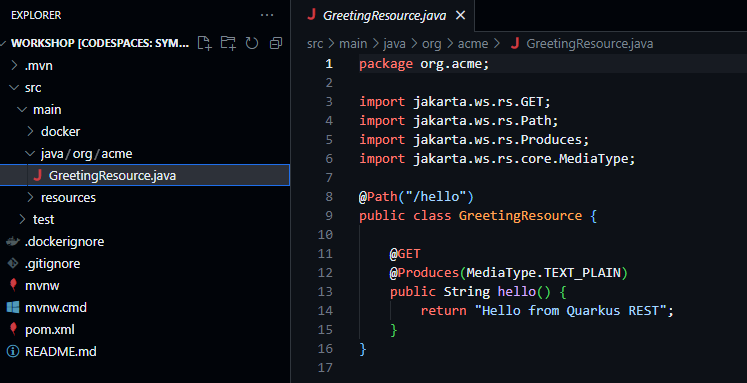
Open GreetingResource, this will force Visual Code to ask to install Extension Pack for Java:

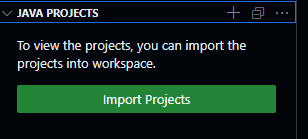
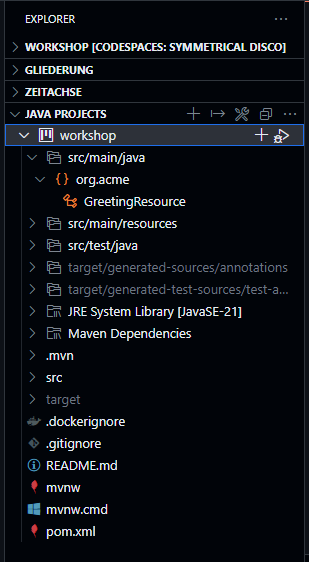
Go to Explorer → Java Projects → Import Projects

It takes a minute or two to show our workshop project:

Start Quarkus

./mvnw quarkus:dev

In Ports Port 5005 is automatically added, but not Port 8080.

We need to add Port 8080 manually.

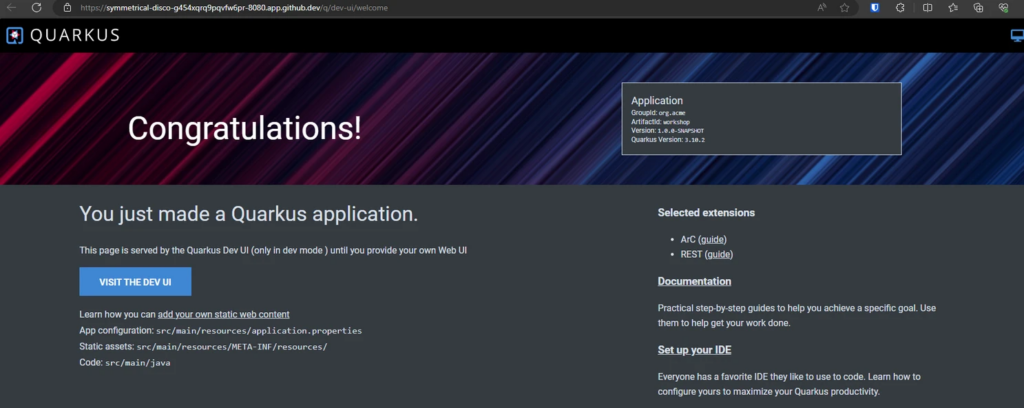
Click on the Globus Icon and Quarkus welcome page opens:

Go to Visit the dev UI → Endpoints

Click on /hello:

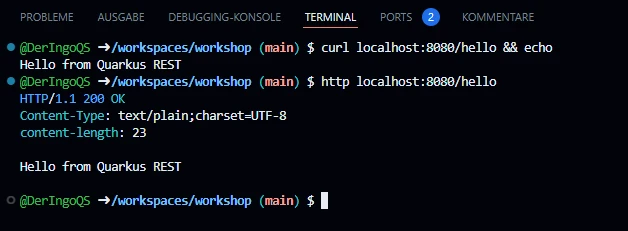
Test from terminal

Open new Terminal

## "&& echo" for additional linebreak
curl localhost:8080/hello && echo
http localhost:8080/hello

WebSockets with Quarkus

Quarkus Guide for using WebSockets

Setup ChatSocket

First we need to install extensions:

./mvnw quarkus:add-extension -Dextensions='websockets'
./mvnw quarkus:add-extension -Dextensions='websockets-next'

Create simple ChatSocket:

package org.acme;

import io.quarkus.websockets.next.OnTextMessage;
import io.quarkus.websockets.next.WebSocket;

@WebSocket(path = "/chatsocket")
public class ChatSocket {
    @OnTextMessage
    public String onMessage(String userMessage){
        return "You said: " + userMessage;
    }
}

Test from terminal

npm install -g wscat
wscat -c ws://localhost:8080/chatsocket

wscat -c ws://localhost:8080/chatsocket
> Hello World!
< You said: Hello World!

Build html client

mkdir -p src/main/resources/META-INF/resources
touch src/main/resources/META-INF/resources/chat.html
<!DOCTYPE html>
<html lang="en">
<head>
    <meta charset="UTF-8">
    <meta name="viewport" content="width=device-width, initial-scale=1.0">
    <title>WebSocket Chat Example</title>
    <style>
        #chat {
            resize: none;
            overflow: hidden;
            min-width: 70%;
            min-height: 300px;
            max-height: 300px;
            overflow-y: scroll;
        }
        #msg {
            min-width: 40%;
        }
    </style>
</head>
<body>
    <h1>WebSocket Chat Example</h1>
    <p id="message">Connecting...</p>
    <br/>
    <div class="container">
        <br/>
        <div class="row">
            <textarea id="chat"></textarea>
        </div>
        <div class="row">
            <input id="msg" type="text" placeholder="enter your message">
            <button id="send" type="button" disabled>send</button>
        </div>
    
    </div>

    <script src="https://cdnjs.cloudflare.com/ajax/libs/jquery/3.7.1/jquery.min.js"></script>
    <script>
        var connected = false;
        var socket;

        $( document ).ready(function() {
            connect();
            $("#send").click(sendMessage);

            $("#name").keypress(function(event){
                if(event.keyCode == 13 || event.which == 13) {
                    connect();
                }
            });

            $("#msg").keypress(function(event) {
                if(event.keyCode == 13 || event.which == 13) {
                    sendMessage();
                }
            });

            $("#chat").change(function() {
                scrollToBottom();
            });

            $("#name").focus();
        });

        var connect = function() {
            if (! connected) {
                socket = new WebSocket('wss://' + location.host + '/chatsocket');
                socket.onopen = function(m) {
                    connected = true;
                    console.log("Connected to the web socket");
                    $("#send").attr("disabled", false);
                    $("#connect").attr("disabled", true);
                    $("#name").attr("disabled", true);
                    $("#chat").append("[Chatbot] Howdy, how may I help you? \n");
                    $("#msg").focus();
                    $("#message").text('Connected');
                };
                socket.onmessage = function(m) {
                    console.log("Got message: " + m.data);
                    $("#message").text('Received: ' + m.data);
                    $("#chat").append("[Chatbot] " + m.data + "\n");
                    scrollToBottom();
                };
                socket.onclose = function(event) {
                    console.log("Disconnected");
                    $("#message").text('Disconnected');
                    $("#chat").append("[Chatbot] Disconnected" + "\n");
                    scrollToBottom();
                };
                socket.onerror = function(error) {
                    console.log("Error: " + error.message);
                    $("#message").text('Error: ' + error.message);
                    $("#chat").append("[Chatbot] Error: " + error.message + "\n");
                    scrollToBottom();
                };
            }
        };

        var sendMessage = function() {
            if (connected) {
                var value = $("#msg").val();
                console.log("Sending " + value);
                $("#chat").append("[You] " + value + "\n")
                socket.send(value);
                $("#msg").val("");
            }
        };

        var scrollToBottom = function () {
            $('#chat').scrollTop($('#chat')[0].scrollHeight);
        };

    </script>
</body>
</html>

CONTEXTS AND DEPENDENCY INJECTION Example

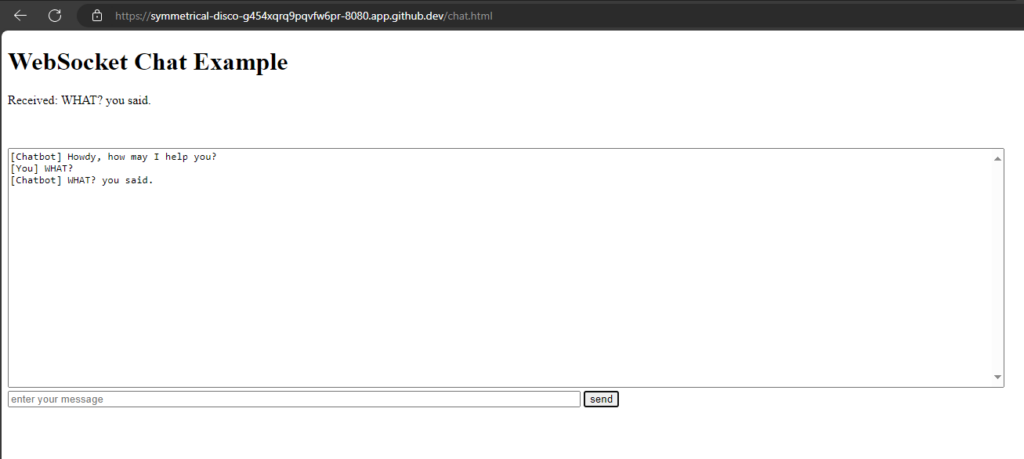
Add a ChatService for the 'logic' and inject it into the Chat Socket:

package org.acme;

import io.quarkus.runtime.StartupEvent;
import jakarta.enterprise.context.ApplicationScoped;
import jakarta.enterprise.event.Observes;

@ApplicationScoped
public class ChatService {
    protected void startup(@Observes StartupEvent event) { 
        System.out.println("Startuuuuuuuuuup event");
    }

    public String chat(String message) {
        return message + " you said.";
    }
}
package org.acme;

import io.quarkus.websockets.next.OnTextMessage;
import io.quarkus.websockets.next.WebSocket;
import jakarta.inject.Inject;

@WebSocket(path = "/chatsocket")
public class ChatSocket {
    @Inject
    ChatService chatService;

    @OnTextMessage
    public String onMessage(String userMessage){
        return chatService.chat(userMessage);
    }
}

Build and run native Image

Building a Native Executable - Quarkus

Build:

# Ich muss vermutlich nur den zweiten Befehl ausführen?
# ./mvnw install -Dnative 
./mvnw package -Dnative -Dquarkus.native.container-build=true -Dquarkus.container-image.build=true

Open another terminal and see how much codespace machine is sweating:

htop

Run:

target/workshop-1.0.0-SNAPSHOT-runner

The project generation has provided a Dockerfile.native-micro in the src/main/docker directory.

# build
docker build -f src/main/docker/Dockerfile.native-micro -t deringo/workshop .

# run
docker run -i --rm -p 8080:8080 deringo/workshop
Categories
Development Java

Quarkus

Heute durfte ich einen Impusvortrag zum Thema Quarkus halten.
Den Inhalt der Folien incl. Kommentare und die Notizen der Live Demo kopiere ich hierher.

Quarkus

https://quarkus.io/

Was ist Quarkus?

• Open-Source-Framework
• Um Anwendungen für eine moderne, Cloud-native Welt zu erstellen
• Kubernetes-natives Java-Framework
• auf GraalVM und HotSpot zugeschnitten
• aus den besten Java-Bibliotheken und -Standards entwickelt

https://quarkus.io/about/
Was ist Quarkus?

Traditionelle Java-Stacks wurden für monolithische Anwendungen mit langen Startzeiten und großem Speicherbedarf in einer Welt entwickelt, in der es noch keine Cloud, Container und Kubernetes gab. Java-Frameworks mussten sich weiterentwickeln, um den Anforderungen dieser neuen Welt gerecht zu werden.

Quarkus wurde entwickelt, um Java-Entwicklern die Möglichkeit zu geben, Anwendungen für eine moderne, Cloud-native Welt zu erstellen. Quarkus ist ein Kubernetes-natives Java-Framework, das auf GraalVM und HotSpot zugeschnitten ist und aus den besten Java-Bibliotheken und -Standards entwickelt wurde. Ziel ist es, Java zur führenden Plattform in Kubernetes- und Serverless-Umgebungen zu machen und Entwicklern ein Framework zu bieten, das eine größere Bandbreite an verteilten Anwendungsarchitekturen abdeckt.

Vollständig und absolut Open Source

https://quarkus.io/about/

Ausgewählte Features

• Live-Coding mit Dev-Modus
• Microprofile-Integration für Cloud-native Anwendungen
• Nutzung von Quarkus für RESTful-Anwendungen
• Serverless Funktionen mit Quarkus Funqy
• Integration mit Datenbanken
• Performance
• Erweiterungen

Live-Coding mit Dev-Modus

Eine der herausragenden Eigenschaften von Quarkus ist die Möglichkeit des Live-Codings. Mit dem Dev-Modus können Entwickler Änderungen am Code vornehmen und diese Änderungen werden sofort in der laufenden Anwendung wirksam, ohne dass ein Neustart erforderlich ist. Dies beschleunigt den Entwicklungsprozess erheblich und ermöglicht eine iterative Entwicklung in Echtzeit.

Serverless Funktionen mit Quarkus Funqy

Eine API für verschiedenen FaaS-Umgebungen wie AWS Lambda, Azure Functions, Google Cloud Functions, Knative und Knative Events (Cloud Events), daher eine sehr einfache API.

https://quarkus.io/guides/funqy
Quarkus Funqy ist Teil der serverlosen Strategie von Quarkus und zielt darauf ab, eine portable Java-API zum Schreiben von Funktionen bereitzustellen, die in verschiedenen FaaS-Umgebungen wie AWS Lambda, Azure Functions, Google Cloud Functions, Knative und Knative Events (Cloud Events) eingesetzt werden können. Es ist auch als eigenständiger Dienst nutzbar.

Da es sich bei Funqy um eine Abstraktion handelt, die mehrere verschiedene Cloud-/Funktionsanbieter und Protokolle umfasst, muss es eine sehr einfache API sein und verfügt daher möglicherweise nicht über alle Funktionen, die Sie von anderen Remoting-Abstraktionen gewohnt sind. Ein schöner Nebeneffekt ist jedoch, dass Funqy so optimiert und so klein wie möglich ist. Das bedeutet, dass Funqy zwar ein wenig an Flexibilität einbüßt, dafür aber einen Rahmen bietet, der wenig bis gar keinen Overhead hat.

Integration mit Datenbanken

Quarkus bietet Erweiterungen für verschiedene Datenbanken, wie z.B. PostgreSQL, MySQL, MongoDB und viele mehr.

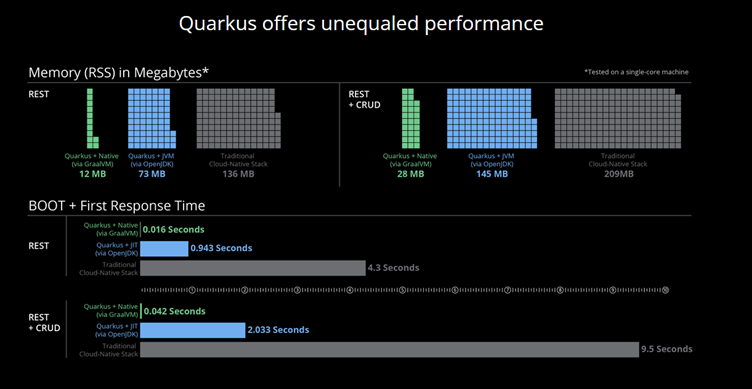
Performance

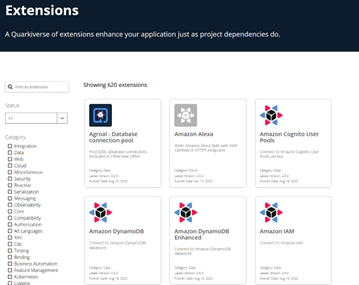
Erweiterungen

Live Demo

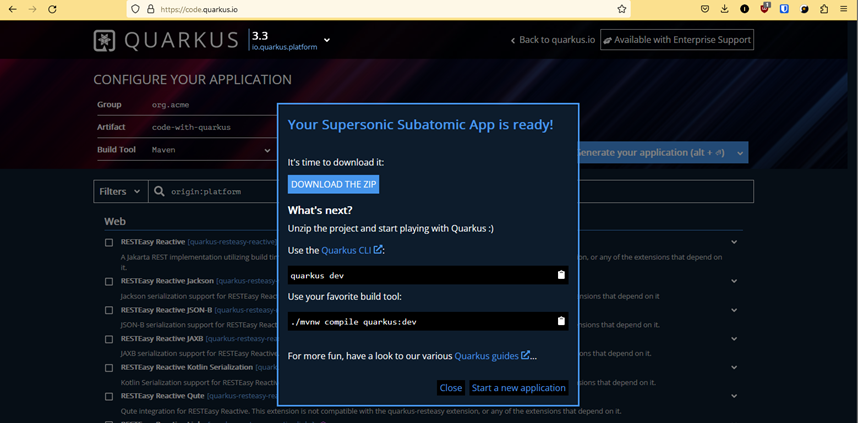
Download

https://code.quarkus.io/

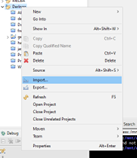
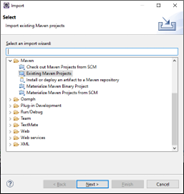
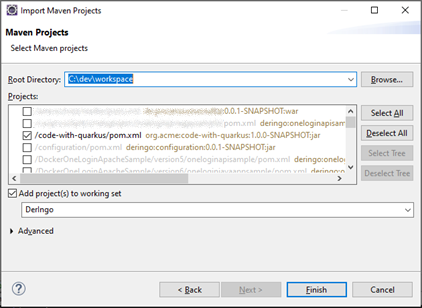
Import into Eclipse IDE

Prerequisites

Eclipse öffnen, Terminal mit Ubuntu (WSL) öffnen

Java und Maven Versionen überprüfen:

java --version
echo $JAVA_HOME
mvn --version
# bei mir wird die Maven Version nicht angezeigt, wohl aber der Pfad der Installation, über den prüfe ich die Version
ls - lisah /opt/maven
cd /mnt/c/dev/workspace/code-with-quarkus/
clear

Start Quarkus

Starte Projekt:

./mvnw compile quarkus:dev

Internal Web Browser öffnen: http://localhost:8080/
„Visit the DEV UI“ funktioniert nicht im Eclipse Browser

Zeige „RESTeasy Reactive“-> @Path /hello
http://localhost:8080/hello

Hot Deployment

curl http://localhost:8080/hello

Zeige Klasse GreetingResource

Return String ändern und hello-Seite neu laden -> kein Neustart notwendig!

curl http://localhost:8080/hello
# In Klasse GreetingResource ändern von:
@Produces(MediaType.TEXT_PLAIN) 
# nach:
@Produces(MediaType.APPLICATION_JSON) 

Änderung wird auch hier ohne Neustart übernommen, um sie zu zeigen verwende ich HTTPie statt cURL:

http http://localhost:8080/hello

Um das Hot Deployment für JUnit Tests zu zeigen gehe ich in das Terminal, mit dem ich Quarkus gestartet habe und drücke "r" für "re-run test".
Der Test schlägt fehlt, da ich in GreetingResource den Rückgabestring geändert hatte. Ich passe den zu erwartenden Wert in GreetingResourceTest an und drücke dann wieder "r" im Terminal. Alle Tests sind jetzt grün. Es war kein Neustart notwendig.

Contexts and Dependency Injection (CDI)

Klasse GreetingService hinzufügen:

package org.acme;

import jakarta.enterprise.context.ApplicationScoped;

@ApplicationScoped
public class GreetingService {
    
    private String greeting = "Hallo";
    
    public String greeting(String name) {
        return greeting + " " + name;
    }

}

Die Klasse GreetingResource erweitern:

package org.acme;

import jakarta.inject.Inject;
import jakarta.ws.rs.GET;
import jakarta.ws.rs.Path;
import jakarta.ws.rs.Produces;
import jakarta.ws.rs.core.MediaType;

@Path("/hello")
public class GreetingResource {

    @Inject
    GreetingService service;

    
    @GET
    @Produces(MediaType.TEXT_PLAIN)
    public String hello() {
        return "Hello from Welt";
    }
    
    @GET
    @Produces(MediaType.TEXT_PLAIN)
    @Path("/greeting/{name}")
    public String greeting(String name) {
        return service.greeting(name);
    }
}

Und wieder ohne Neustart testen:

http http://localhost:8080/hello/greeting/Welt

Configuration

Klasse GreetingService ändern:

package org.acme;

import jakarta.enterprise.context.ApplicationScoped;

@ApplicationScoped
public class GreetingService {
    
    @ConfigProperty(name = "greeting")
    private String greeting;
    
    public String greeting(String name) {
        return greeting + " " + name;
    }

}

Testen:

http http://localhost:8080/hello/greeting/Welt

Der Test schlägt fehl, da die Property greeting noch nicht gesetzt wurde, was wir jetzt nachholen:

greeting=Huhu

Testen:

http http://localhost:8080/hello/greeting/Welt

Jetzt funktioniert es und es kommt "Huhu Welt" zurück.

Staged Properties: In DEV Modus möchten wir eine andere Begrüßung sehen:

greeting=Huhu
%dev.greeting=Moin

Testen:

http http://localhost:8080/hello/greeting/Welt

Es funktioniert und es kommt "Moin Welt" zurück.

Metrics

Testen:

http http://localhost:8080/q/metrics

Fehler: Not Found

Mit Maven nachinstallieren (alternativ: Gradle oder Quarkus CLI):

./mvnw quarkus:add-extension -Dextensions='quarkus-smallrye-metrics'

Testen:

http http://localhost:8080/q/metrics

ggf. ein paar Mal wiederholen dann gehts; wieder ohne Neustart

OpenAPI

Testen:

http http://localhost:8080/q/openapi

Fehler: Not Found

Mit Maven nachinstallieren (alternativ: Gradle oder Quarkus CLI):

./mvnw quarkus:add-extension -Dextensions='quarkus-smallrye-openapi'

Testen:

http http://localhost:8080/q/openapi

ggf. ein paar Mal wiederholen dann gehts; wieder ohne Neustart

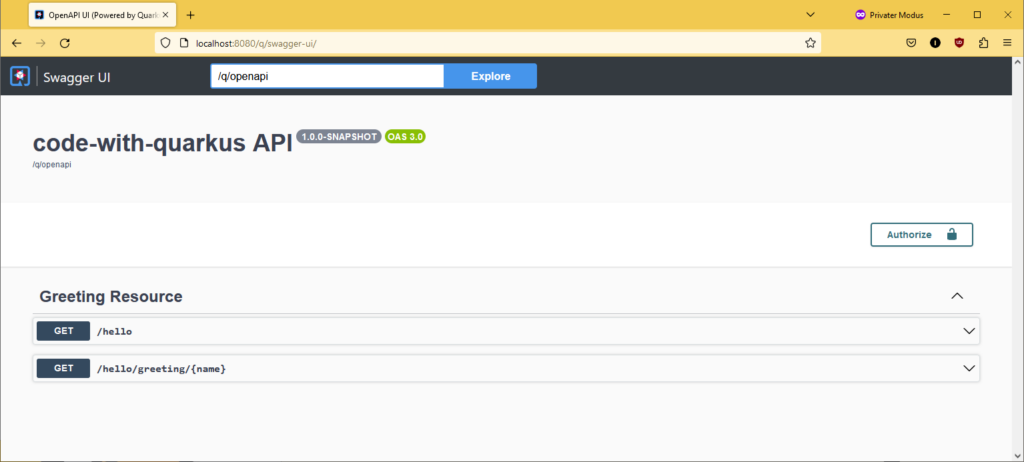
In "richtigem" Browser zeigen das Swagger direkt mit enthalten ist:

Swagger

Abschluss

Fragen

Wer hat schon Erfahrungen mit Quarkus sammeln können?
Wie war der persönliche Eindruck?

Wurde ggf. schon mal in einem Projekt gegen Quarkus entschieden?
Warum?

Diskussion

Quarkus vs. Spring Boot?