I was on JCON 2024 and beside other interesting talks I heard one talk about cloud-based IDEs, and I wanted to try out, if GitHub Codespaces could work for me.
Explore the evolving landscape of cloud-based integrated development environments (IDEs), focusing on Gitpod, GitHub codespaces and Devpod. Compare and contrast these cloud IDEs with traditional counterparts, emphasizing the role of container technology, specifically the devcontainer specification. The discussion includes advances, existing limitations, and the potential for developing polyglot, container-based distributed applications. A live demo illustrates the rapid setup and coding process across various languages and frameworks, showcasing testing capabilities and seamless deployment to Kubernetes. Discover how custom additions enhance flexibility. Additionally, uncover the impact of cloud IDEs on teaching and team projects, ensuring consistent development setups for enhanced efficiency and streamlined processes.
[EN] Codespaces, Gitpod, Devpod ... what cloud and container-based IDEs can do for you
by Matthias Haeussler (Novatec Consulting GmbH)
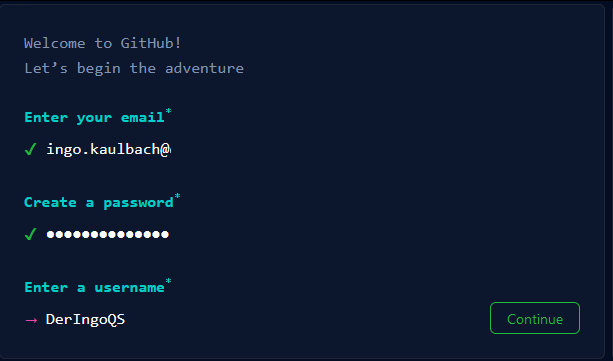
Create GitHub Account
Go to GitHub and create an account. Free plan is suitable.
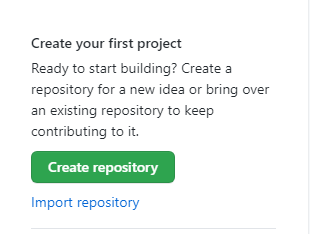
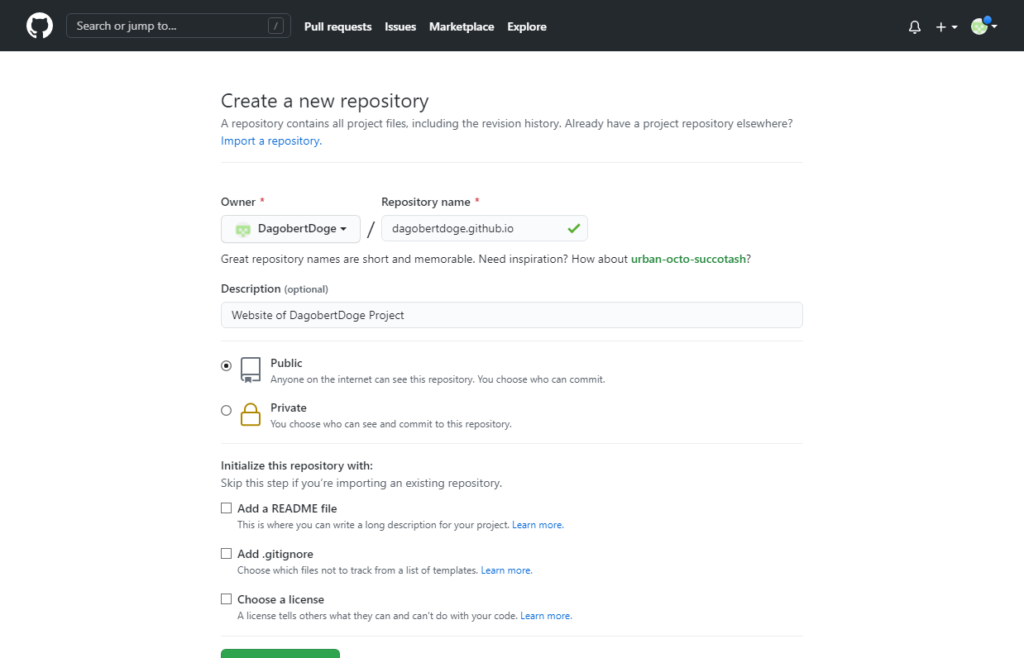
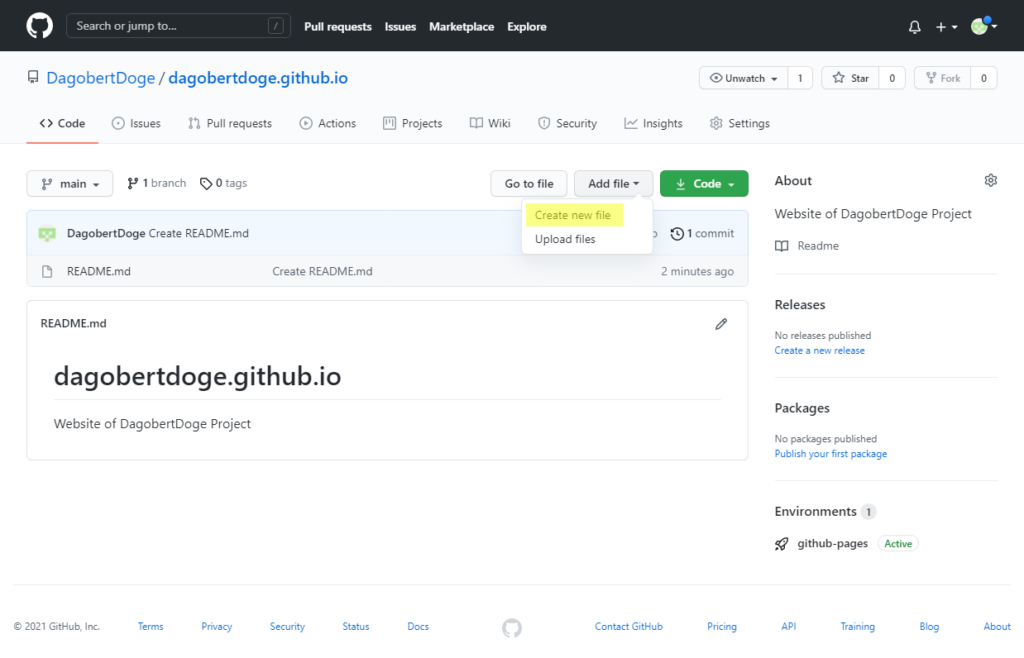
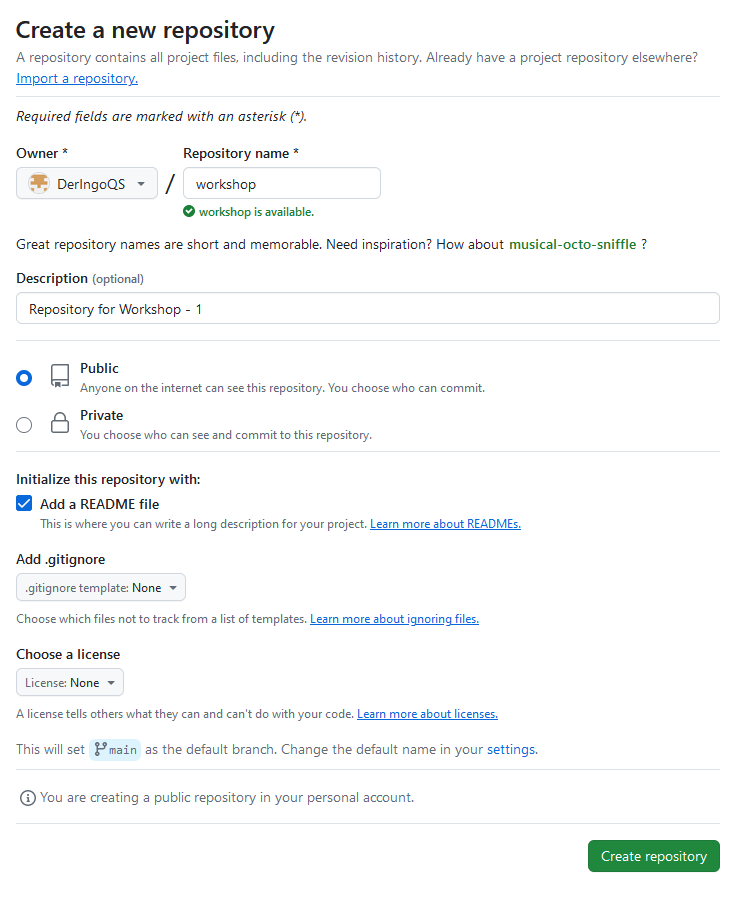
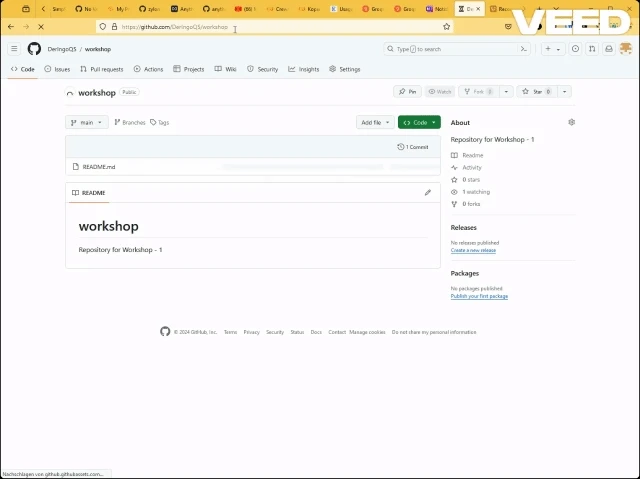
Create Repository
Create a new repository with name “workshop”. Add a README file.
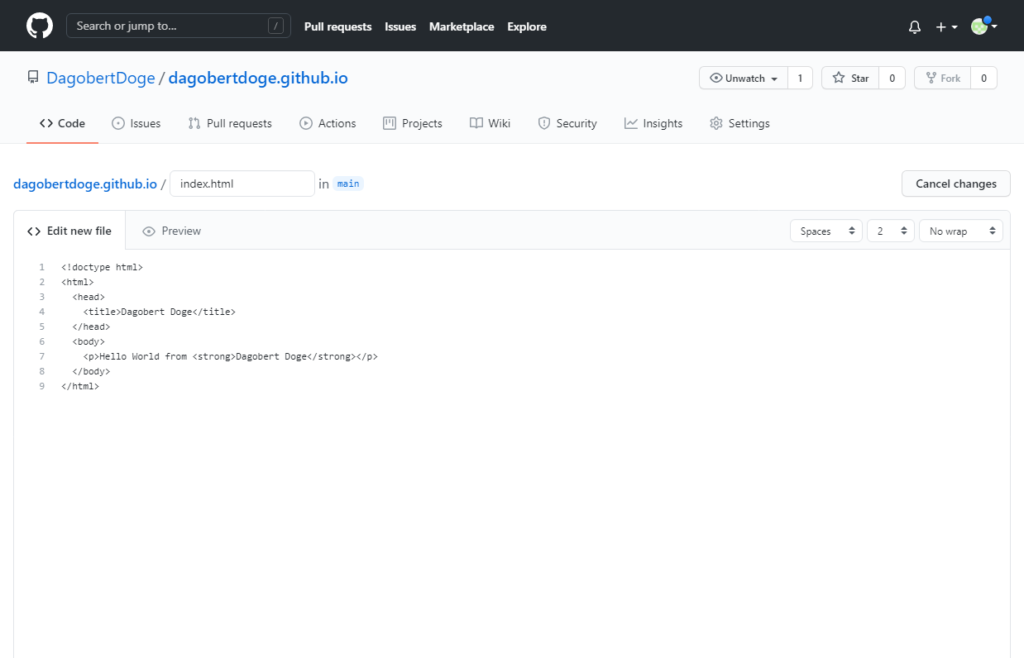
Create Codespace
TODO: funktioniert das GIF?
Change Keyboard Layout to German: In the lower right corner click on “Layout: US” and enter “German” in the upcoming window.
TODO: Ich hätte gerne die Sprache von Visual Code auf Englisch umgestellt. Wie?
Work in the Terminal
Copy & Paste
Type something into the terminal.
Mark it with your mouse.
One Right Click to copy into Clipboard.
Another Right Click to paste from Clipboard.

Timezone
Set Timzone to Europe -> Berlin
sudo dpkg-reconfigure tzdata
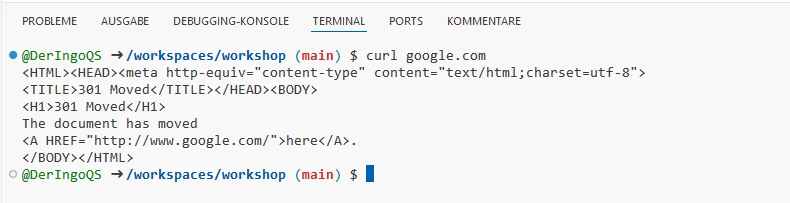
Internet
Do we have access to the Internet? Let’s try with curl:
curl google.com
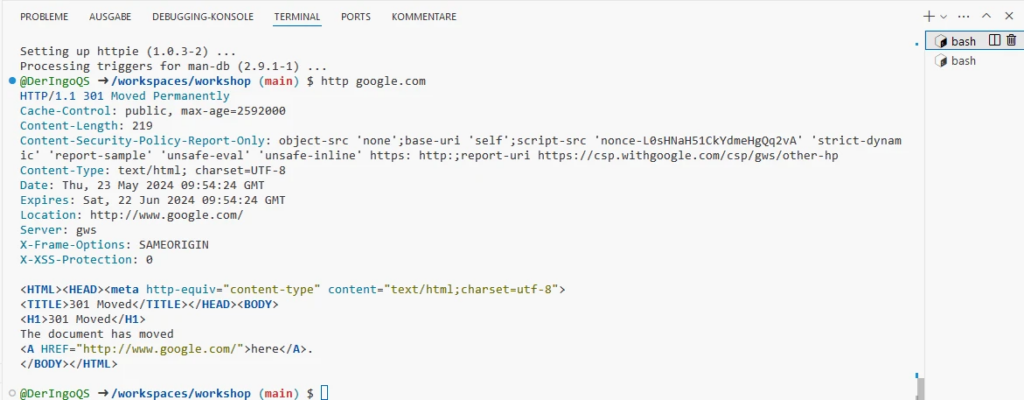
HTTPie
A modern alternative to curl is HTTPie:
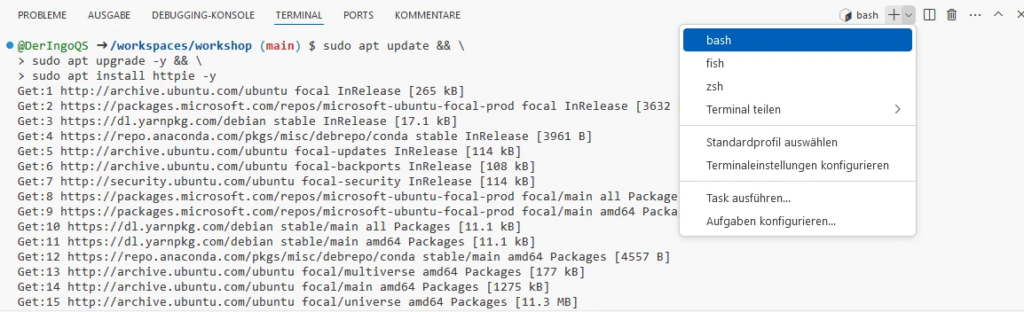
Install httpie:
sudo apt update && \
sudo apt upgrade -y && \
sudo apt install httpie -y
This will take a few minutes. Meanwhile we can work in another Terminal window. Later we come back and test HTTPie:
http google.com
Additional Terminal window
Open a second Terminal with bash:
VIM
ls -lisah
touch test.sh
ls -lisah
vim test.sh
chmod +x test.sh
./test.sh
name=Ingo
echo "My name is $name"
echo "But here I am: $(whoami)"

Python
Do we have Python in our Codespace? Which version(s)?
python3 --version
python --version

vim hello_world.py
python hello_world.py
# Print "Hello World" to the console
print("Hello World")
Docker
docker --version
docker-compose --version
docker run hello-world
Apache HTTPD
docker run -p 8888:80 httpd
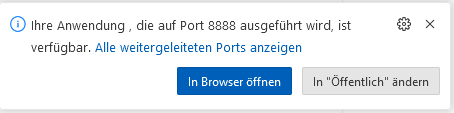
Open in Browser:

Find all open Ports in the Ports-Tab:

Normally Port 8888 should be listed here.
We need to add Port, just enter 8888:

Open Website just with a click on the Globus-Icon.
When we try to open the address in another browser, we will see a GitHub-Login.
When we login with another GitHub-Account, we will get a 404-error. Because the page is Private.
Switch to Public:
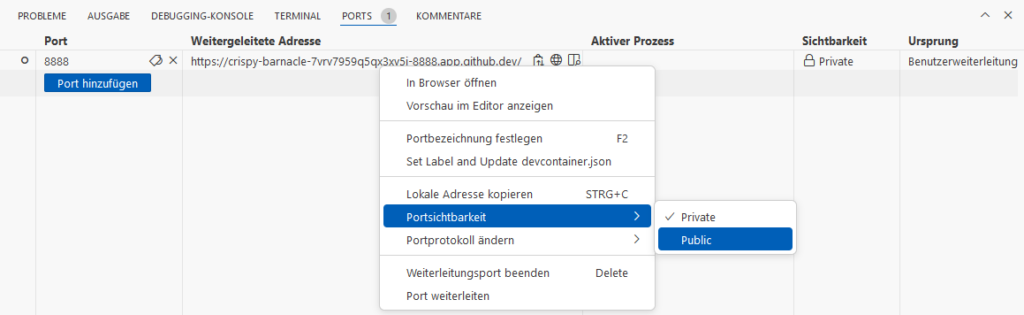
Now we can access the page in another brower.
At the end we can shutdown HTTPD with <STRG>+<C> in Terminal window. It should automatically disapear in the Ports-Tab. If not, you can remove it manually.
Microsoft Edge - Caching problem
Open the Public page in MS Edge.
Make the page Private again. Try to open in a new browser, won’t work.
Reload (the Public loaded) page in MS Edge: You can still see the site!
This is a cached version and we need to force MS Edge to reload from server.
Open Developer Tools (F12 or <STRG>+<SHIFT>+<I>), then you can Right Click on the reload button to have additional options:

Java
java --version

vim HelloWorld.java
javac HelloWorld.java
java HelloWorld
rm -f HelloWorld*
class HelloWorld {
  public static void main(String args[]) {
      System.out.println("Hello World");
  }
}
Run Java Source as Shell Scripts
type -a java
# java is /home/codespace/java/current/bin/java
# java is /usr/local/sdkman/candidates/java/current/bin/java

vim HelloWorld.sh
chmod +x HelloWorld.sh
./HelloWorld.sh
rm HelloWorld.sh
#!/home/codespace/java/current/bin/java --source 21

class HelloWorld {
  public static void main(String args[]) {
      System.out.println("Hello World");
  }
}
Maven
Start
We create a new pom.xml from scratch.
We need a template. We will take “The Basics”-one from the Apache Maven POM Reference page.
    <project xmlns="http://maven.apache.org/POM/4.0.0" xmlns:xsi="http://www.w3.org/2001/XMLSchema-instance"
      xsi:schemaLocation="http://maven.apache.org/POM/4.0.0 https://maven.apache.org/xsd/maven-4.0.0.xsd">
      <modelVersion>4.0.0</modelVersion>

      <groupId>org.codehaus.mojo</groupId>
      <artifactId>my-project</artifactId>
      <version>1.0</version>
    </project>
mvn --version vim pom.xml mvn clean verify
Sample Project
Open pom.xml in Explorer (GUI) and change:
- org.codehaus.mojo to org.acme
- my-project to workshop
No need to save: Changes are automatically saved

To doublecheck that everything is still ok run mvn clean verify again.
mkdir -p src/main/java/org/acme
touch src/main/java/org/acme/HelloWorld.java
Open HelloWorld.java with <STRG>+<MOUSECLICK> in GUI-Editor.
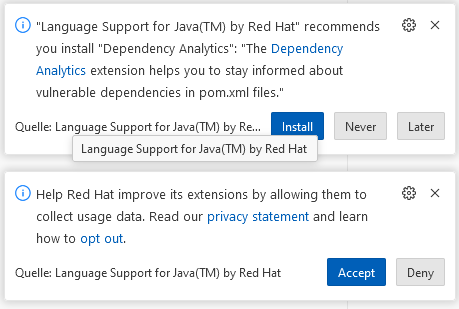
Install Extension Pack for Java as suggested:

And also the next two suggestions:
package org.acme;

class HelloWorld {
  public static void main(String args[]) {
      System.out.println("Hello World");
  }
}
mvn package java -classpath ./target/workshop-1.0.jar org.acme.HelloWorld
Maven - different version
In our Codespace we have Maven 3.9.6 and Java 21.
Let’s test with a different version. We will use Docker.
Official Maven Image on DockerHub.
We want to re-use the local Maven Cache. Let’s find out where it is:
sudo apt install locate -y
sudo updatedb
locate .m2
# /home/codespace/.m2
Adjust the “How to use this image” command:
docker run -it --rm \
--name workshop-maven-project \
-v /home/codespace/.m2:/root/.m2 \
-v "$(pwd)":/usr/src/workshop \
-w /usr/src/workshop \
maven:3.3-jdk-8 \
mvn clean package
java -classpath ./target/workshop-1.0.jar org.acme.HelloWorld
Sourcecode management
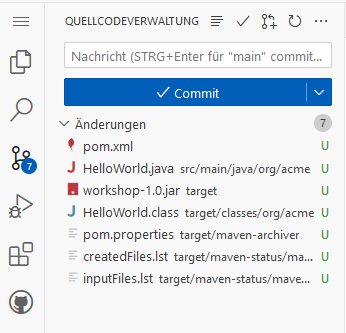
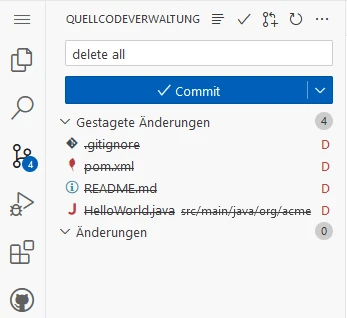
We have 7 uncommited changes, but only 2 files should go into the repository:
What we need is a .gitignore file.
touch .gitignore
There are two template files we will copy:
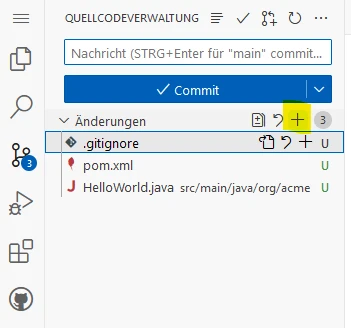
Now there are only 3 files we can commit:
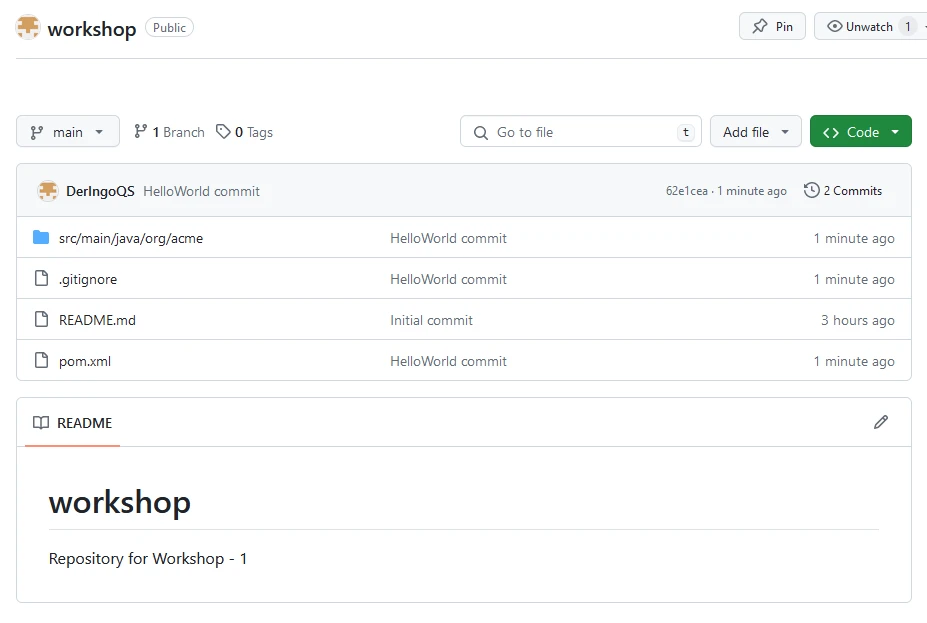
Now we can see these files in our repository:
Secrets
Use GitHub Secrets for API-keys etc.
In the upper-right corner of any page, click your profile photo, then click Settings. Under Codespaces we can set our secrets:
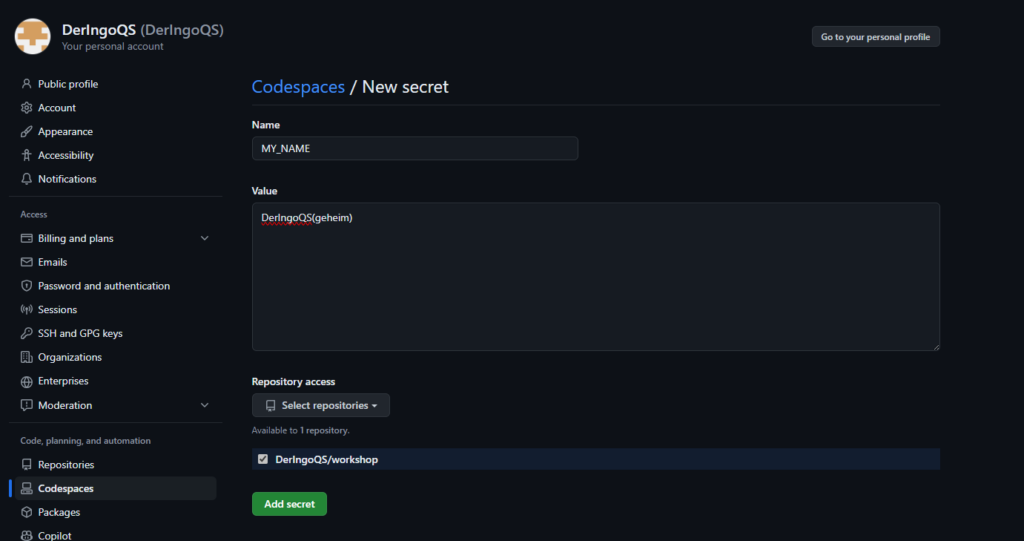
In our Codespace we can access the secret as environment variable:

A running codespace has to be restarted!
Cleanup
Delete all files:
rm -rf target && \
rm -rf src && \
rm pom.xml && \
rm README.md && \
rm .gitignore
Stage & commit changes:
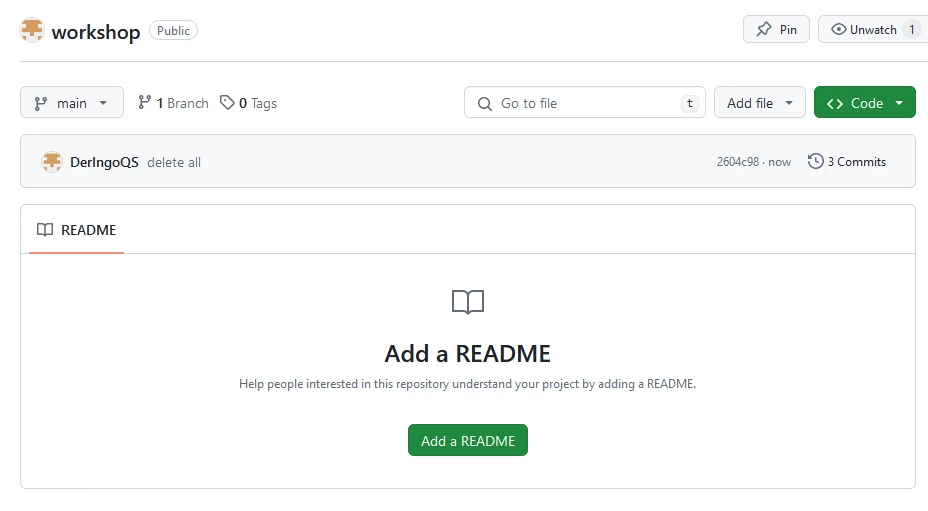
Now we have a clean repository:
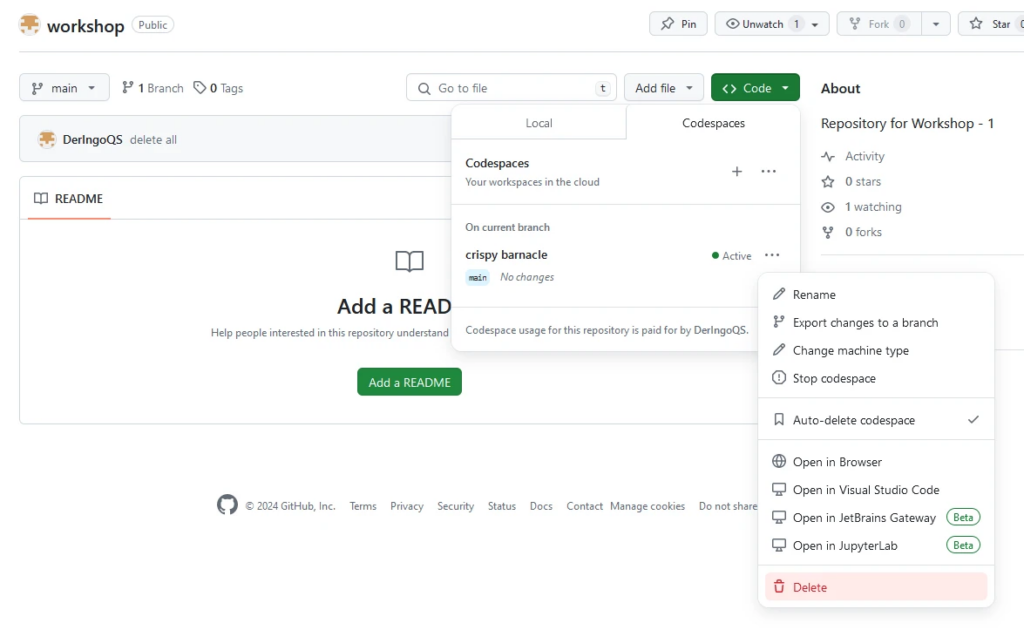
Close browser window with codespace and delete the codespace:
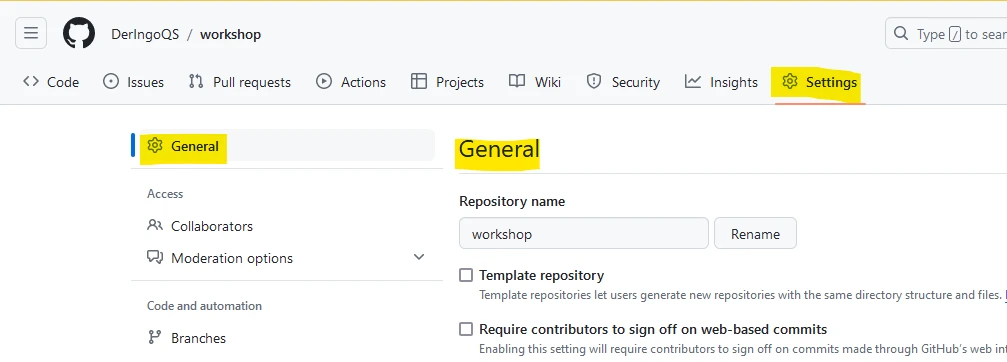
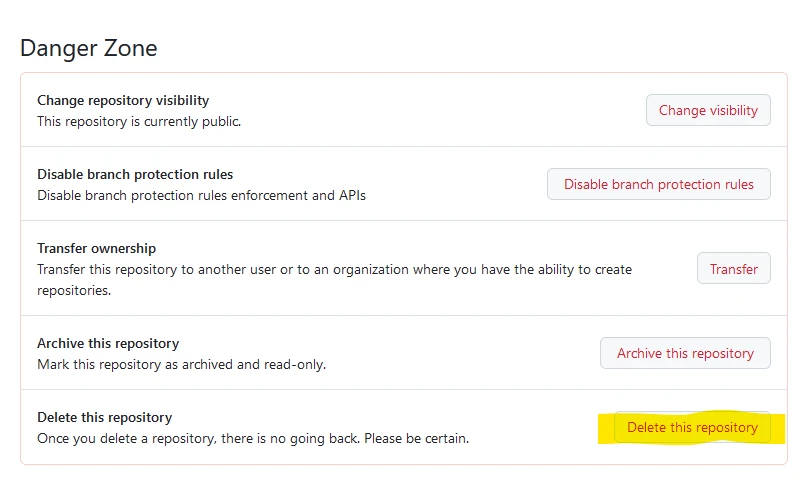
Delete the repository:
Go to Settings → General → Danger Zone → Delete this repository