I was on JCON 2024 and beside other interesting talks I heard one talk about cloud-based IDEs, and I wanted to try out, if GitHub Codespaces could work for me.
Explore the evolving landscape of cloud-based integrated development environments (IDEs), focusing on Gitpod, GitHub codespaces and Devpod. Compare and contrast these cloud IDEs with traditional counterparts, emphasizing the role of container technology, specifically the devcontainer specification. The discussion includes advances, existing limitations, and the potential for developing polyglot, container-based distributed applications. A live demo illustrates the rapid setup and coding process across various languages and frameworks, showcasing testing capabilities and seamless deployment to Kubernetes. Discover how custom additions enhance flexibility. Additionally, uncover the impact of cloud IDEs on teaching and team projects, ensuring consistent development setups for enhanced efficiency and streamlined processes.
[EN] Codespaces, Gitpod, Devpod ... what cloud and container-based IDEs can do for you by Matthias Haeussler (Novatec Consulting GmbH)
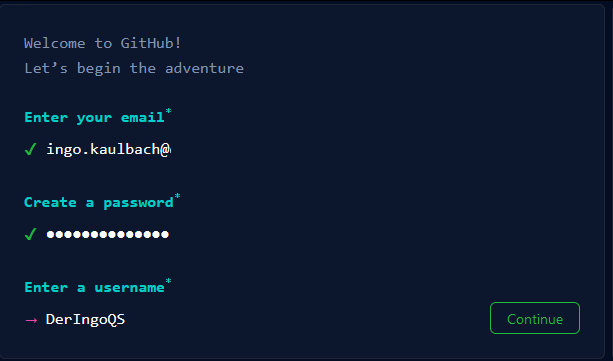
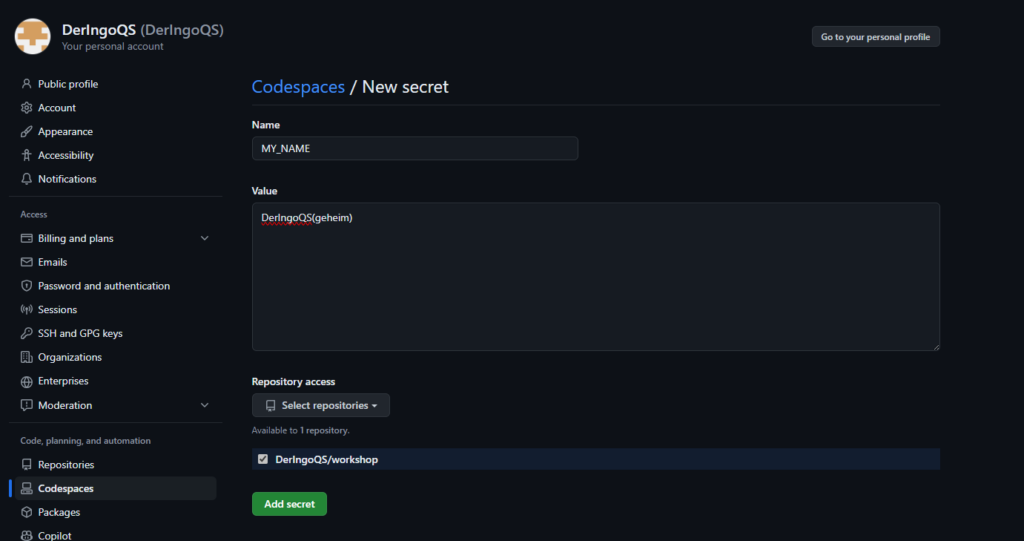
Create GitHub Account
Go to GitHub and create an account. Free plan is suitable.
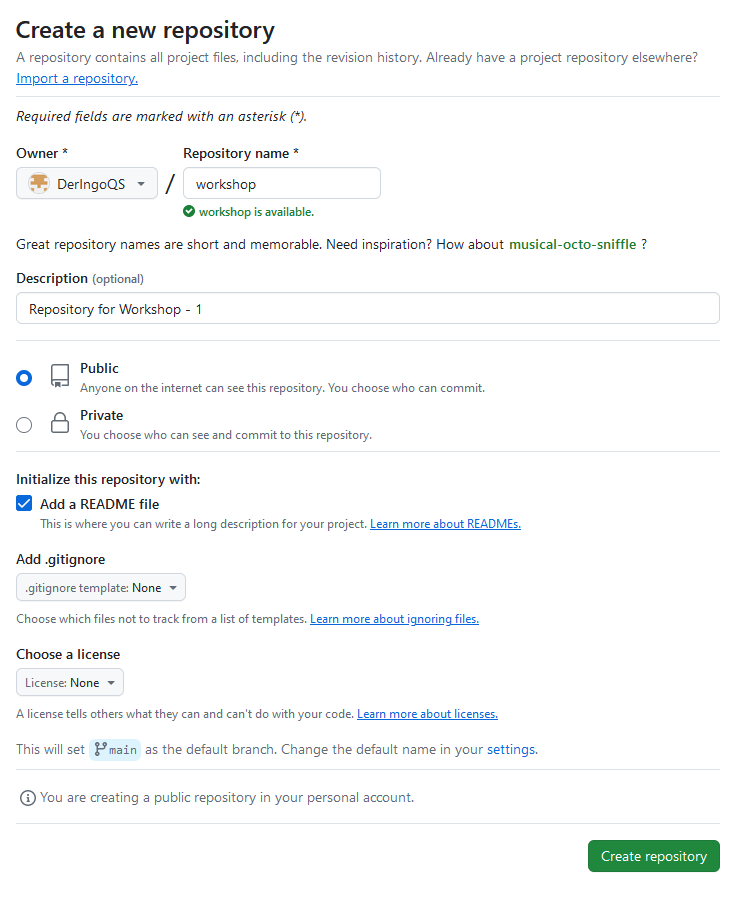
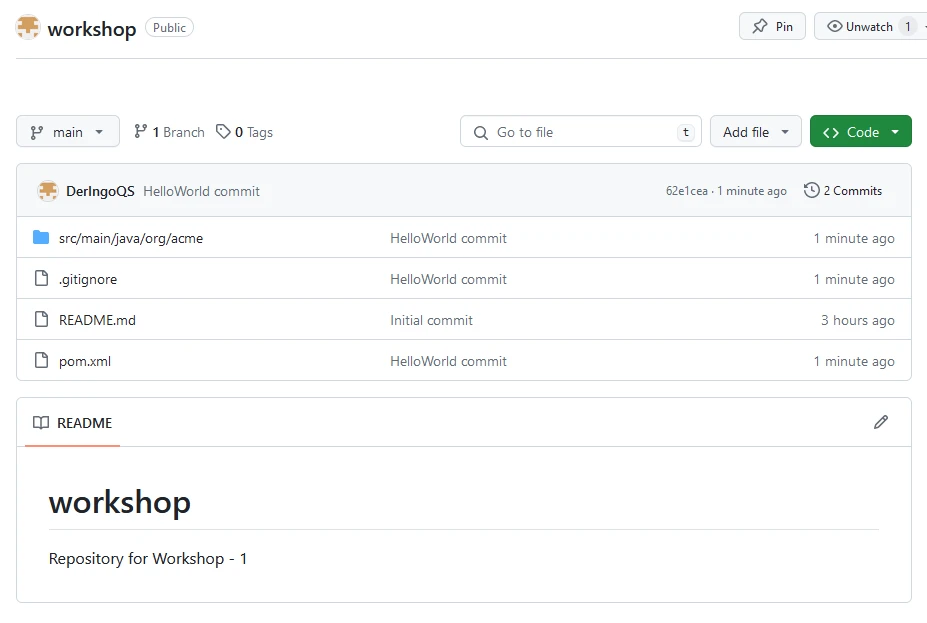
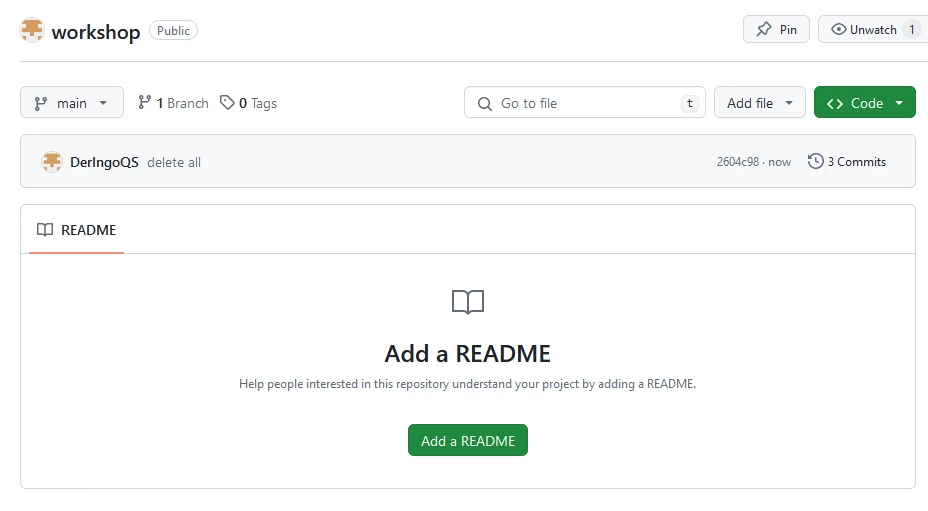
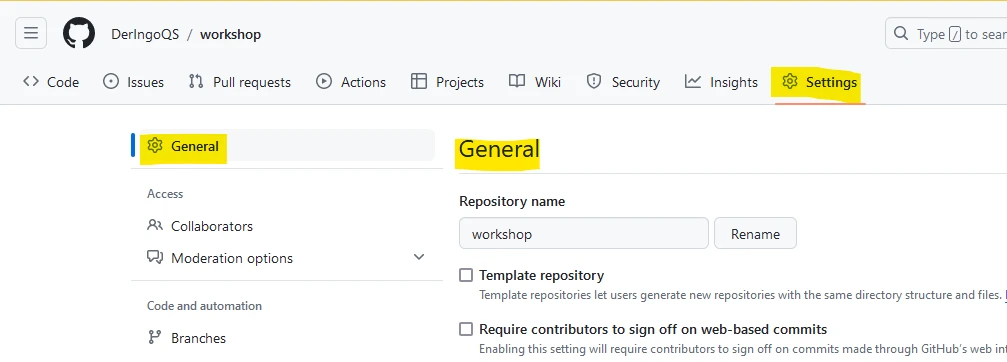
Create Repository
Create a new repository with name “workshop”. Add a README file.
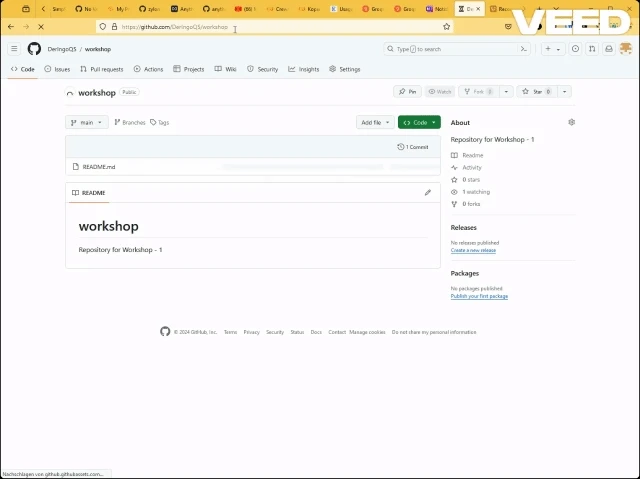
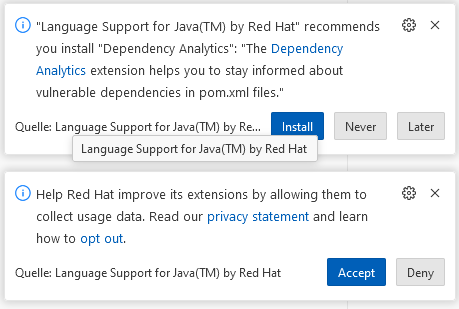
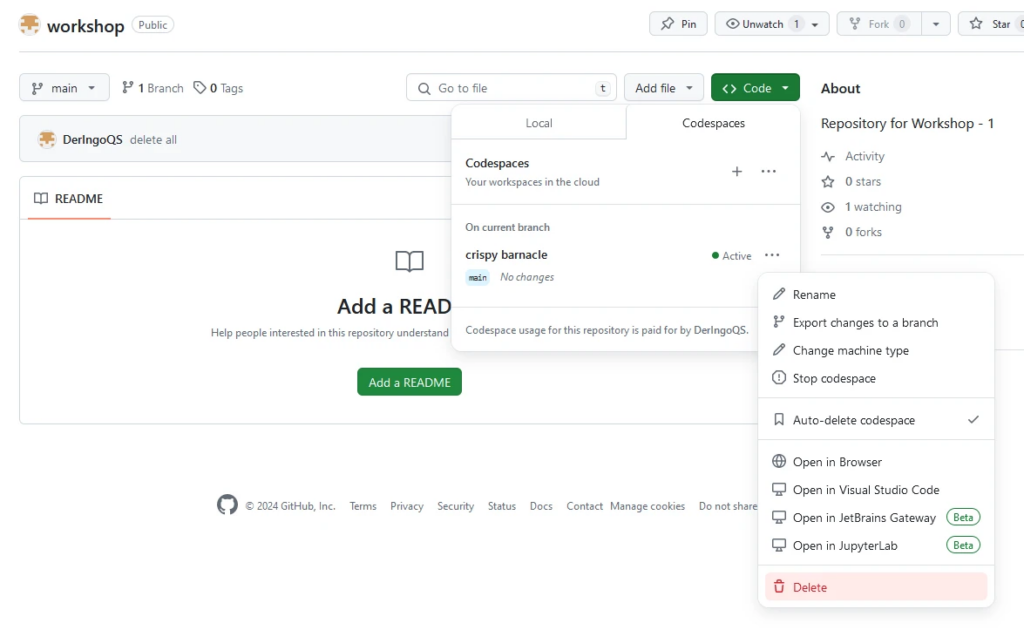
Create Codespace
TODO: funktioniert das GIF?
Change Keyboard Layout to German: In the lower right corner click on “Layout: US” and enter “German” in the upcoming window.
TODO: Ich hätte gerne die Sprache von Visual Code auf Englisch umgestellt. Wie?
Work in the Terminal
Copy & Paste
Type something into the terminal. Mark it with your mouse. One Right Click to copy into Clipboard. Another Right Click to paste from Clipboard.
Timezone
Set Timzone to Europe -> Berlin
sudo dpkg-reconfigure tzdata
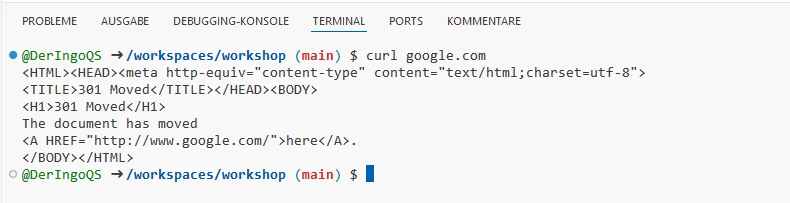
Internet
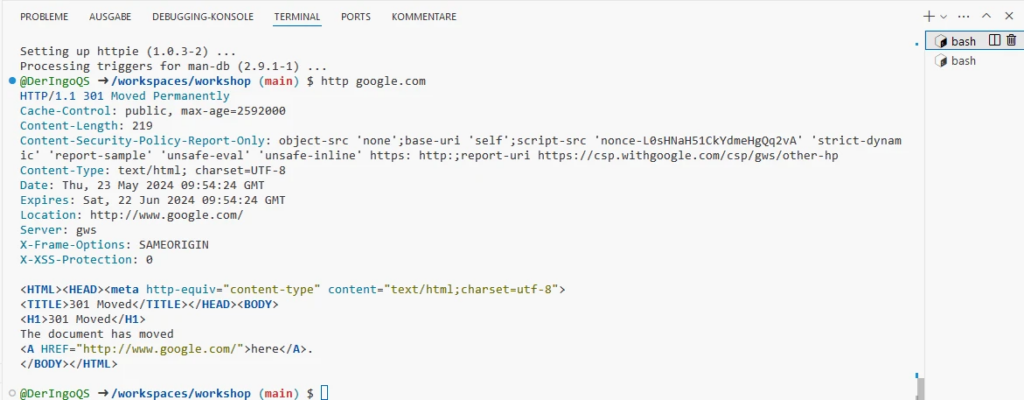
Do we have access to the Internet? Let’s try with curl:
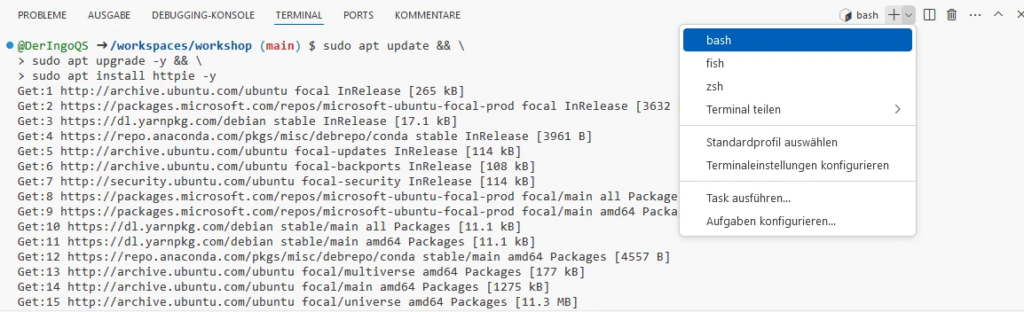
This will take a few minutes. Meanwhile we can work in another Terminal window. Later we come back and test HTTPie:
http google.com
Additional Terminal window
Open a second Terminal with bash:
VIM
ls -lisah
touch test.sh
ls -lisah
vim test.sh
chmod +x test.sh
./test.sh
name=Ingo
echo "My name is $name"
echo "But here I am: $(whoami)"
Python
Do we have Python in our Codespace? Which version(s)?
python3 --version
python --version
vim hello_world.py
python hello_world.py
# Print "Hello World" to the console
print("Hello World")
Docker
docker --version
docker-compose --version
docker run hello-world
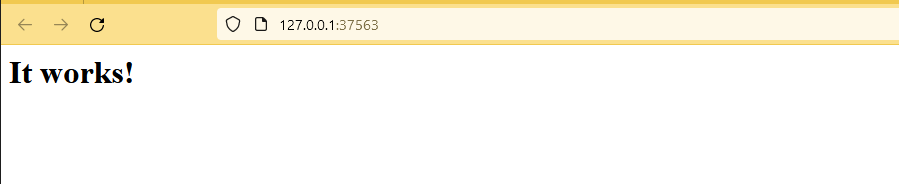
Apache HTTPD
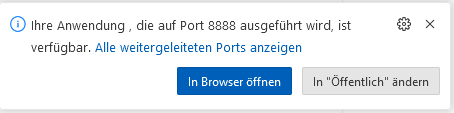
docker run -p 8888:80 httpd
Open in Browser:
Find all open Ports in the Ports-Tab:
Normally Port 8888 should be listed here. We need to add Port, just enter 8888:
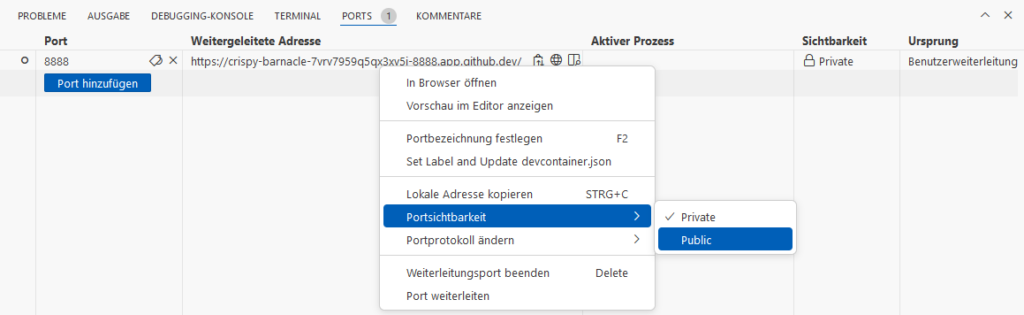
Open Website just with a click on the Globus-Icon.
When we try to open the address in another browser, we will see a GitHub-Login. When we login with another GitHub-Account, we will get a 404-error. Because the page is Private. Switch to Public:
Now we can access the page in another brower.
At the end we can shutdown HTTPD with <STRG>+<C> in Terminal window. It should automatically disapear in the Ports-Tab. If not, you can remove it manually.
Microsoft Edge - Caching problem
Open the Public page in MS Edge. Make the page Private again. Try to open in a new browser, won’t work. Reload (the Public loaded) page in MS Edge: You can still see the site! This is a cached version and we need to force MS Edge to reload from server.
Open Developer Tools (F12 or <STRG>+<SHIFT>+<I>), then you can Right Click on the reload button to have additional options:
Java
java --version
vim HelloWorld.java
javac HelloWorld.java
java HelloWorld
rm -f HelloWorld*
class HelloWorld {
  public static void main(String args[]) {
      System.out.println("Hello World");
  }
}
Run Java Source as Shell Scripts
type -a java
# java is /home/codespace/java/current/bin/java
# java is /usr/local/sdkman/candidates/java/current/bin/java

vim HelloWorld.sh
chmod +x HelloWorld.sh
./HelloWorld.sh
rm HelloWorld.sh
#!/home/codespace/java/current/bin/java --source 21

class HelloWorld {
  public static void main(String args[]) {
      System.out.println("Hello World");
  }
}
Maven
Start
We create a new pom.xml from scratch. We need a template. We will take “The Basics”-one from the Apache Maven POM Reference page.
I want to login from one Linux server to another Linux server without the need to enter a password.
Create SSH keys
# Login to server 1
ssh-keygen
Output:
Generating public/private rsa key pair.
Enter file in which to save the key (/home/'USERNAME'/.ssh/id_rsa):
Enter passphrase (empty for no passphrase):
Enter same passphrase again:
Your identification has been saved in /home/'USERNAME'/.ssh/id_rsa
Your public key has been saved in /home/'USERNAME'/.ssh/id_rsa.pub
The key fingerprint is:
SHA256:27U2nApZQLSwS1UVh2Lw4aDM/B9/gR0Uum1ppRrqjpg 'USERNAME'@server1
The key\'s randomart image is:
+---[RSA 3072]----+
|    +o+ .o       |
| + . Bo+o .      |
|  = o.*...       |
|   o + o .       |
|    + o S   .    |
|     . X * +     |
| .    * @ O      |
|E . .. B * .     |
| ..+..o o        |
+----[SHA256]-----+
The utility will prompt to select a location for the keys that will be generated. By default, the keys will be stored in the ~/.ssh directory within user’s home directory. The private key will be called id_rsa and the associated public key will be called id_rsa.pub.
Now we have a private and public key that we can use to authenticate.
Now we SHOULD connect to server2 without the need to enter a password.
Failing - But why?
Unluckily in my case I still have to enter a password. But why?
# Login to server 2
ssh server2ip
Password:

# check auth.log
less /var/log/auth.log
...
rexec line 15: Deprecated option RSAAuthentication
...

# check sshd_config
less /etc/ssh/sshd_config
...
RSAAuthentication no
...
So in my case the RSA-Authentication has been disabled. As the default is enabled by purpose, this has been done by purpose. Unfortunatly I am not the admin or manager of the server, so I can not change this settings.
Dadurch werden die Logfiles mit dem User root geschrieben und ich kann sie mit meinem User ingo nicht lesen.
Auf der Console kann ich das leicht mit einem vorangestellten sudo lösen, aber um mal eben schnell in die Logfiles rein zu schauen würde ich gerne mein graphisches Tool WinSCP verwenden
Lösung
Man kann Docker / Docker Compose mit einem User starten und mit dem würden dann vermutlich auch die Logfiles geschrieben werden. Als ich das mit einem Tomcat Image getestet hatte, ist es daran gescheitert, dass mit meinem User ingo auf bestimmte Verzeichnisse im Container nicht zugegriffen werden konnte.
Gelöst habe ich es dann so, dass ich nicht den User, oder User und Gruppe, gesetzt habe, sondern nur die Gruppe. So wird mit dem root User gearbeitet, die Dateien gehören dem User root und für die gesetzte Gruppe sind sie lesbar. Mein User muss natürlich ebenfalls in der Gruppe sein.
Gruppe anlegen:
sudo groupadd -g 1001 logfilegroup
Die Group ID ist relativ willkürlich gesetzt. Eigentlich hatte ich groupadd ohne das -g Flag aufgerufen und dann mit cat /etc/group die Group ID rausgesucht. Hier wollte ich das Statement mit explizitem setzen der Group ID hinschreiben, da ich es auch im Projekt verwendet hatte, um auf jedem Server die selbe Group ID zu haben.
User der Gruppe hinzufügen:
sudo usermod --append --groups logfilegroup ingo
Mit den Befehlen groups oder id kann man die Gruppen seines Users sehen, die neue logfilegroup wird aber erst in einer neuen Shell hinzugefügt. Also entweder die Shell schließen und neu öffnen, oder mit su ingo weiter arbeiten.
ingo$ sudo usermod --append --groups logfilegroup ingo
ingo$ groups
ingo adm
ingo$ su ingo
Password:
ingo$ groups
ingo adm logfilegroup
Docker Compose File:
Im Docker Compose File muss die Group ID gesetzt werden, mit dem Namen der Gruppe geht es nicht.
Am Wochenende habe ich zum ersten Mal einen Escape Room spielen dürfen und ich muss sagen, heute habe ich mich ähnlich gefühlt, denn das Bugfixing ähnelt auch einer kreativen rätselratenden Schnitzeljagd.
Der Bug
Die von mir entwickelte Anwendung ist mittlerweile im Pilot-Betrieb und ein Benutzer meldet, dass er einen Vorgang nicht beenden kann: Vermeindlich hochgeladene Bilder, die zwingend erforderlich sind, 'verschwinden' und so kann er nicht abschließend speichern.
Die Bilder werden dankenswerterweise mitgeliefert, so dass ich auch versuchen kann, das Problem nachzustellen.
Es gibt auch einen Hinweis, das das Ausführen einer bestimmten Funktion während des Vorgangs das Problem verursacht haben könnte. ERROR-Einträge in den Logfiles unterstützen diese These, aber letztendlich hatte es damit nichts zu tun. Es war nur eine falsche Fährte, eine Ablenkung, wie bei jedem guten Spiel 😉 Und die Erkenntnis, dass da noch irgendwo ein weiterer Bug schlummert, der von mir gejagt und entdeckt werden will.
Bug reproduzieren
Als erstes versuche ich, den Bug lokal nachstellen zu können, also auf meinem Entwickler-Laptop. Das funktioniert aber nicht, da alles fehlerfrei funktioniert, incl. Upload der beiden Bilder.
Hier wäre jetzt eine gute Gelegenheit, das Ticket mit "Works on my machine" zu schließen.
Aber ich forsche weiter und versuche, das Problem auf dem Server nachzustellen. Und hier gelingt es: Die Bilder verschwinden auf magische Art und Weise. Und ohne Einträge in den Logs.
Analyse
Der Vorgang durchläuft einen Wizard, und nachdem man die Bilder hochgeladen hat, kann man einen Schritt weiter. Wenn man dann einen Schritt zurück geht, sind die Bilder weg.
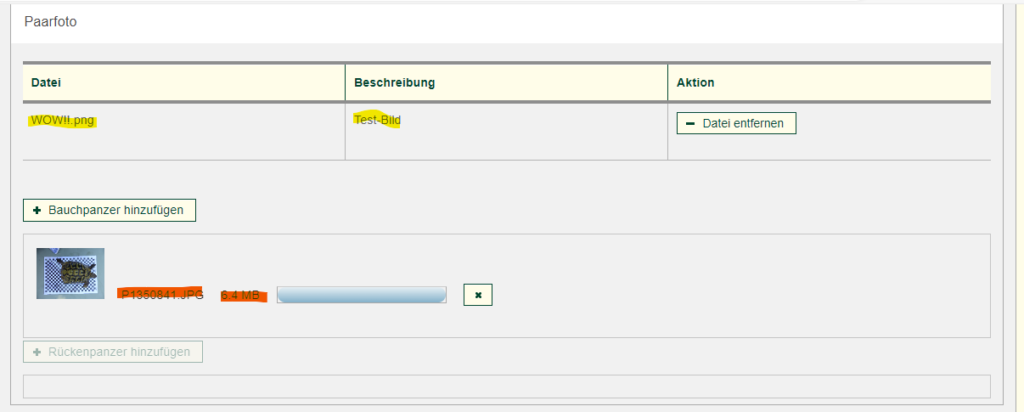
Mit meiner Testdatei (WOW!!.png) funktioniert es hingegen.
Auffällig ist, dass die andere Datei nicht korrekt in die Tabelle der Dateien übertragen wird, sondern ewig in der Upload-Ansicht verharrt. Es gibt aber keine Fehlermeldung. Die Datei ist 6,4 MB groß, erlaubt sind Dateigrößen bis 10 MB; bei größeren Dateien kommt auch ein entsprechender Hinweis. Hier scheint der Upload nie enden zu wollen, was auch ein Hinweis ist, warum sie später verschwindet: sie war nie auf dem Server.
Mein erster Verdacht war, dass vielleicht ein Virenscanner dazwischenfunkt und die Datei auf dem Server direkt wieder löscht. Alles schon mal vorgekommen. Also lade ich die beiden Bilder per FTP auf den Server, was auch funktioniert und somit gegen die Virenscannerhypothese spricht.
Also zurück in den Browser und mal schauen, was sich so in der Entwicklerkonsole tut. Und dort ist auch ein Eintrag:
Der Upload wurde abgebrochen (413 - Request Entity Too Large). Das hat das JQuery- bzw. PrimeFaces-Framework nicht richtig erkannt und keine Fehlermeldung auf der Oberfläche angezeigt. Ein Bug im Framework, dass dieser spezielle Fall nicht richtig erkannt wird. Das interessiert mich aber nicht so sehr, viel spannender ist der Fehler 413. Erlaubt sind 10 MB, die Datei sind keine 7 MB. Es müsste also eigentlich passen.
In der Anwendung sind 10 MB erlaubt, das sollte nicht das Problem sein, bliebe noch der Anwendungsserver, ein Apache Tomcat, oder der davorgeschaltete ReverseProxy, ein Apache HTTP-Server.
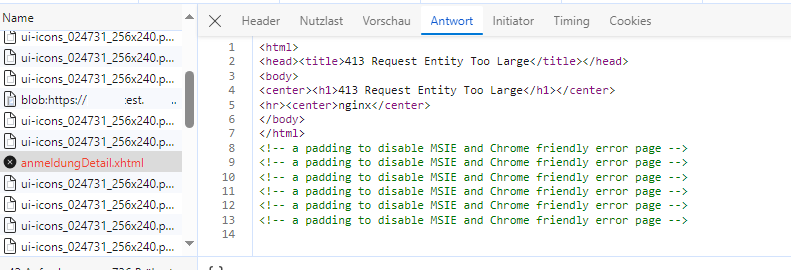
Wenn man dem Netzwerkverkehr folgt sieht man, dass folgende Antwort beim Upload-Versuch zurück kommt:
Das Indiz für die Ursache des Problems ist das unscheinbare Wort: "nginx"
Der Verdacht erhärtet sich beim weiteren Testen: Wenn ich die WOW-Testdatei in der Anwendung hochlade, erscheint das POST in den Logs des vorgelagerten Apache-ReverseProxies:
Der Versuch des Hochladens des Problembildes erzeugt keinen Log-Eintrag.
Es scheint also so zu sein, dass der Upload bereits vor meiner Anwendung abgebrochen wird.
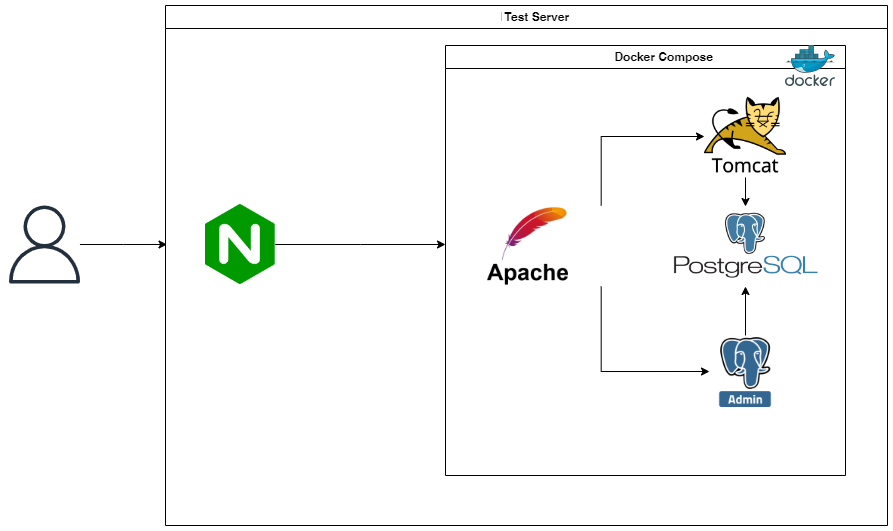
Der Server
Schauen wir mal, wie es auf dem Test Server aussieht:
Meine Anwendung starte ich über ein Docker-Compose, bestehend aus:
Apache HTTP als Reverse Proxy
Apache Tomcat
PG Admin
PostgreSQL Datenbank
Auf dem Server selbst läuft aber nicht nur meine Anwendung, sondern auch noch weitere, die uA über unterschiedliche Domainnamen erreichbar sind. Und das steuert ein Nginx-Server:
Und was finde ich, wenn ich das default File Limit für Nginx suche:
By default, Nginx has a limit of 1MB on file uploads.
Die Lösung
Wir müssen also den file upload für die Anwendung erhöhten auf 10MB, besser 15MB:
Nach der Änderung die Konfiguration prüfen, um sicher zu gehen, dass keine Fehler eingebaut wurden und beim Neustart (bzw. Reload) der ganze Nginx-Server lahm gelegt wird:
nginx -t
Erst dann den Neustart, bzw. Reload durchführen:
service nginx reload
Test
Abschließend muss natürlich noch der Test erfolgen, ob wir damit erfolgreich waren: Der Upload funktioniert jetzt! 🥳
Everyone talks about Kubernetes, therefore I thought, it might be a good idea to get some experiences with this tool and install it on my developer machine.
To run a single node cluster of Kubernetes on my machine I will install Minikube.
My developer machine is a Windows computer with Ubuntu 20.04 on WSL 2.
$ minikube start
😄  minikube v1.30.1 on Ubuntu 20.04
✨  Automatically selected the docker driver. Other choices: none, ssh
📌  Using Docker driver with root privileges
👍  Starting control plane node minikube in cluster minikube
🚜  Pulling base image ...
💾  Downloading Kubernetes v1.26.3 preload ...
    > preloaded-images-k8s-v18-v1...:  397.02 MiB / 397.02 MiB  100.00% 3.21 Mi
    > gcr.io/k8s-minikube/kicbase...:  373.53 MiB / 373.53 MiB  100.00% 2.76 Mi
🔥  Creating docker container (CPUs=2, Memory=6300MB) ...
🐳  Preparing Kubernetes v1.26.3 on Docker 23.0.2 ...
    ▪ Generating certificates and keys ...
    ▪ Booting up control plane ...
    ▪ Configuring RBAC rules ...
🔗  Configuring bridge CNI (Container Networking Interface) ...
    ▪ Using image gcr.io/k8s-minikube/storage-provisioner:v5
🔎  Verifying Kubernetes components...
🌟  Enabled addons: default-storageclass, storage-provisioner
🏄  Done! kubectl is now configured to use "minikube" cluster and "default" namespace by default
Step 6: Minikube Basic operations
To check cluster status, run:
$ kubectl cluster-info
Kubernetes control plane is running at https://127.0.0.1:32769
CoreDNS is running at https://127.0.0.1:32769/api/v1/namespaces/kube-system/services/kube-dns:dns/proxy

To further debug and diagnose cluster problems, use 'kubectl cluster-info dump'.
Note that Minikube configuration file is located under ~/.minikube/machines/minikube/config.json
Let's doublecheck that minikube is a running Docker container:
$ sudo docker container ls
CONTAINER ID   IMAGE                                 COMMAND                  CREATED          STATUS          PORTS                                                                                                                                  NAMES
e36590b3ea7e   gcr.io/k8s-minikube/kicbase:v0.0.39   "/usr/local/bin/entr…"   28 minutes ago   Up 28 minutes   127.0.0.1:32772->22/tcp, 127.0.0.1:32771->2376/tcp, 127.0.0.1:32770->5000/tcp, 127.0.0.1:32769->8443/tcp, 127.0.0.1:32768->32443/tcp   minikube
ingo:~$ minikube dashboard --port=42827 &
[6] 55787
ingo:~$ 🤔  Verifying dashboard health ...
🚀  Launching proxy ...
🤔  Verifying proxy health ...
🎉  Opening http://127.0.0.1:42827/api/v1/namespaces/kubernetes-dashboard/services/http:kubernetes-dashboard:/proxy/ in your default browser...
👉  http://127.0.0.1:42827/api/v1/namespaces/kubernetes-dashboard/services/http:kubernetes-dashboard:/proxy/
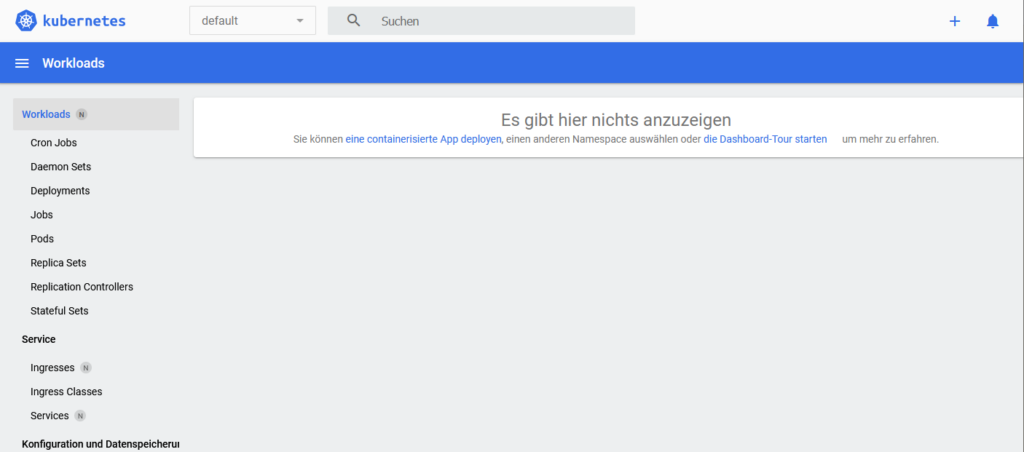
Open URL in Browser:
kubernetes dashboard
To enable a module use command:
minikube addons enable <module>
Example:
$ minikube addons enable portainer
❗  portainer is a 3rd party addon and is not maintained or verified by minikube maintainers, enable at your own risk.
❗  portainer does not currently have an associated maintainer.
    ▪ Using image docker.io/portainer/portainer-ce:2.15.1
🌟  The 'portainer' addon is enabled
But I have no clue, what to do with the enabled 'portainer' addon. 🤷♂️
Deployments are the recommended way to manage the creation and scaling of Pods.
Use the kubectl create command to create a Deployment that manages a Pod. The Pod runs a Container based on the provided Docker image.
# Run a test container image that includes a webserver
kubectl create deployment hello-node --image=registry.k8s.io/e2e-test-images/agnhost:2.39 -- /agnhost netexec --http-port=8080
2. View the Deployment:
$ kubectl get deployments
NAME         READY   UP-TO-DATE   AVAILABLE   AGE
hello-node   0/1     1            0           9s
3. View the Pod:
$ kubectl get pods
NAME                          READY   STATUS    RESTARTS   AGE
hello-node-7b87cd5f68-rj79x   1/1     Running   0          67s
4. View cluster events:
kubectl get events
5. View the kubectl configuration:
kubectl config view
Create a Service
By default, the Pod is only accessible by its internal IP address within the Kubernetes cluster. To make the hello-node Container accessible from outside the Kubernetes virtual network, you have to expose the Pod as a Kubernetes Service.
Expose the Pod to the public internet using the kubectl expose command:
The --type=LoadBalancer flag indicates that you want to expose your Service outside of the cluster.
The application code inside the test image only listens on TCP port 8080. If you used kubectl expose to expose a different port, clients could not connect to that other port.
2. View the Service you created:
$ kubectl get services
NAME         TYPE           CLUSTER-IP       EXTERNAL-IP   PORT(S)          AGE
hello-node   LoadBalancer   10.101.148.235   <pending>     8080:31331/TCP   2m52s
kubernetes   ClusterIP      10.96.0.1        <none>        443/TCP          71m
On cloud providers that support load balancers, an external IP address would be provisioned to access the Service. On minikube, the LoadBalancer type makes the Service accessible through the minikube service command.
3. Run the following command:
$ minikube service hello-node
|-----------|------------|-------------|---------------------------|
| NAMESPACE |    NAME    | TARGET PORT |            URL            |
|-----------|------------|-------------|---------------------------|
| default   | hello-node |        8080 | http://192.168.49.2:31331 |
|-----------|------------|-------------|---------------------------|
🏃  Starting tunnel for service hello-node.
|-----------|------------|-------------|------------------------|
| NAMESPACE |    NAME    | TARGET PORT |          URL           |
|-----------|------------|-------------|------------------------|
| default   | hello-node |             | http://127.0.0.1:34597 |
|-----------|------------|-------------|------------------------|
🎉  Opening service default/hello-node in default browser...
👉  http://127.0.0.1:34597
❗  Because you are using a Docker driver on linux, the terminal needs to be open to run it.
Open http://127.0.0.1:34597/ in a browser:
hello-node
4. View Pods and Services created in 'default' namespace:
$ kubectl get pod,svc -n default
NAME                              READY   STATUS    RESTARTS   AGE
pod/hello-node-7b87cd5f68-rj79x   1/1     Running   0          12m

NAME                 TYPE           CLUSTER-IP       EXTERNAL-IP   PORT(S)          AGE
service/hello-node   LoadBalancer   10.101.148.235   <pending>     8080:31331/TCP   8m54s
service/kubernetes   ClusterIP      10.96.0.1        <none>        443/TCP          77m
5. Cleanup
$ kubectl delete service hello-node
service "hello-node" deleted
$ kubectl delete deployment hello-node
deployment.apps "hello-node" deleted
kubectl apply -f deployment.yaml
kubectl get deployment
kubectl get service
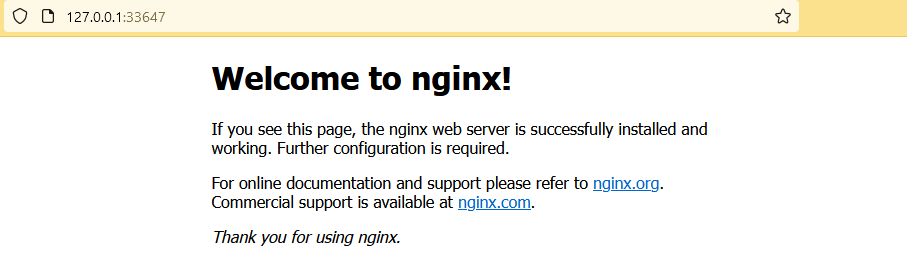
Start Service:
minikube service nginx-service &
Check in Terminal:
$ http http://127.0.0.1:45137
HTTP/1.1 200 OK
Accept-Ranges: bytes
Connection: keep-alive
Content-Length: 615
Content-Type: text/html
Date: Thu, 29 Jun 2023 14:57:23 GMT
ETag: "6488865a-267"
Last-Modified: Tue, 13 Jun 2023 15:08:10 GMT
Server: nginx/1.25.1

<!DOCTYPE html>
<html>
<head>
<title>Welcome to nginx!</title>
<style>
html { color-scheme: light dark; }
body { width: 35em; margin: 0 auto;
font-family: Tahoma, Verdana, Arial, sans-serif; }
</style>
</head>
<body>
<h1>Welcome to nginx!</h1>
<p>If you see this page, the nginx web server is successfully installed and
working. Further configuration is required.</p>

<p>For online documentation and support please refer to
<a href="http://nginx.org/">nginx.org</a>.<br/>
Commercial support is available at
<a href="http://nginx.com/">nginx.com</a>.</p>

<p><em>Thank you for using nginx.</em></p>
</body>
</html>
<!DOCTYPE html>
<html>
<head>
<title>Page Title</title>
</head>
<body>
<h1>This is a Heading</h1>
<p style="color: green;">This is a paragraph.</p>
<p>Lorem ipsum dolor sit amet, consetetur sadipscing elitr, sed diam nonumy eirmod tempor invidunt ut labore et dolore magna aliquyam erat, sed diam voluptua. At vero eos et accusam et justo duo dolores et ea rebum. Stet clita kasd gubergren, no sea takimata sanctus est Lorem ipsum dolor sit amet. Lorem ipsum dolor sit amet, consetetur sadipscing elitr, sed diam nonumy eirmod tempor invidunt ut labore et dolore magna aliquyam erat, sed diam voluptua. At vero eos et accusam et justo duo dolores et ea rebum. Stet clita kasd gubergren, no sea takimata sanctus est Lorem ipsum dolor sit amet.</p>
</body>
</html>
Dockerfile for an nginx webserver to deliver this website:
FROM nginx

COPY index.html /usr/share/nginx/html

EXPOSE 80
Build, run and test image:
docker build -t myweb-image .
docker run -it -p 80:80 --name myweb-container myweb-image


$ http http://localhost
HTTP/1.1 200 OK
Accept-Ranges: bytes
Connection: keep-alive
Content-Length: 763
Content-Type: text/html
Date: Thu, 29 Jun 2023 15:57:54 GMT
ETag: "649da8a5-2fb"
Last-Modified: Thu, 29 Jun 2023 15:52:05 GMT
Server: nginx/1.25.1

<!DOCTYPE html>
<html>
<head>
<title>Page Title</title>
</head>
<body>
<h1>This is a Heading</h1>
<p style="color: green;">This is a paragraph.</p>
<p>Lorem ipsum dolor sit amet, consetetur sadipscing elitr, sed diam nonumy eirmod tempor invidunt ut labore et dolore magna aliquyam erat, sed diam voluptua. At vero eos et accusam et justo duo dolores et ea rebum. Stet clita kasd gubergren, no sea takimata sanctus est Lorem ipsum dolor sit amet. Lorem ipsum dolor sit amet, consetetur sadipscing elitr, sed diam nonumy eirmod tempor invidunt ut labore et dolore magna aliquyam erat, sed diam voluptua. At vero eos et accusam et justo duo dolores et ea rebum. Stet clita kasd gubergren, no sea takimata sanctus est Lorem ipsum dolor sit amet.</p>
</body>
</html>
kubectl apply -f myweb.yaml
kubectl get deployment
kubectl get service
Start Service:
minikube service myweb-service &
Check in Terminal:
$ http http://127.0.0.1:38915
HTTP/1.1 200 OK
Accept-Ranges: bytes
Connection: keep-alive
Content-Length: 763
Content-Type: text/html
Date: Thu, 29 Jun 2023 16:19:18 GMT
ETag: "649da8a5-2fb"
Last-Modified: Thu, 29 Jun 2023 15:52:05 GMT
Server: nginx/1.25.1

<!DOCTYPE html>
<html>
<head>
<title>Page Title</title>
</head>
<body>
<h1>This is a Heading</h1>
<p style="color: green;">This is a paragraph.</p>
<p>Lorem ipsum dolor sit amet, consetetur sadipscing elitr, sed diam nonumy eirmod tempor invidunt ut labore et dolore magna aliquyam erat, sed diam voluptua. At vero eos et accusam et justo duo dolores et ea rebum. Stet clita kasd gubergren, no sea takimata sanctus est Lorem ipsum dolor sit amet. Lorem ipsum dolor sit amet, consetetur sadipscing elitr, sed diam nonumy eirmod tempor invidunt ut labore et dolore magna aliquyam erat, sed diam voluptua. At vero eos et accusam et justo duo dolores et ea rebum. Stet clita kasd gubergren, no sea takimata sanctus est Lorem ipsum dolor sit amet.</p>
</body>
</html>
Cleanup:
$ kubectl delete -f myweb.yaml
Work in a pod
Start some pods & service and display them:
kubectl apply -f myweb.yaml
kubectl get all -o wide
Output:
NAME                                    READY   STATUS    RESTARTS   AGE     IP            NODE       NOMINATED NODE   READINESS GATES
pod/myweb-deployment-565b64686c-2nnrl   1/1     Running   0          3m42s   10.244.0.39   minikube   <none>           <none>
pod/myweb-deployment-565b64686c-m4p4c   1/1     Running   0          3m42s   10.244.0.41   minikube   <none>           <none>
pod/myweb-deployment-565b64686c-sx6sx   1/1     Running   0          3m42s   10.244.0.40   minikube   <none>           <none>

NAME                    TYPE        CLUSTER-IP      EXTERNAL-IP   PORT(S)        AGE     SELECTOR
service/kubernetes      ClusterIP   10.96.0.1       <none>        443/TCP        23h     <none>
service/myweb-service   NodePort    10.97.251.106   <none>        80:32715/TCP   3m42s   app=myweb-app

NAME                               READY   UP-TO-DATE   AVAILABLE   AGE     CONTAINERS        IMAGES            SELECTOR
deployment.apps/myweb-deployment   3/3     3            3           3m42s   myweb-container   myweb-image:1.0   app=myweb-app

NAME                                          DESIRED   CURRENT   READY   AGE     CONTAINERS        IMAGES            SELECTOR
replicaset.apps/myweb-deployment-565b64686c   3         3         3       3m42s   myweb-container   myweb-image:1.0   app=myweb-app,pod-template-hash=565b64686c
i
apt update
apt install httpie inetutils-ping -y

# Connect to another Pod via IP
http 10.244.0.39
# Connect to Service via IP
http 10.97.251.106
# Connect to Service via Service Name
http myweb-service

# Check IP of Service
ping myweb-service
## OUTPUT:
# PING myweb-service.default.svc.cluster.local (10.97.251.106): 56 data bytes

exit
Cleanup:
$ kubectl delete -f myweb.yaml
Environment Variable
Sample how to set an environment variable via deployment file:
Add env section to deployment file:
[...]
    spec:
      containers:
      - name: myweb-container
        image: myweb-image:1.0
        ports:
        - containerPort: 80
        env:
        - name: MY_ENV_1
          value: My Value No 1
        - name: MY_ENV_2
          value: My Value No 2
---
[...]
Start Pods, jump into Pod and check values:
kubectl apply -f myweb.yaml
kubectl get all -o wide

kubectl exec -it myweb-deployment-864984686b-5p7dn -- /bin/bash

## Inside Pod:
echo $MY_ENV_1
# Output: My Value No 1
echo $MY_ENV_2
# Output: My Value No 2
exit

# Cleanup:
kubectl delete -f myweb.yaml
We have a very, very old application that needs to be migrated into AWS. So we copied all files into AWS EC2 instance and tried to start the application. After fixing a lot of minor problems we faced a tough challenge with a SAPJCO RFC Call.
The Exception message was something like this:
Exception in thread "main" java.lang.ExceptionInInitializerError: JCO.classInitialize(): Could not load middleware layer 'com.sap.mw.jco.rfc.MiddlewareRFC'
JCO.nativeInit(): Could not initialize dynamic link library sapjcorfc [sapjcorfc (Not found in java.library.path)]. java.library.path [/usr/lib/jvm/java-1.6.0-ibm.x86_64/jre/lib/amd64/default:/usr/lib/jvm/java-1.6.0-ibm.x86_64/jre/lib/amd64:/usr/lib]
        at com.sap.mw.jco.JCO.<clinit>(JCO.java:871)
        at java.lang.J9VMInternals.initializeImpl(Native Method)
        at java.lang.J9VMInternals.initialize(J9VMInternals.java:199)
I guess, with a JCO Version 3 we would not have much trouble, but in this ancient application JCO Version 2 is used and we cannot update to Version 3 without a huge efford. In other projects I had the luck that I could migrate to Version.
The application is running on a Linux system. But belive me: it would have been much harder on a Windows machine.
Analysis
To find the cause of the problem I wrote the simpliest JCO Test Programm I can image:
import com.sap.mw.jco.JCO;

public class TestMain {

    public static void main(String[] args) {
        System.out.println(JCO.getVersion());
    }

}
Exception in thread "main" java.lang.ExceptionInInitializerError: JCO.classInitialize(): Could not load middleware layer 'com.sap.mw.jco.rfc.MiddlewareRFC'
JCO.nativeInit(): Could not initialize dynamic link library sapjcorfc [/app/JCo/libsapjcorfc.so: librfccm.so: cannot open shared object file: No such file or directory]. java.library.path [/app/JCo]
        at com.sap.mw.jco.JCO.<clinit>(JCO.java:871)
        at TestMain.main(TestMain.java:11)
Need to set an environment property first:
export LD_LIBRARY_PATH=/app/JCo
Run command line to start programm again and got another error:
Exception in thread "main" java.lang.ExceptionInInitializerError: JCO.classInitialize(): Could not load middleware layer 'com.sap.mw.jco.rfc.MiddlewareRFC'
JCO.nativeInit(): Could not initialize dynamic link library sapjcorfc [/app/JCo/libsapjcorfc.so: libstdc++.so.5: cannot open shared object file: No such file or directory]. java.library.path [/app/JCo]
        at com.sap.mw.jco.JCO.<clinit>(JCO.java:871)
        at TestMain.main(TestMain.java:11)
The interesting part of the error message:
Could not initialize dynamic link library sapjcorfc [/app/JCo/libsapjcorfc.so: libstdc++.so.5
Solution
We need the libstdc++.so.5 library, but installed is libstdc++.so.6
To get libstdc++.so.5 we installed package compat-libstdc++-33-3.2.3-66.x86_64:
yum install compat-libstdc++-33-3.2.3-66.x86_64

## to be honest, I am not exactly 100% sure, what I did in my investigations, so the command may be a little differend, ex:
# yum install compat-libstdc++-33-3
# yum install compat-libstdc++-33
# yum install compat-libstdc++-33 libstdc++.so.5
Test
Run from command line:
java -cp ".:/app/JCo/sapjco.jar" TestMain
That gave me no error, but SAPJCo Version number.:
libstdc++.so.5 is a very old version of the standard c++ library.
Some Analysis Details
Writing this article is giving me the feeling, that this was all super easy. But in reality it was a real pain in the allerwertesten.
To isolate the source of the problem, I did not only write the small Java (JCO.getVersion) application, I also set up a Docker environment.
One challenge was to find a useful Docker image to start from. I started with an OpenJDK Image that was already deprecated. Deprecated was not the problem, but I could not install libstdc++.so.5.
Next I tried to use the newer, undeprecated Eclipse-Temurin Image. But still could not install libstdc++.so.5
So I finally ended in a Debian Image and self installed Java where I was able to install libstdc++5.
But there is one problem: You can only interact with a running container. But the TestMain-Programm is executed and immediately closed.
So I wrote another Test Programm, that keeps running, so I can enter the running container and test stuff (install packages, compile Java programm, etc.):
import java.io.BufferedReader;
import java.io.InputStreamReader;

import com.sap.mw.jco.JCO;

public class TestMain {

    public static void main(String[] args) {
        System.out.println("Hello World");
        //System.out.println("JCO Version: " + JCO.getVersion());

        while (true) {
            BufferedReader br = new BufferedReader(new InputStreamReader(System.in));
            System.out.println("Enter Input : ");
            try {
                String s = br.readLine();
                System.out.println(s);
            }catch(Exception e) {
                System.out.println(e);
            }
        }

    }

}
Version 2 aus dem Beispiel Reverse Proxy mit OneLogin soll zu Testzwecken in der Cloud zum Laufen gebracht werden.
Bei dem PoC handelt es sich um einen Apache HTTP-Server mit simpler Public Page und OneLogin Authentifizierung für den Zugriff auf die Private Page: der ShowHeaders Anwendung in einem Apache Tomcat-Server. Beide Server laufen in Docker Containern, die über Docker Compose gestartet werden.
Cloud Server einrichten
Auf dem Server muss Docker etc. eingerichtet werden:
sudo su

yum install docker -y
systemctl umask docker
systemctl start docker
docker version

curl -L https://github.com/docker/compose/releases/download/v2.2.3/docker-compose-`uname -s`-`uname -m` -o /usr/bin/docker-compose
chmod +x /usr/bin/docker-compose
docker-compose --version
# # Output:
# Docker Compose version v2.2.3

yum install git -y
mkdir /app
cd /app
git clone https://github.com/DerIngo/DockerOneLoginApacheSample.git

vim /app/DockerOneLoginApacheSample/version2/reverseproxy/conf/reverseproxy.conf
Fehler
Auf dem lokalen Entwicklerlaptop läuft der PoC und entsprechend soll er auch in der Cloud gestartet werden:
sudo su
cd /app/DockerOneLoginApacheSample/version2
docker-compose up
Zuerst sieht alles wie gewohnt aus, bis Maven ShowHeaders bauen soll:
root@showheaders:/usr/local/tomcat/ShowHeaders# mvn package
[INFO] Scanning for projects...
[INFO]
[INFO] ------------------------< deringo:ShowHeaders >-------------------------
[INFO] Building ShowHeaders 0.0.1-SNAPSHOT
[INFO] --------------------------------[ war ]---------------------------------
Downloading from central: https://repo.maven.apache.org/maven2/org/apache/tomcat/tomcat-catalina/8.5.53/tomcat-catalina-8.5.53.pom
[INFO] ------------------------------------------------------------------------
[INFO] BUILD FAILURE
[INFO] ------------------------------------------------------------------------
[INFO] Total time:  0.956 s
[INFO] Finished at: 2022-06-07T12:28:46Z
[INFO] ------------------------------------------------------------------------
[ERROR] Failed to execute goal on project ShowHeaders: Could not resolve dependencies for project deringo:ShowHeaders:war:0.0.1-SNAPSHOT: Failed to collect dependencies at org.apache.tomcat:tomcat-catalina:jar:8.5.53: Failed to read artifact descriptor for org.apache.tomcat:tomcat-catalina:jar:8.5.53: Could not transfer artifact org.apache.tomcat:tomcat-catalina:pom:8.5.53 from/to central (https://repo.maven.apache.org/maven2): Transfer failed for https://repo.maven.apache.org/maven2/org/apache/tomcat/tomcat-catalina/8.5.53/tomcat-catalina-8.5.53.pom: PKIX path building failed: sun.security.provider.certpath.SunCertPathBuilderException: unable to find valid certification path to requested target -> [Help 1]
[ERROR]
[ERROR] To see the full stack trace of the errors, re-run Maven with the -e switch.
[ERROR] Re-run Maven using the -X switch to enable full debug logging.
[ERROR]
[ERROR] For more information about the errors and possible solutions, please read the following articles:
[ERROR] [Help 1] http://cwiki.apache.org/confluence/display/MAVEN/DependencyResolutionException
Es kann eine Dependency nicht aufgelöst werden und im Text findet sich dieser Satz: "PKIX path building failed". Also irgendwas mit Zertifikaten, wie mir die Erfahrung sagt.
Nach einer Recherche ist klar: In dem Cloud Setup wird der ausgehende Traffic durch einen Proxy geleitet und dessen Zertifikate sind nicht in den Standard-Zertifikaten enthalten.
Simple Lösung: Validierung aushebeln
Die schnellste Lösung: Einfach auf jedwede Validierung verzichten.
In dem Dockerfile von ShowHeaders wird der Maven Aufruf um obige Parameter ergänzt:
WORKDIR ShowHeaders
# aus
    RUN mvn package
# wird
    RUN mvn package -Dmaven.wagon.http.ssl.insecure=true -Dmaven.wagon.http.ssl.allowall=true -Dmaven.wagon.http.ssl.ignore.validity.dates=true
und schon kann das Image wieder erfolgreich gebaut werden.
Der gleiche Fehler
Die Images werden gebaut, die Container starten und die Public Page wird korrekt angezeigt auf http://localhost:80/public
Aber: die Private Page auf http://localhost:80/private wird nicht angezeigt, bzw. wird nicht mal das OneLogin Login angezeigt.
Das Problem findet sich in der OpenID Konfiguration für OneLogin:
Das funktioniert prinzipiell, dauert aber sehr lange. Außerdem wird in einem ausführlichen Kommentar darauf hingewiesen, dass die Intermediate Certificates so nicht gezogen würden.
Eine ausführliche Anleitung findet sich auf Baeldung, deren Ansatz ist wesentlich schneller (von mir nicht auf Intermediate C. getestet):
Leider kann momentan nur auf der Konsole getestet werden:
curl localhost/private/
Aber der Docker Output sieht nicht gut aus: "SSL certificate problem: unable to get local issuer certificate":
version2-reverseproxy-1  | [Tue Jun 07 13:48:25.115383 2022] [auth_openidc:error] [pid 9:tid 140428228966144] [client 172.21.0.1:57644] oidc_util_http_call: curl_easy_perform() failed on: https://deringo-dev.onelogin.com/oidc/2/.well-known/openid-configuration (SSL certificate problem: unable to get local issuer certificate)
version2-reverseproxy-1  | [Tue Jun 07 13:48:25.115513 2022] [auth_openidc:error] [pid 9:tid 140428228966144] [client 172.21.0.1:57644] oidc_provider_static_config: could not retrieve metadata from url: https://deringo-dev.onelogin.com/oidc/2/.well-known/openid-configurationversion2-reverseproxy-1  | 172.21.0.1 - - [07/Jun/2022:13:48:25 +0000] "GET /private/ HTTP/1.1" 500 531
version2-reverseproxy-1  | 172.21.0.1 - - [07/Jun/2022:13:48:27 +0000] "GET /private/ HTTP/1.1" 302 478
Allerdings, nach einem Neustart sieht es doch gut aus in der Konsole:
curl localhost/private/
<!DOCTYPE HTML PUBLIC "-//IETF//DTD HTML 2.0//EN">
<html><head>
<title>302 Found</title>
</head><body>
<h1>Found</h1><p>The document has moved <a href="https://deringo-dev.onelogin.com/oidc/2/auth?response_type=code&scope=openid&client_id=781a5c80-a77f-013a-c94a-020f214c554637671&state=4RRlolG4XrN45Q3yCOc15Hf_6Ns&redirect_uri=http%3A%2F%2Flocalhost%2Fprivate%2Fredirect_uri&nonce=B-PSe0ZSm6ZIoHebvpVtNQnv_JHqQLeSMpkI5tuoEi0">here</a>.</p>
</body></html>
Anschließend wieder gestoppt, Reverse Proxy Image neu bauen lassen, Container wieder gestartet: Beim ersten curl kommt der "SSL certificate problem: unable to get local issuer certificate"-Fehler, bei weiteren curls der "The document has moved"-Hinweis.
Schauen wir mal, wie das im Container aussieht:
Vorbereitung:
# frisch starten:
docker-compose down -v
docker-compose build reverseproxy
docker-compose up
# vor dem ersten Aufruf: Ab in den Container:
docker exec -it version2-reverseproxy-1 bash
Im Container:
# Im Container:
apt install curl

# 1. Aufruf
curl https://deringo-dev.onelogin.com/oidc/2/.well-known/openid-configuration
curl: (60) SSL certificate problem: unable to get local issuer certificate
More details here: https://curl.se/docs/sslcerts.html

curl failed to verify the legitimacy of the server and therefore could not
establish a secure connection to it. To learn more about this situation and
how to fix it, please visit the web page mentioned above.

# 2. Aufruf
curl https://deringo-dev.onelogin.com/oidc/2/.well-known/openid-configuration
curl: (60) SSL certificate problem: unable to get local issuer certificate
More details here: https://curl.se/docs/sslcerts.html

curl failed to verify the legitimacy of the server and therefore could not
establish a secure connection to it. To learn more about this situation and
how to fix it, please visit the web page mentioned above.

# 3. Aufruf
curl https://deringo-dev.onelogin.com/oidc/2/.well-known/openid-configuration
{"acr_values_supported":["onelogin:nist:level:1:re-auth"],"authorization_endpoint":"https://deringo-dev.onelogin.com/oidc/2/auth","claims_parameter_suppor[...]
Ich habe es noch ein paar mal ausprobiert, ungefähr jedes zweite bis dritte Mal hat es funktioniert.
Offensichtlich ist da noch ein LoadBalancer zwischen. 🤦♂️🤦♂️🤦♂️
Mehrmaliges pingen gab zwei verschiedene IPs zurück.
apt install nmap

nmap deringo-dev.onelogin.com
Starting Nmap 7.80 ( https://nmap.org ) at 2022-06-07 14:18 UTC
Nmap scan report for deringo-dev.onelogin.com (52.29.255.229)
Host is up (0.0052s latency).
Other addresses for deringo-dev.onelogin.com (not scanned): 52.29.255.230
rDNS record for 52.29.255.229: ec2-52-29-255-229.eu-central-1.compute.amazonaws.com
Not shown: 994 filtered ports
PORT     STATE SERVICE
21/tcp   open  ftp
53/tcp   open  domain
80/tcp   open  http
443/tcp  open  https
554/tcp  open  rtsp
1723/tcp open  pptp
Aha! Es gibt zwei IPs zu dem Domainnamen und anscheinend ist OneLogin in den AWS.
Nochmal ein anderer Test; Wie ist das denn, wenn ich nicht im Container, sondern direkt vom Host curle:
Jeder Aufruf funktioniert, diesmal sieht es wirklich gut aus.
Umsetzung
Das Dockerfile des Reverse Proxies:
FROM httpd:2.4
RUN apt update && apt install -y \
        libapache2-mod-auth-openidc \
        ca-certificates
COPY /etc/pki/ca-trust/source/anchors/ZscalerCloudChain.crt /usr/local/share/ca-certificates/ZscalerCloudChain.crt
RUN update-ca-certificates
RUN cp /usr/lib/apache2/modules/mod_auth_openidc.so /usr/local/apache2/modules/
RUN mv conf/httpd.conf conf/container_httpd.conf
CMD ["httpd-foreground"]
Anschließend das Image neu bauen:
docker-compose build reverseproxy
Ich fasse es nicht:
Step 3/6 : COPY /etc/pki/ca-trust/source/anchors/ZscalerCloudChain.crt /usr/local/share/ca-certificates/ZscalerCloudChain.crt
1 error occurred:
        * Status: COPY failed: file not found in build context or excluded by .dockerignore: stat etc/pki/ca-trust/source/anchors/ZscalerCloudChain.crt: filedoes not exist, Code: 1
FROM httpd:2.4
RUN apt update && apt install -y \
        libapache2-mod-auth-openidc \
        ca-certificates
COPY ./ZscalerCloudChain.crt /usr/local/share/ca-certificates/ZscalerCloudChain.crt
RUN update-ca-certificates
RUN cp /usr/lib/apache2/modules/mod_auth_openidc.so /usr/local/apache2/modules/
RUN mv conf/httpd.conf conf/container_httpd.conf
CMD ["httpd-foreground"]
cp /etc/pki/ca-trust/source/anchors/ZscalerCloudChain.crt /app/DockerOneLoginApacheSample/version2/reverseproxy/ZscalerCloudChain.crt
docker-compose build reverseproxy
docker-compose up
Test
curl localhost/private/
Keine Fehler im Log! 🎉
Test im Browser mit Login
Steht noch aus, aktuell ist der Server nur über Console zu erreichen.
UPDATE: Inzwischen wurde der Zugriff per Browser auf den Server freigeschaltet (bzw. eine fehlerhafte Netzwerkkonfiguration gefixt) und die Public Seiten sind zugänglich.
Bei Aufruf der Private Seiten kommt allerdings eine Fehlermeldung: