In my projects I use Maven as dependency managment system.
In the past I updated versions of libraries manually in pom.xml. But as projects grow, this becomes more and more annoying and time consuming. So I decided to give it a try to do this automatically.
I could not update the version of the plugins when the version information is hardcoded in the plugin section. So I used properties for the plugin versions.
We can not just delete the workshop folder, because GIT information are inside this folder.
Workaround:
cd /workspaces/workshop/

mvn io.quarkus.platform:quarkus-maven-plugin:3.10.2:create \
    -DprojectGroupId=org.acme \
    -DprojectArtifactId=workshop

mv workshop/* .
ls -lisah workshop/
# hidden files/directory still there
mv workshop/.* .
ls -lisah workshop/
# now everthing has moved
rmdir workshop
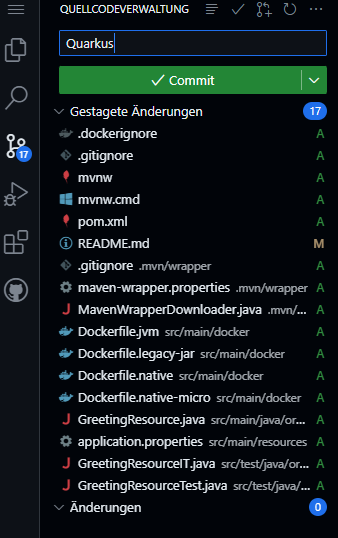
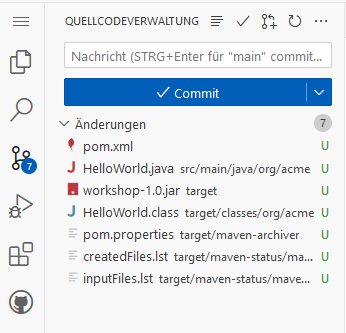
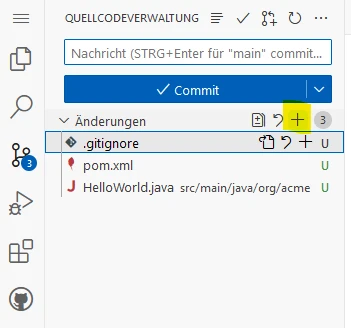
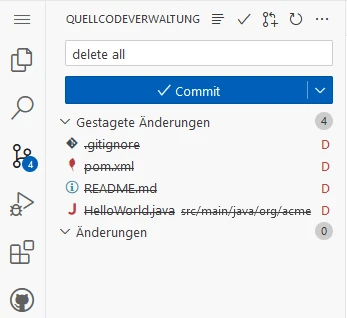
Stage, commit and push to repository:
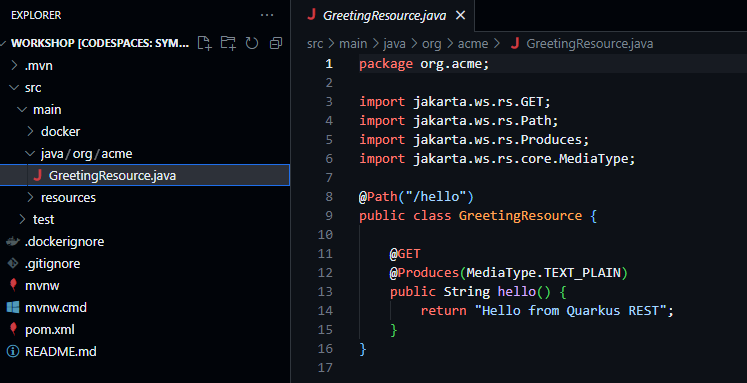
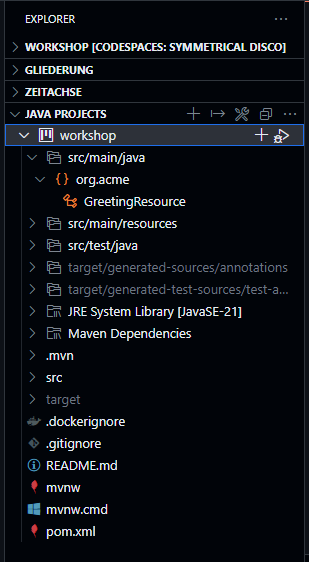
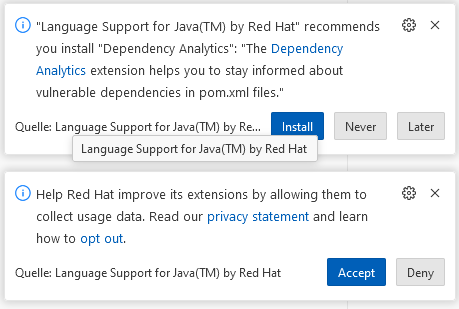
Open GreetingResource, this will force Visual Code to ask to install Extension Pack for Java:
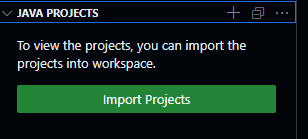
Go to Explorer → Java Projects → Import Projects
It takes a minute or two to show our workshop project:
Start Quarkus
./mvnw quarkus:dev
In Ports Port 5005 is automatically added, but not Port 8080.
We need to add Port 8080 manually.
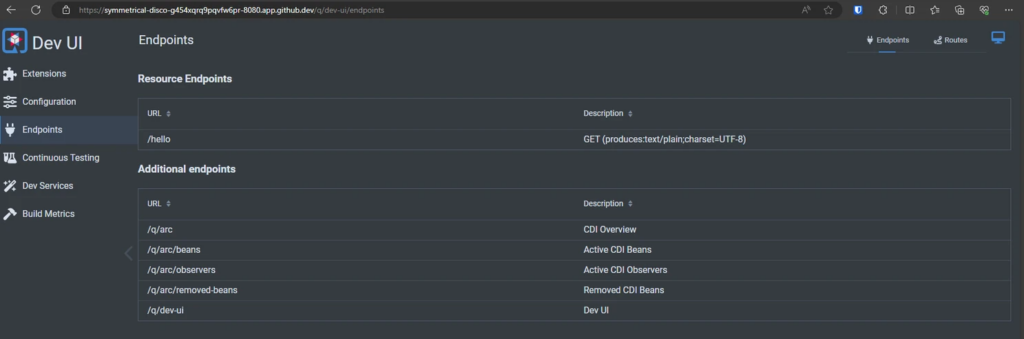
Click on the Globus Icon and Quarkus welcome page opens:
# Ich muss vermutlich nur den zweiten Befehl ausführen?
# ./mvnw install -Dnative
./mvnw package -Dnative -Dquarkus.native.container-build=true -Dquarkus.container-image.build=true
Open another terminal and see how much codespace machine is sweating:
htop
Run:
target/workshop-1.0.0-SNAPSHOT-runner
The project generation has provided a Dockerfile.native-micro in the src/main/docker directory.
# build
docker build -f src/main/docker/Dockerfile.native-micro -t deringo/workshop .

# run
docker run -i --rm -p 8080:8080 deringo/workshop
I was on JCON 2024 and beside other interesting talks I heard one talk about cloud-based IDEs, and I wanted to try out, if GitHub Codespaces could work for me.
Explore the evolving landscape of cloud-based integrated development environments (IDEs), focusing on Gitpod, GitHub codespaces and Devpod. Compare and contrast these cloud IDEs with traditional counterparts, emphasizing the role of container technology, specifically the devcontainer specification. The discussion includes advances, existing limitations, and the potential for developing polyglot, container-based distributed applications. A live demo illustrates the rapid setup and coding process across various languages and frameworks, showcasing testing capabilities and seamless deployment to Kubernetes. Discover how custom additions enhance flexibility. Additionally, uncover the impact of cloud IDEs on teaching and team projects, ensuring consistent development setups for enhanced efficiency and streamlined processes.
[EN] Codespaces, Gitpod, Devpod ... what cloud and container-based IDEs can do for you by Matthias Haeussler (Novatec Consulting GmbH)
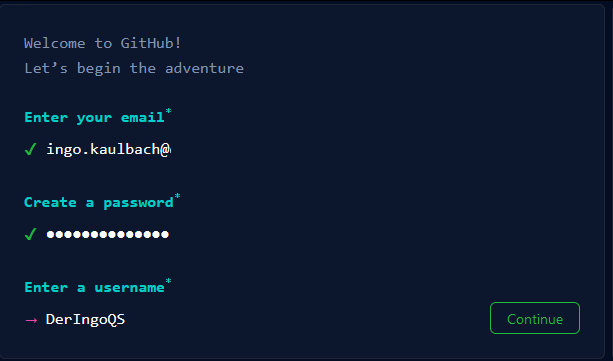
Create GitHub Account
Go to GitHub and create an account. Free plan is suitable.
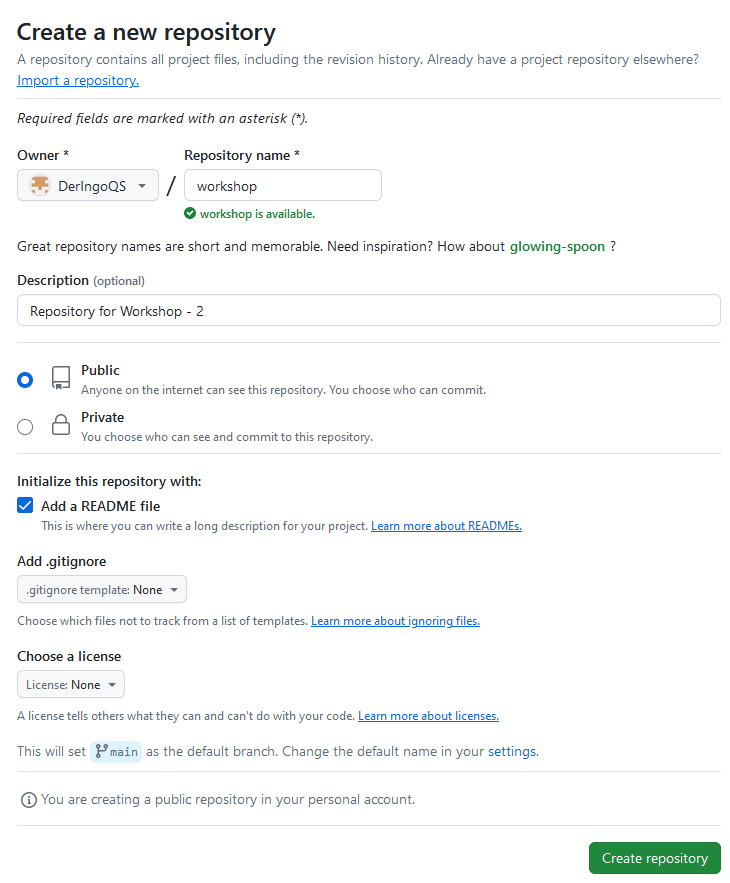
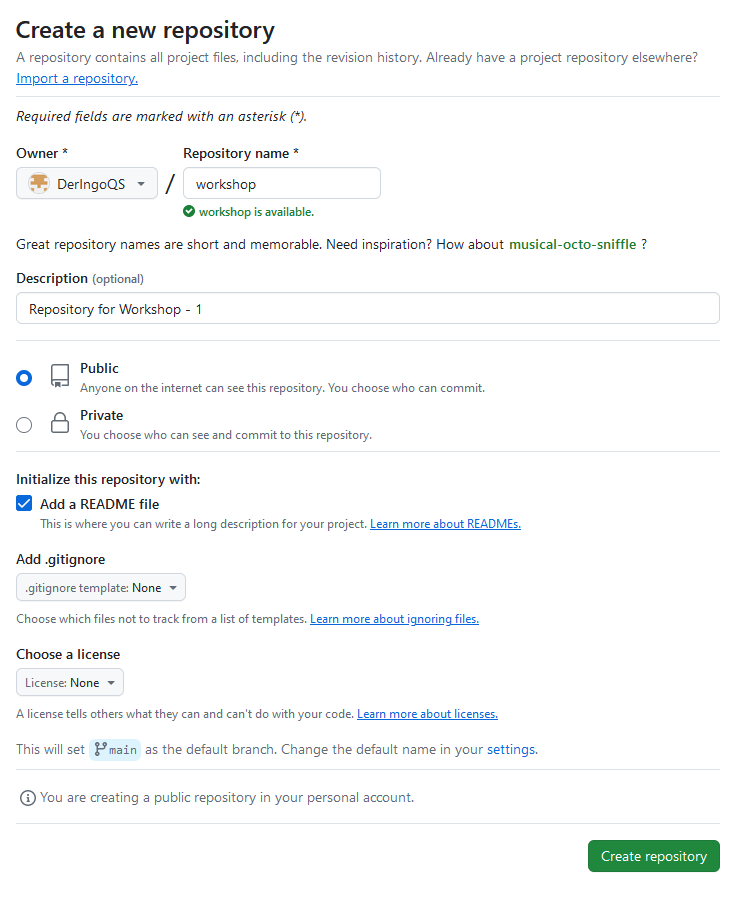
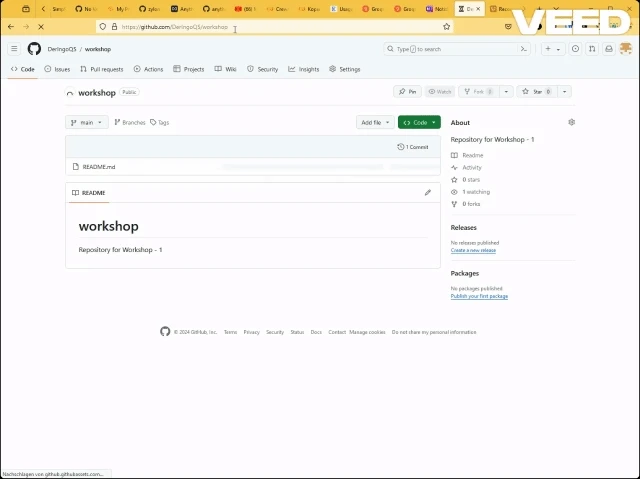
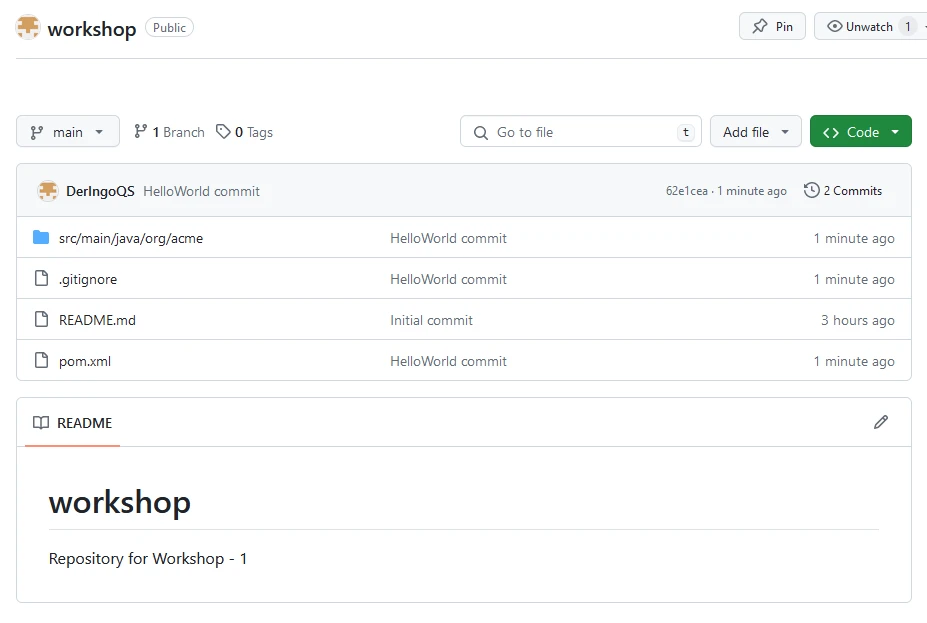
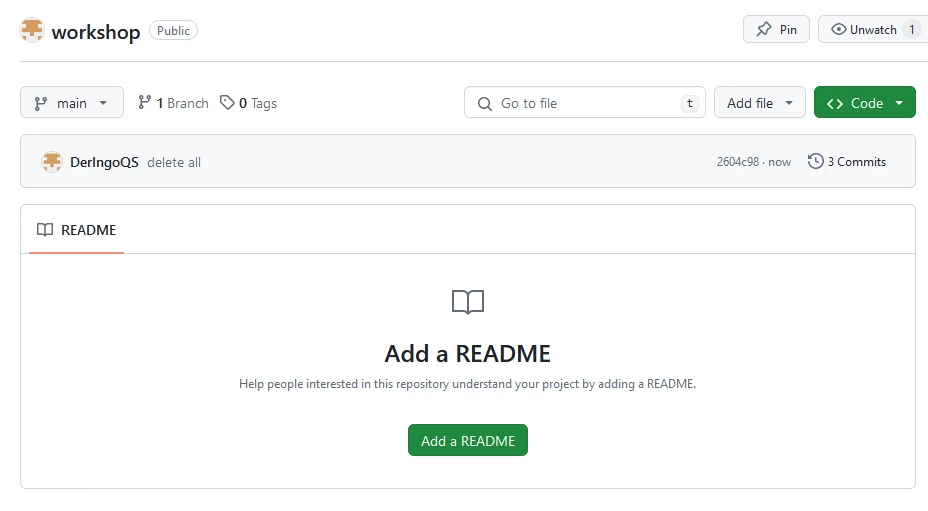
Create Repository
Create a new repository with name “workshop”. Add a README file.
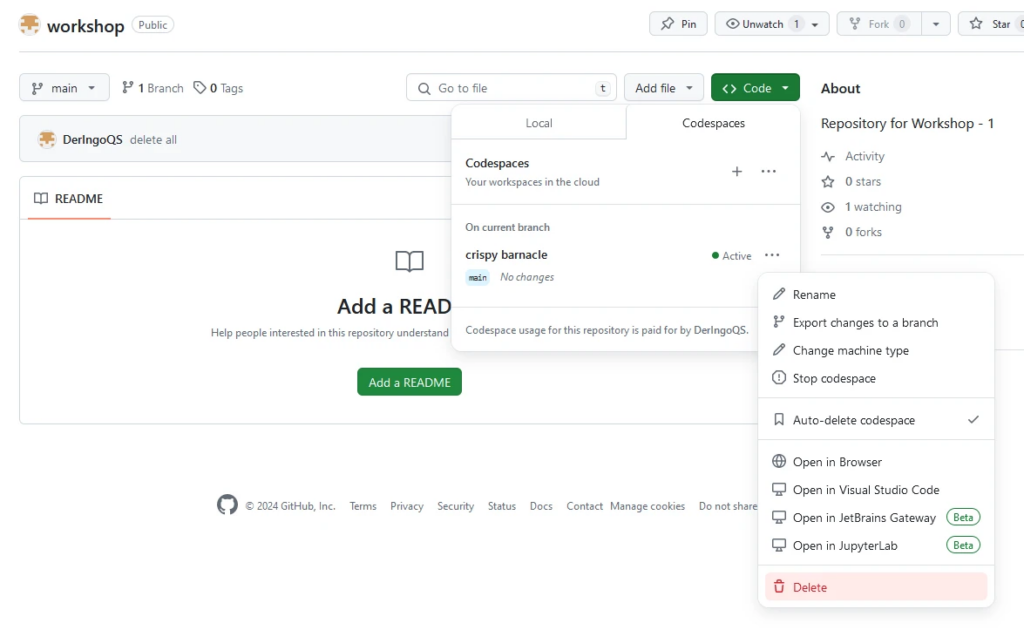
Create Codespace
TODO: funktioniert das GIF?
Change Keyboard Layout to German: In the lower right corner click on “Layout: US” and enter “German” in the upcoming window.
TODO: Ich hätte gerne die Sprache von Visual Code auf Englisch umgestellt. Wie?
Work in the Terminal
Copy & Paste
Type something into the terminal. Mark it with your mouse. One Right Click to copy into Clipboard. Another Right Click to paste from Clipboard.
Timezone
Set Timzone to Europe -> Berlin
sudo dpkg-reconfigure tzdata
Internet
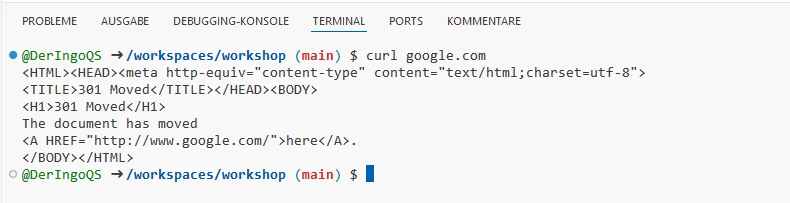
Do we have access to the Internet? Let’s try with curl:
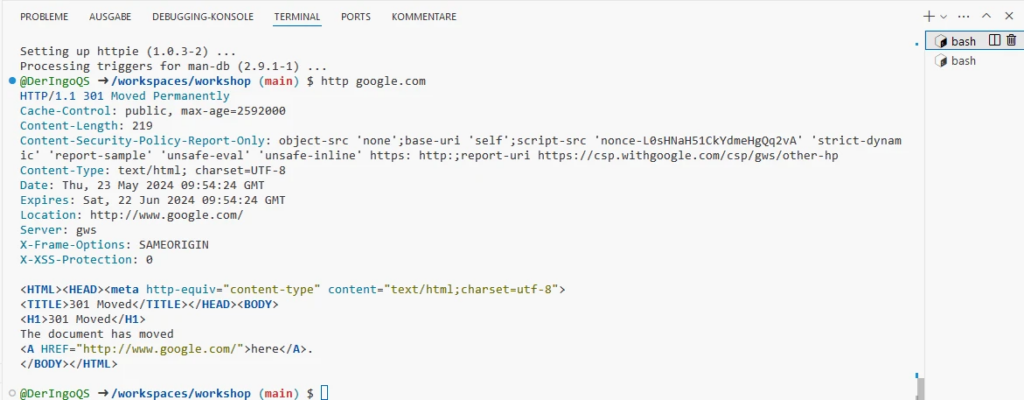
This will take a few minutes. Meanwhile we can work in another Terminal window. Later we come back and test HTTPie:
http google.com
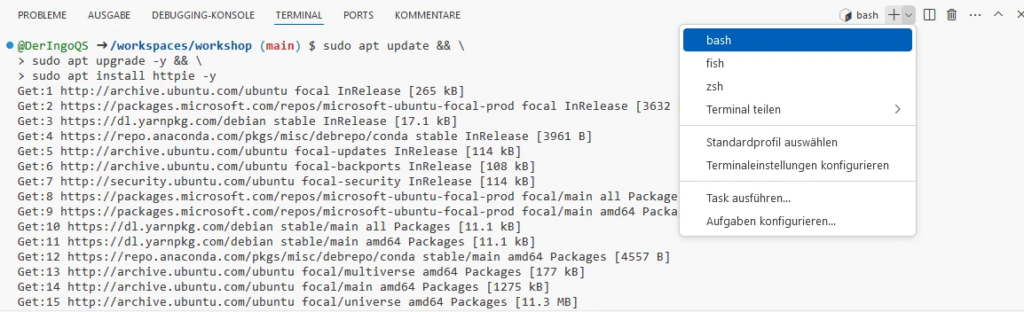
Additional Terminal window
Open a second Terminal with bash:
VIM
ls -lisah
touch test.sh
ls -lisah
vim test.sh
chmod +x test.sh
./test.sh
name=Ingo
echo "My name is $name"
echo "But here I am: $(whoami)"
Python
Do we have Python in our Codespace? Which version(s)?
python3 --version
python --version
vim hello_world.py
python hello_world.py
# Print "Hello World" to the console
print("Hello World")
Docker
docker --version
docker-compose --version
docker run hello-world
Apache HTTPD
docker run -p 8888:80 httpd
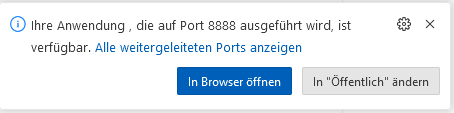
Open in Browser:
Find all open Ports in the Ports-Tab:
Normally Port 8888 should be listed here. We need to add Port, just enter 8888:
Open Website just with a click on the Globus-Icon.
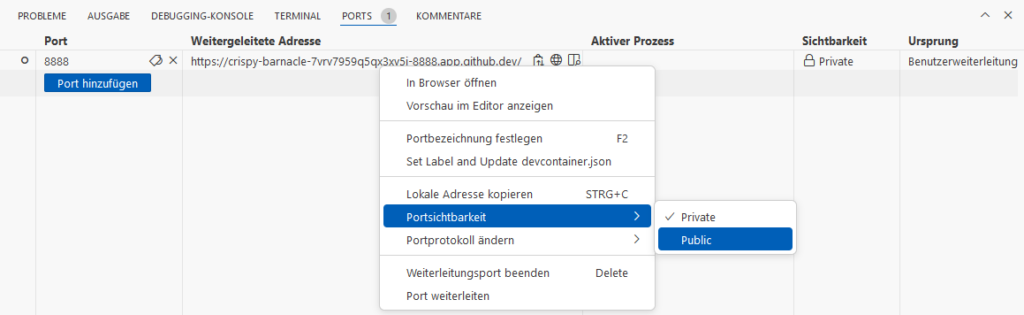
When we try to open the address in another browser, we will see a GitHub-Login. When we login with another GitHub-Account, we will get a 404-error. Because the page is Private. Switch to Public:
Now we can access the page in another brower.
At the end we can shutdown HTTPD with <STRG>+<C> in Terminal window. It should automatically disapear in the Ports-Tab. If not, you can remove it manually.
Microsoft Edge - Caching problem
Open the Public page in MS Edge. Make the page Private again. Try to open in a new browser, won’t work. Reload (the Public loaded) page in MS Edge: You can still see the site! This is a cached version and we need to force MS Edge to reload from server.
Open Developer Tools (F12 or <STRG>+<SHIFT>+<I>), then you can Right Click on the reload button to have additional options:
Java
java --version
vim HelloWorld.java
javac HelloWorld.java
java HelloWorld
rm -f HelloWorld*
class HelloWorld {
  public static void main(String args[]) {
      System.out.println("Hello World");
  }
}
Run Java Source as Shell Scripts
type -a java
# java is /home/codespace/java/current/bin/java
# java is /usr/local/sdkman/candidates/java/current/bin/java

vim HelloWorld.sh
chmod +x HelloWorld.sh
./HelloWorld.sh
rm HelloWorld.sh
#!/home/codespace/java/current/bin/java --source 21

class HelloWorld {
  public static void main(String args[]) {
      System.out.println("Hello World");
  }
}
Maven
Start
We create a new pom.xml from scratch. We need a template. We will take “The Basics”-one from the Apache Maven POM Reference page.
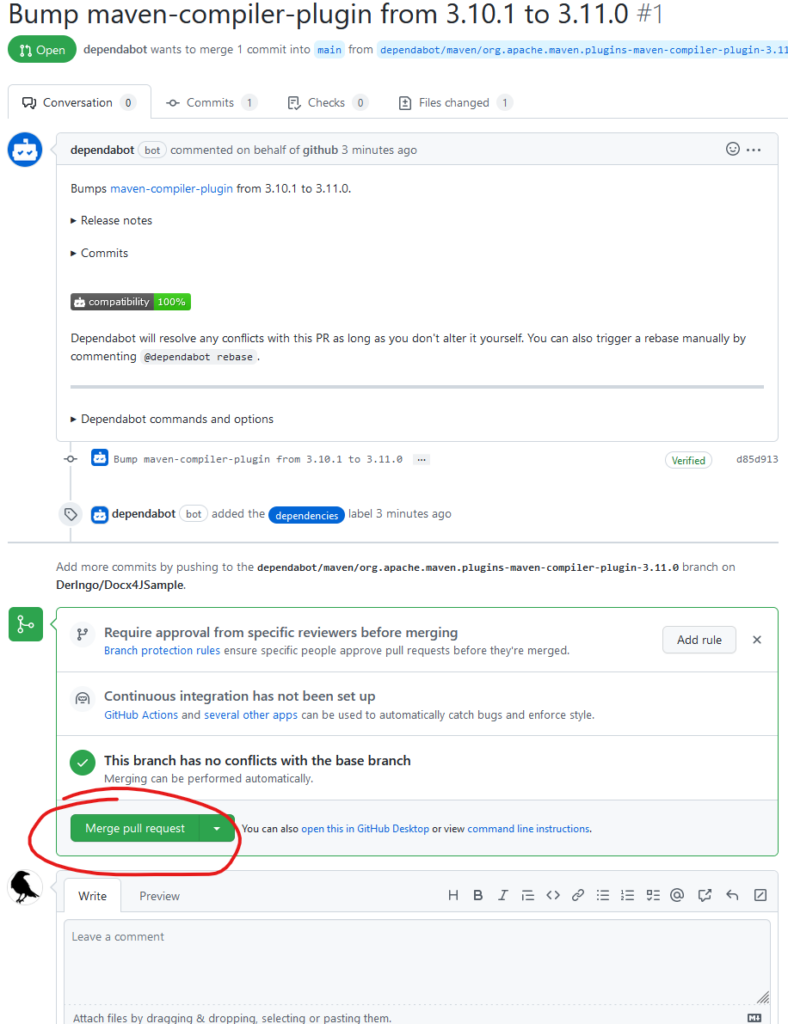
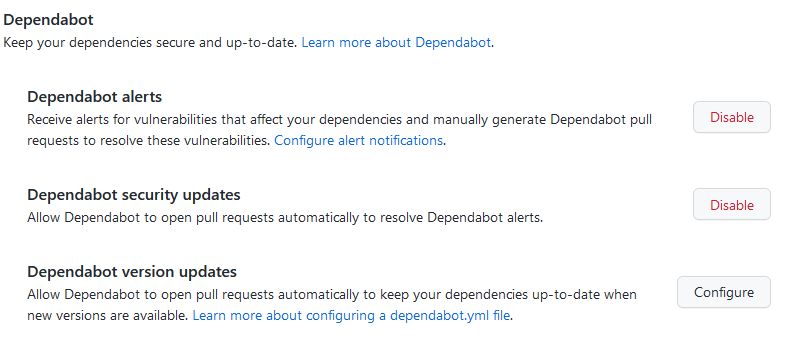
Habe gestern gehört, dass es auf GitHub einen Dienst gibt, der die Aktualität der verwendeten Bibliotheken überwacht und über neuere Versionen informiert.
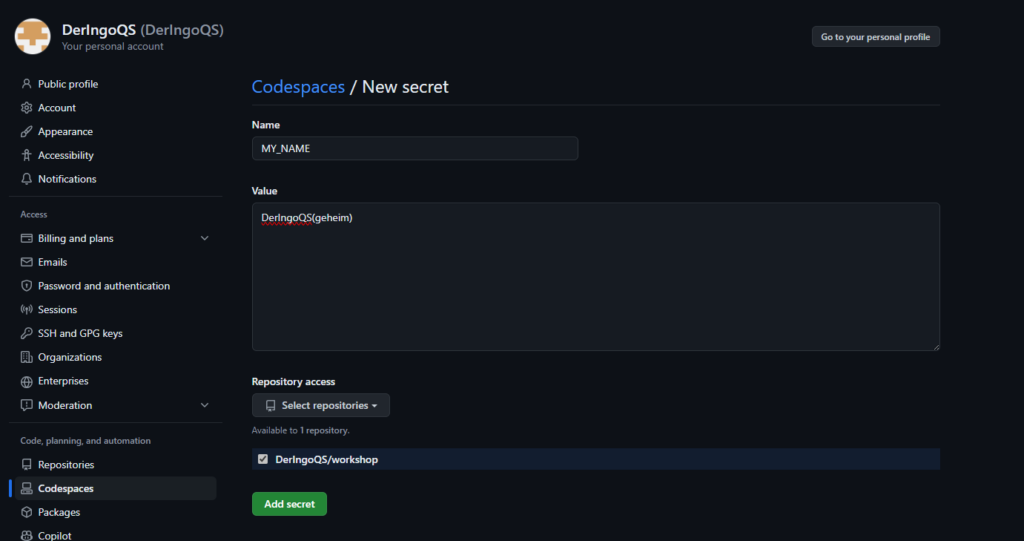
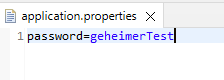
Klingt interessant. Mein Projekt hat keine Secrets, also füge ich erstmal eine Properties-Datei mit einem geheimen Passwort hinzu:
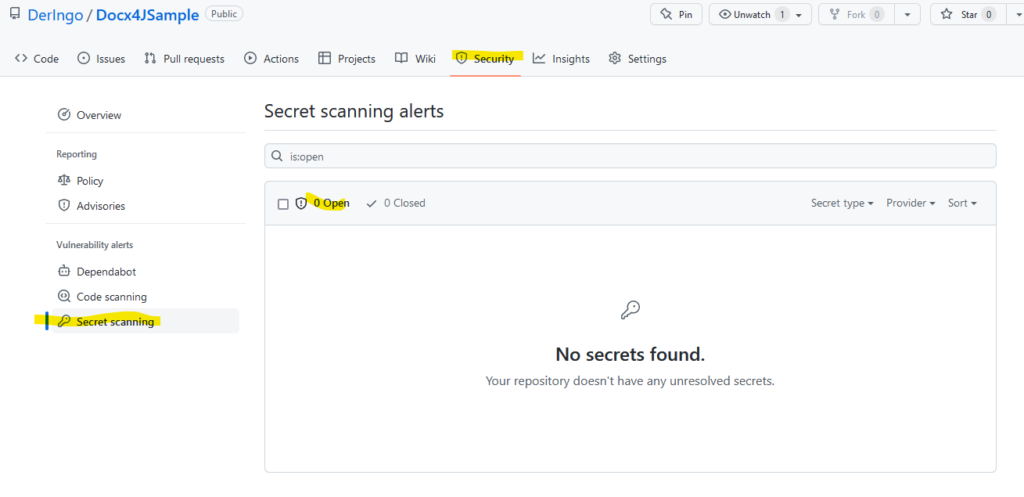
Anschließend wird das Secret scanning aktiviert:
Es wird kein Secret Alert ausgelöst:
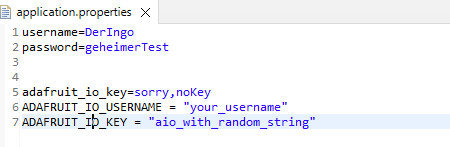
Anschließend füge ich dem password auch noch ein username hinzu, aber das Ergebnis bleibt das Gleiche.
In der Dokumentation finden sich Supported secrets, ich probiere eines davon ("adafruit_io_key") als Property-Eintrag aus. aber das Ergebnis bleibt das Gleiche.
Ich suche nach "adafruit_io_key" und erweitere die Properties-Datei ein weiteres mal:
Aber das Ergebnis bleibt das Gleiche.
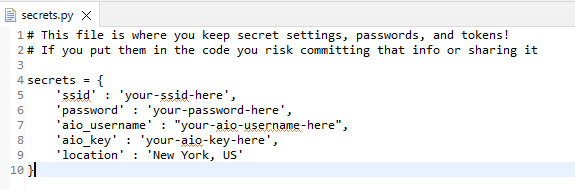
Ich probiere es mit einer weiteren Secret Datei:
Aber das Ergebnis bleibt das Gleiche.
Also sind meine Fake-Credentials zu billig, als dass GitHub darauf anspringt, oder das Feature funktioniert anders als gedacht.
Version 2 aus dem Beispiel Reverse Proxy mit OneLogin soll zu Testzwecken in der Cloud zum Laufen gebracht werden.
Bei dem PoC handelt es sich um einen Apache HTTP-Server mit simpler Public Page und OneLogin Authentifizierung für den Zugriff auf die Private Page: der ShowHeaders Anwendung in einem Apache Tomcat-Server. Beide Server laufen in Docker Containern, die über Docker Compose gestartet werden.
Cloud Server einrichten
Auf dem Server muss Docker etc. eingerichtet werden:
sudo su

yum install docker -y
systemctl umask docker
systemctl start docker
docker version

curl -L https://github.com/docker/compose/releases/download/v2.2.3/docker-compose-`uname -s`-`uname -m` -o /usr/bin/docker-compose
chmod +x /usr/bin/docker-compose
docker-compose --version
# # Output:
# Docker Compose version v2.2.3

yum install git -y
mkdir /app
cd /app
git clone https://github.com/DerIngo/DockerOneLoginApacheSample.git

vim /app/DockerOneLoginApacheSample/version2/reverseproxy/conf/reverseproxy.conf
Fehler
Auf dem lokalen Entwicklerlaptop läuft der PoC und entsprechend soll er auch in der Cloud gestartet werden:
sudo su
cd /app/DockerOneLoginApacheSample/version2
docker-compose up
Zuerst sieht alles wie gewohnt aus, bis Maven ShowHeaders bauen soll:
root@showheaders:/usr/local/tomcat/ShowHeaders# mvn package
[INFO] Scanning for projects...
[INFO]
[INFO] ------------------------< deringo:ShowHeaders >-------------------------
[INFO] Building ShowHeaders 0.0.1-SNAPSHOT
[INFO] --------------------------------[ war ]---------------------------------
Downloading from central: https://repo.maven.apache.org/maven2/org/apache/tomcat/tomcat-catalina/8.5.53/tomcat-catalina-8.5.53.pom
[INFO] ------------------------------------------------------------------------
[INFO] BUILD FAILURE
[INFO] ------------------------------------------------------------------------
[INFO] Total time:  0.956 s
[INFO] Finished at: 2022-06-07T12:28:46Z
[INFO] ------------------------------------------------------------------------
[ERROR] Failed to execute goal on project ShowHeaders: Could not resolve dependencies for project deringo:ShowHeaders:war:0.0.1-SNAPSHOT: Failed to collect dependencies at org.apache.tomcat:tomcat-catalina:jar:8.5.53: Failed to read artifact descriptor for org.apache.tomcat:tomcat-catalina:jar:8.5.53: Could not transfer artifact org.apache.tomcat:tomcat-catalina:pom:8.5.53 from/to central (https://repo.maven.apache.org/maven2): Transfer failed for https://repo.maven.apache.org/maven2/org/apache/tomcat/tomcat-catalina/8.5.53/tomcat-catalina-8.5.53.pom: PKIX path building failed: sun.security.provider.certpath.SunCertPathBuilderException: unable to find valid certification path to requested target -> [Help 1]
[ERROR]
[ERROR] To see the full stack trace of the errors, re-run Maven with the -e switch.
[ERROR] Re-run Maven using the -X switch to enable full debug logging.
[ERROR]
[ERROR] For more information about the errors and possible solutions, please read the following articles:
[ERROR] [Help 1] http://cwiki.apache.org/confluence/display/MAVEN/DependencyResolutionException
Es kann eine Dependency nicht aufgelöst werden und im Text findet sich dieser Satz: "PKIX path building failed". Also irgendwas mit Zertifikaten, wie mir die Erfahrung sagt.
Nach einer Recherche ist klar: In dem Cloud Setup wird der ausgehende Traffic durch einen Proxy geleitet und dessen Zertifikate sind nicht in den Standard-Zertifikaten enthalten.
Simple Lösung: Validierung aushebeln
Die schnellste Lösung: Einfach auf jedwede Validierung verzichten.
In dem Dockerfile von ShowHeaders wird der Maven Aufruf um obige Parameter ergänzt:
WORKDIR ShowHeaders
# aus
    RUN mvn package
# wird
    RUN mvn package -Dmaven.wagon.http.ssl.insecure=true -Dmaven.wagon.http.ssl.allowall=true -Dmaven.wagon.http.ssl.ignore.validity.dates=true
und schon kann das Image wieder erfolgreich gebaut werden.
Der gleiche Fehler
Die Images werden gebaut, die Container starten und die Public Page wird korrekt angezeigt auf http://localhost:80/public
Aber: die Private Page auf http://localhost:80/private wird nicht angezeigt, bzw. wird nicht mal das OneLogin Login angezeigt.
Das Problem findet sich in der OpenID Konfiguration für OneLogin:
Das funktioniert prinzipiell, dauert aber sehr lange. Außerdem wird in einem ausführlichen Kommentar darauf hingewiesen, dass die Intermediate Certificates so nicht gezogen würden.
Eine ausführliche Anleitung findet sich auf Baeldung, deren Ansatz ist wesentlich schneller (von mir nicht auf Intermediate C. getestet):
Leider kann momentan nur auf der Konsole getestet werden:
curl localhost/private/
Aber der Docker Output sieht nicht gut aus: "SSL certificate problem: unable to get local issuer certificate":
version2-reverseproxy-1  | [Tue Jun 07 13:48:25.115383 2022] [auth_openidc:error] [pid 9:tid 140428228966144] [client 172.21.0.1:57644] oidc_util_http_call: curl_easy_perform() failed on: https://deringo-dev.onelogin.com/oidc/2/.well-known/openid-configuration (SSL certificate problem: unable to get local issuer certificate)
version2-reverseproxy-1  | [Tue Jun 07 13:48:25.115513 2022] [auth_openidc:error] [pid 9:tid 140428228966144] [client 172.21.0.1:57644] oidc_provider_static_config: could not retrieve metadata from url: https://deringo-dev.onelogin.com/oidc/2/.well-known/openid-configurationversion2-reverseproxy-1  | 172.21.0.1 - - [07/Jun/2022:13:48:25 +0000] "GET /private/ HTTP/1.1" 500 531
version2-reverseproxy-1  | 172.21.0.1 - - [07/Jun/2022:13:48:27 +0000] "GET /private/ HTTP/1.1" 302 478
Allerdings, nach einem Neustart sieht es doch gut aus in der Konsole:
curl localhost/private/
<!DOCTYPE HTML PUBLIC "-//IETF//DTD HTML 2.0//EN">
<html><head>
<title>302 Found</title>
</head><body>
<h1>Found</h1><p>The document has moved <a href="https://deringo-dev.onelogin.com/oidc/2/auth?response_type=code&scope=openid&client_id=781a5c80-a77f-013a-c94a-020f214c554637671&state=4RRlolG4XrN45Q3yCOc15Hf_6Ns&redirect_uri=http%3A%2F%2Flocalhost%2Fprivate%2Fredirect_uri&nonce=B-PSe0ZSm6ZIoHebvpVtNQnv_JHqQLeSMpkI5tuoEi0">here</a>.</p>
</body></html>
Anschließend wieder gestoppt, Reverse Proxy Image neu bauen lassen, Container wieder gestartet: Beim ersten curl kommt der "SSL certificate problem: unable to get local issuer certificate"-Fehler, bei weiteren curls der "The document has moved"-Hinweis.
Schauen wir mal, wie das im Container aussieht:
Vorbereitung:
# frisch starten:
docker-compose down -v
docker-compose build reverseproxy
docker-compose up
# vor dem ersten Aufruf: Ab in den Container:
docker exec -it version2-reverseproxy-1 bash
Im Container:
# Im Container:
apt install curl

# 1. Aufruf
curl https://deringo-dev.onelogin.com/oidc/2/.well-known/openid-configuration
curl: (60) SSL certificate problem: unable to get local issuer certificate
More details here: https://curl.se/docs/sslcerts.html

curl failed to verify the legitimacy of the server and therefore could not
establish a secure connection to it. To learn more about this situation and
how to fix it, please visit the web page mentioned above.

# 2. Aufruf
curl https://deringo-dev.onelogin.com/oidc/2/.well-known/openid-configuration
curl: (60) SSL certificate problem: unable to get local issuer certificate
More details here: https://curl.se/docs/sslcerts.html

curl failed to verify the legitimacy of the server and therefore could not
establish a secure connection to it. To learn more about this situation and
how to fix it, please visit the web page mentioned above.

# 3. Aufruf
curl https://deringo-dev.onelogin.com/oidc/2/.well-known/openid-configuration
{"acr_values_supported":["onelogin:nist:level:1:re-auth"],"authorization_endpoint":"https://deringo-dev.onelogin.com/oidc/2/auth","claims_parameter_suppor[...]
Ich habe es noch ein paar mal ausprobiert, ungefähr jedes zweite bis dritte Mal hat es funktioniert.
Offensichtlich ist da noch ein LoadBalancer zwischen. 🤦♂️🤦♂️🤦♂️
Mehrmaliges pingen gab zwei verschiedene IPs zurück.
apt install nmap

nmap deringo-dev.onelogin.com
Starting Nmap 7.80 ( https://nmap.org ) at 2022-06-07 14:18 UTC
Nmap scan report for deringo-dev.onelogin.com (52.29.255.229)
Host is up (0.0052s latency).
Other addresses for deringo-dev.onelogin.com (not scanned): 52.29.255.230
rDNS record for 52.29.255.229: ec2-52-29-255-229.eu-central-1.compute.amazonaws.com
Not shown: 994 filtered ports
PORT     STATE SERVICE
21/tcp   open  ftp
53/tcp   open  domain
80/tcp   open  http
443/tcp  open  https
554/tcp  open  rtsp
1723/tcp open  pptp
Aha! Es gibt zwei IPs zu dem Domainnamen und anscheinend ist OneLogin in den AWS.
Nochmal ein anderer Test; Wie ist das denn, wenn ich nicht im Container, sondern direkt vom Host curle:
Jeder Aufruf funktioniert, diesmal sieht es wirklich gut aus.
Umsetzung
Das Dockerfile des Reverse Proxies:
FROM httpd:2.4
RUN apt update && apt install -y \
        libapache2-mod-auth-openidc \
        ca-certificates
COPY /etc/pki/ca-trust/source/anchors/ZscalerCloudChain.crt /usr/local/share/ca-certificates/ZscalerCloudChain.crt
RUN update-ca-certificates
RUN cp /usr/lib/apache2/modules/mod_auth_openidc.so /usr/local/apache2/modules/
RUN mv conf/httpd.conf conf/container_httpd.conf
CMD ["httpd-foreground"]
Anschließend das Image neu bauen:
docker-compose build reverseproxy
Ich fasse es nicht:
Step 3/6 : COPY /etc/pki/ca-trust/source/anchors/ZscalerCloudChain.crt /usr/local/share/ca-certificates/ZscalerCloudChain.crt
1 error occurred:
        * Status: COPY failed: file not found in build context or excluded by .dockerignore: stat etc/pki/ca-trust/source/anchors/ZscalerCloudChain.crt: filedoes not exist, Code: 1
FROM httpd:2.4
RUN apt update && apt install -y \
        libapache2-mod-auth-openidc \
        ca-certificates
COPY ./ZscalerCloudChain.crt /usr/local/share/ca-certificates/ZscalerCloudChain.crt
RUN update-ca-certificates
RUN cp /usr/lib/apache2/modules/mod_auth_openidc.so /usr/local/apache2/modules/
RUN mv conf/httpd.conf conf/container_httpd.conf
CMD ["httpd-foreground"]
cp /etc/pki/ca-trust/source/anchors/ZscalerCloudChain.crt /app/DockerOneLoginApacheSample/version2/reverseproxy/ZscalerCloudChain.crt
docker-compose build reverseproxy
docker-compose up
Test
curl localhost/private/
Keine Fehler im Log! 🎉
Test im Browser mit Login
Steht noch aus, aktuell ist der Server nur über Console zu erreichen.
UPDATE: Inzwischen wurde der Zugriff per Browser auf den Server freigeschaltet (bzw. eine fehlerhafte Netzwerkkonfiguration gefixt) und die Public Seiten sind zugänglich.
Bei Aufruf der Private Seiten kommt allerdings eine Fehlermeldung:
Aktuell migrieren wir eine Legacy Anwendung in eine neue Systemlandschaft und dabei wollen wir das Dependency Managment überarbeiten, das bisher aus einem Verzeichnis mit *.jar Library Dateien besteht, ohne Sourcecode. Wir wollen im Projekt Maven einführen. Das funktioniert überwiegend recht gut und einfach, indem wir die einzelnen *.jar Dateien durchgehen, die Versionsnummer bestmöglich raten und dann die entsprechende Abhängigkeit in die Maven Datei pom.xml hinzufügen. Die einzelnen Bibliotheken lassen sich gut über diese Seite finden: https://mvnrepository.com/
Allerdings gibt es auch firmeninterne oder propritäre Java Bibliotheken, diese lassen sich natürlich nicht über das zentrale Maven Repository finden.
Bei einem anderen Kunden haben wir zur Lösung dieses Problems einen eigenes, internes Repository aufgebaut: Sonatype Nexus. Dieses dient als Proxy für das öffentliche Maven Repository und zusätlich können hier die internen Bibliotheken hochgeladen und so verfügbar gemacht werden. Dieses Vorgehen kam bei dem aktuellen Projekt allerdings nicht in Betracht, so dass wir uns nach einer Alternative umgesehen haben. Das Dependency Managment nicht zu ändern wäre auch eine Alternative gewesen.
Die Alternative, die wir dann fanden, war das Einrichten eines im Projekt eingebetteten, lokalen Repositories. Die Idee dazu fanden wir in diesem Artikel: https://devcenter.heroku.com/articles/local-maven-dependencies
Das Vorgehen ist von der Idee her recht simpel: Im Projekt Ordner wird ein Ordner, zB maven/repository, angelegt und in diesem ein lokales Repository aufgebaut, welches dann in der pom.xml referenziert werden kann, um so von dort die internen Libraries verfügbar zu machen.
Repository anlegen
Im Projekt wird ein Verzeichnis für das lokale Repository angelegt, zB maven/repository.
Mittels des Maven deploy Befehls können dann die internen Libraries aus dem bisherigen Repository (aka WEB-INF/lib Folder) in das Maven Repository importiert werden.
Beispielsweise wird die firmeninterne companyLib.jar incl. Sourcecode in der Version 'latest', denn es gibt immer nur die letzte Version, installiert:
To analyse an unknown Json API I setup a small project with Smallrye Rest Client to access the Json structure. I added JUnit for a test driven approach and Hamcrest for Matchers (like assertThat or is).