WebSockets are a protocol that provides full-duplex communication channels over a single, long-lived connection. They are designed for real-time, event-driven web applications and allow for low-latency communication between a client (typically a web browser) and a server. Here are some key points about WebSockets:
- Full-Duplex Communication: Unlike HTTP, which is request-response based, WebSockets allow for two-way communication where both client and server can send and receive messages independently of each other.
- Persistent Connection: WebSocket connections are persistent, meaning they remain open as long as both the client and server agree to keep the connection alive. This reduces the overhead associated with establishing new connections.
- Low Latency: WebSockets are ideal for scenarios requiring real-time updates because they reduce the latency associated with polling or long-polling techniques.
- Protocol: WebSockets are established by upgrading an HTTP/HTTPS connection using a WebSocket handshake, switching the protocol from HTTP to WebSocket.
- Use Cases: Common use cases include live chat applications, real-time notifications, collaborative editing, online gaming, and any application requiring real-time data updates.
Node.js in Codespace
I want to test WebSockets with Node.js in GitHub Codespace.
Node Version Manager (nvm)
# test installation
command -v nvm
nvm


# check version
nvm ls
       v18.20.1
       v20.12.1
->       system
default -> 20 (-> v20.12.1)
iojs -> N/A (default)
unstable -> N/A (default)
node -> stable (-> v20.12.1) (default)
stable -> 20.12 (-> v20.12.1) (default)
lts/* -> lts/iron (-> v20.12.1)
lts/argon -> v4.9.1 (-> N/A)
lts/boron -> v6.17.1 (-> N/A)
lts/carbon -> v8.17.0 (-> N/A)
lts/dubnium -> v10.24.1 (-> N/A)
lts/erbium -> v12.22.12 (-> N/A)
lts/fermium -> v14.21.3 (-> N/A)
lts/gallium -> v16.20.2 (-> N/A)
lts/hydrogen -> v18.20.1
lts/iron -> v20.12.1


# check node version
node --version
v20.12.1
Node.js
# install LTS
nvm install --lts
Installing latest LTS version.
Now using node v20.14.0 (npm v10.7.0)


# check version
nvm ls


# check node version
node --version
v20.14.0
Some npm commands
# Show installed Nodes
nvm ls
# Show available versions
nvm ls-remote
# Install latest version
nvm install node
# Install LTS version
nvm install --lts
# Install a specific version (list available -> example 16.20.2)
nvm install 16.20.2
# Use a specific version
nvm use 16.20.2
# Show npm version
npm --version
Simple Website with Node.js
To serve an HTML page using Node.js, we can use the built-in http module.
Create an HTML file
<!DOCTYPE html>
<html lang="en">
<head>
    <meta charset="UTF-8">
    <meta name="viewport" content="width=device-width, initial-scale=1.0">
    <title>Node.js HTML Server</title>
</head>
<body>
    <h1>Hello, World!</h1>
    <p>This is a simple HTML page served by Node.js.</p>
</body>
</html>
Create a Node.js script to serve the HTML file
const http = require('http');
const fs = require('fs');
const path = require('path');

const hostname = '127.0.0.1';
const port = 3000;

const server = http.createServer((req, res) => {
    if (req.method === 'GET' && req.url === '/') {
        const filePath = path.join(__dirname, 'index.html');
        fs.readFile(filePath, (err, data) => {
            if (err) {
                res.statusCode = 500;
                res.setHeader('Content-Type', 'text/plain');
                res.end('Internal Server Error');
            } else {
                res.statusCode = 200;
                res.setHeader('Content-Type', 'text/html');
                res.end(data);
            }
        });
    } else {
        res.statusCode = 404;
        res.setHeader('Content-Type', 'text/plain');
        res.end('Not Found');
    }
});

server.listen(port, hostname, () => {
    console.log(`Server running at http://${hostname}:${port}/`);
});
Run the Node.js server
node server.js
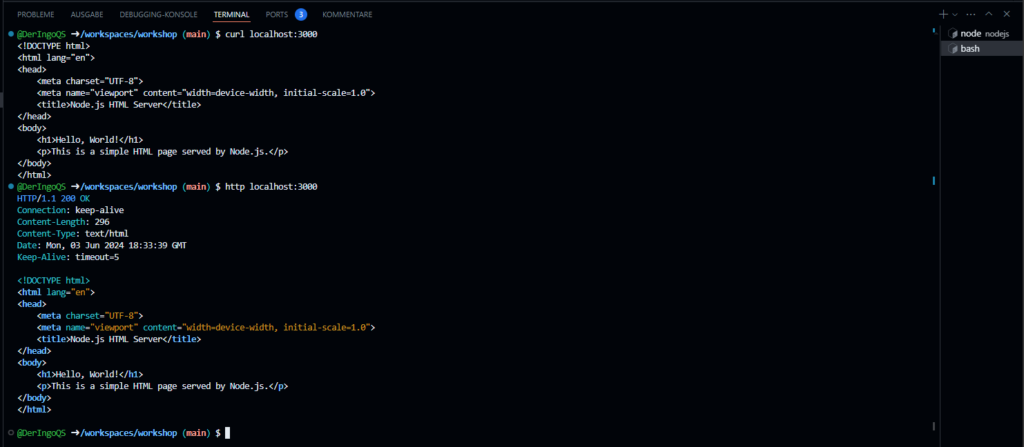
Test Node.js server in terminal
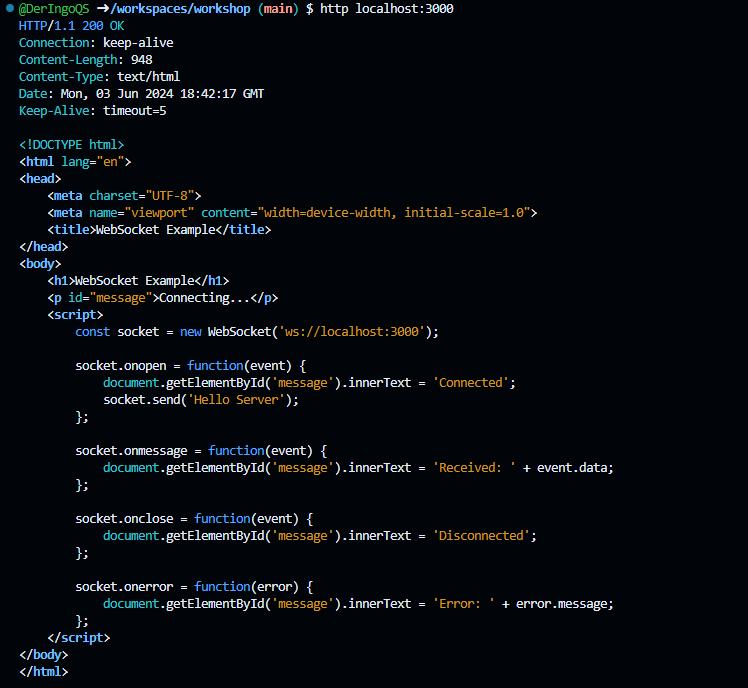
curl localhost:3000
http localhost:3000
Test Node.js server in browser

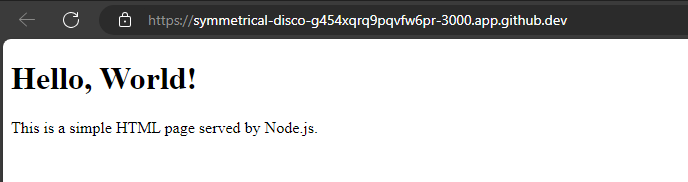
WebSocket in Codespace
To create a Node.js server that provides both an HTTP server for serving an HTML page and a WebSocket server for real-time communication, we can use the ws library for WebSockets.
Install the ws library
npm install ws
Create the HTML file
<!DOCTYPE html>
<html lang="en">
<head>
    <meta charset="UTF-8">
    <meta name="viewport" content="width=device-width, initial-scale=1.0">
    <title>WebSocket Example</title>
</head>
<body>
    <h1>WebSocket Example</h1>
    <p id="message">Connecting...</p>
    <script>
        const socket = new WebSocket('ws://localhost:3000');

        socket.onopen = function(event) {
            document.getElementById('message').innerText = 'Connected';
            socket.send('Hello Server');
        };

        socket.onmessage = function(event) {
            document.getElementById('message').innerText = 'Received: ' + event.data;
        };

        socket.onclose = function(event) {
            document.getElementById('message').innerText = 'Disconnected';
        };

        socket.onerror = function(error) {
            document.getElementById('message').innerText = 'Error: ' + error.message;
        };
    </script>
</body>
</html>
Create the Node.js server
const http = require('http');
const fs = require('fs');
const path = require('path');
const WebSocket = require('ws');

const hostname = '127.0.0.1';
const port = 3000;

// Create HTTP server
const server = http.createServer((req, res) => {
    if (req.method === 'GET' && req.url === '/') {
        const filePath = path.join(__dirname, 'index.html');
        fs.readFile(filePath, (err, data) => {
            if (err) {
                res.statusCode = 500;
                res.setHeader('Content-Type', 'text/plain');
                res.end('Internal Server Error');
            } else {
                res.statusCode = 200;
                res.setHeader('Content-Type', 'text/html');
                res.end(data);
            }
        });
    } else {
        res.statusCode = 404;
        res.setHeader('Content-Type', 'text/plain');
        res.end('Not Found');
    }
});

// Create WebSocket server
const wss = new WebSocket.Server({ server });

wss.on('connection', ws => {
    console.log('Client connected');

    ws.on('message', message => {
        console.log(`Received: ${message}`);
        ws.send('Hello Client');
    });

    ws.on('close', () => {
        console.log('Client disconnected');
    });
});

server.listen(port, hostname, () => {
    console.log(`Server running at http://${hostname}:${port}/`);
});
Run the Node.js server
node server.js
Test Node.js server in terminal
curl localhost:3000
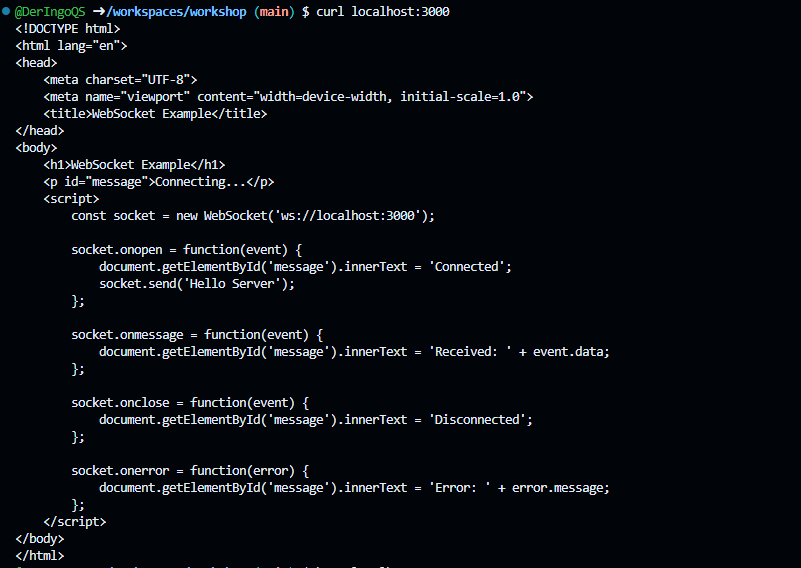
http localhost:3000
Test Node.js server in browser
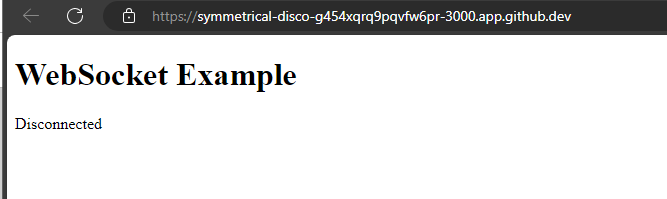
Brower Fix
We need to adjust the address of the WebSocket.
When setting up a WebSocket connection from the client-side script within the HTML file, the WebSocket URL must match the address and port where the WebSocket server is running. This URL should include the WebSocket protocol (ws:// or wss:// for secure connections)
Adjustment:
const socket = new WebSocket('wss://symmetrical-disco-g454xqrq9pqvfw6pr-3000.app.github.dev/:3000');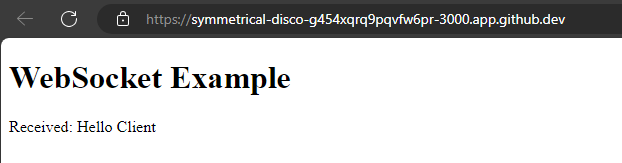
OK, this works, so make it a little more dynamic:
const socket = new WebSocket('wss://' + location.host + '/:3000');Test WebSocket from terminal
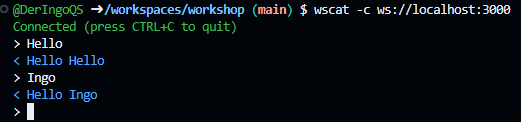
Unfortunately, curl and httpie do not natively support WebSocket protocols. To test WebSocket connections using command-line we can use wscat, which is specifically designed for WebSocket communication.
npm install -g wscat
Using wscat to Test WebSocket Connections:
wscat -c ws://localhost:3000

Connected (press CTRL+C to quit)
> hello
< Hello Client
Build a Chat App
Let's build a "Chat App"
Server
We enhance the server to dynamically answer to a message:
[...]
     ws.on('message', message => {
        console.log(`Received: ${message}`);
        ws.send('Hello ' + message);
    });
[...]
Amazing!
Client
<!DOCTYPE html>
<html lang="en">
<head>
    <meta charset="UTF-8">
    <meta name="viewport" content="width=device-width, initial-scale=1.0">
    <title>WebSocket Chat Example</title>
    <style>
        #chat {
            resize: none;
            overflow: hidden;
            min-width: 70%;
            min-height: 300px;
            max-height: 300px;
            overflow-y: scroll;
        }
        #msg {
            min-width: 40%;
        }
    </style>
</head>
<body>
    <h1>WebSocket Chat Example</h1>
    <p id="message">Connecting...</p>
    <br/>
    <div class="container">
        <br/>
        <div class="row">
            <textarea id="chat"></textarea>
        </div>
        <div class="row">
            <input id="msg" type="text" placeholder="enter your message">
            <button id="send" type="button" disabled>send</button>
        </div>

    </div>

    <script src="https://cdnjs.cloudflare.com/ajax/libs/jquery/3.7.1/jquery.min.js"></script>
    <script>
        var connected = false;
        var socket;

        $( document ).ready(function() {
            connect();
            $("#send").click(sendMessage);

            $("#name").keypress(function(event){
                if(event.keyCode == 13 || event.which == 13) {
                    connect();
                }
            });

            $("#msg").keypress(function(event) {
                if(event.keyCode == 13 || event.which == 13) {
                    sendMessage();
                }
            });

            $("#chat").change(function() {
                scrollToBottom();
            });

            $("#name").focus();
        });

        var connect = function() {
            if (! connected) {
                socket = new WebSocket('wss://' + location.host + '/:3000');
                socket.onopen = function(m) {
                    connected = true;
                    console.log("Connected to the web socket");
                    $("#send").attr("disabled", false);
                    $("#connect").attr("disabled", true);
                    $("#name").attr("disabled", true);
                    $("#chat").append("[Chatbot] Howdy, how may I help you? \n");
                    $("#msg").focus();
                    $("#message").text('Connected');
                };
                socket.onmessage = function(m) {
                    console.log("Got message: " + m.data);
                    $("#message").text('Received: ' + m.data);
                    $("#chat").append("[Chatbot] " + m.data + "\n");
                    scrollToBottom();
                };
                socket.onclose = function(event) {
                    console.log("Disconnected");
                    $("#message").text('Disconnected');
                    $("#chat").append("[Chatbot] Disconnected" + "\n");
                    scrollToBottom();
                };
                socket.onerror = function(error) {
                    console.log("Error: " + error.message);
                    $("#message").text('Error: ' + error.message);
                    $("#chat").append("[Chatbot] Error: " + error.message + "\n");
                    scrollToBottom();
                };
            }
        };

        var sendMessage = function() {
            if (connected) {
                var value = $("#msg").val();
                console.log("Sending " + value);
                $("#chat").append("[You] " + value + "\n")
                socket.send(value);
                $("#msg").val("");
            }
        };

        var scrollToBottom = function () {
            $('#chat').scrollTop($('#chat')[0].scrollHeight);
        };

    </script>
</body>
</html>
Awesome!
Also 'Chatbot' is working from terminal: