Ich musste grade von meiner Postgres-DB einen Dump ziehen und auf eine zweite DB wieder einspielen.
Problem dabei: ich habe Postgres (pg_dump, psql) nicht auf meinem Host System installiert und möchte daher Docker verwenden.
Zuerst habe ich alle relevanten Parameter in eine Datei (.env) gespeichert:
Anschließend habe ich die Parameter (zB Hostname) für das Zielsystem angepasst und wieder source .env ausgeführt um dann das Backup auf der Ziel-DB einspielen zu können:
<!-- /data/docker/apache1/html/index.html -->
<!DOCTYPE html>
<html>
<head>
    <title>Welcome to Kabango.eu</title>
</head>
<body>
    <h1>Welcome to Kabango.eu</h1>
    <p>This is the main website.</p>
    <p>Visit our <a href="/special">special section</a>.</p>
</body>
</html>
Special Section (apache2):
<!-- /data/docker/apache2/html/index.html -->
<!DOCTYPE html>
<html>
<head>
    <title>Special Section - Kabango.eu</title>
</head>
<body>
    <h1>Special Section</h1>
    <p>This is the special section of Kabango.eu</p>
    <p><a href="/">Back to main page</a></p>
</body>
</html>
Copy all configuration files to their respective locations as shown above
Ensure correct file permissions
Configure DNS:
Point these domains to your server's IP:
kabango.eu
www.kabango.eu
traefik.kabango.eu
portainer.kabango.eu
Start services in order:
cd /data/docker/traefik && docker compose up -d
cd /data/docker/apache1 && docker compose up -d
cd /data/docker/apache2 && docker compose up -d
cd /data/docker/portainer && docker compose up -d
Access Points
After setup, the following services will be available:
Ich möchte die nativen Dienste auf meinem Server zur besseren Verwaltung und als Vorbereitung für eine kommende Migration auf Docker umstellen.
Als Vorbereitung für diese Aufgabe habe ich in Lokaler virtueller Server bereits ein grundlegendes Setup lokal evaluiert.
Heute möchte ich den Apache HTTP Server, der auch als Reverse Proxy dient, in einen Container stecken.
Vorbereitung
Docker deinstallieren
Auf dem Server ist bereits eine alte Docker Installation vorhanden. Diese habe ich als erstes rückstandslos entfernt.
# Service finden
systemctl list-unit-files --type service
# Service stoppen
sudo systemctl stop apache2
Container-Apache starten:
cd /data/docker/apache
docker compose up
Ausgabe:
[+] Building 0.0s (0/0)
Attaching to apache
apache  | httpd: Could not open configuration file /usr/local/apache2/conf/httpd.conf: No such file or directory
apache exited with code 0
Das hat also schon mal so gar nicht geklappt. Woran kann es liegen? Zur Analyse interaktiv in dem Container agieren:
docker compose run -it --entrypoint /bin/bash apache
Ich kann im Container sehen, dass die Konfigurations-Dateien vorhanden sind, d.h. die Docker-Compose-Konfig ist an der Stelle korrekt.
Allerdings fehlt die geforderte httpd.conf.
Bei Ubuntu heißt die Datei apache2.conf, der Docker Container erwartet aber eine httpd.conf. Als Workaround lege ich eine httpd.confan, die auf die apache2.conf verweist:
Include /usr/local/apache2/conf/apache2.conf
Jetzt bekomme ich beim Starten des Containers andere Fehlermeldungen.
Aufräumen
Das entwickelt sich nicht wie gewünscht, ich breche ab und räume auf:
docker compose down -v
sudo rm -rf /data/docker/apache
Kleiner Apache
Um einen minimalen Teilerfolg feiern zu können, setzte ich einen Apache im Container auf, der die HTML-Seiten auf Port 9080 ausliefert.
mkdir /data/docker/apache
mkdir /data/docker/apache/logs

cd /data/docker/apache
vim docker-compose.yml

docker compose up -d
docker logs apache
Der naive "Lift and Shift" Ansatz hat mal wieder nicht funktioniert.
Die Pfade sind bei der nativen Ubuntu Installation und dem Container Apache unterschiedlich. Der simple Workaround mit der httpd.conf-Datei war ein erster Schritt, danach hätten noch Umgebungsvariablen wie APACHE_RUN_DIR gesetzt werden müssen.
Dann hätte ich noch einige Pfade vom Server in den Container mappen müssen.
Und dann ist da noch der Let's encrypt Certbot, der doch mehr mit der Apache Installation verdrahtet ist, als ich am Anfang dachte. Den hätte ich auch noch im Container installieren müssen.
Sicherlich alles machbar, aber für eine Interimslösung zu aufwändig. Am Ende soll ja Traefik SSL und Reverse Proxy übernehmen. Daher belasse ich es hier erstmal.
Performance-Analyse einer PostgreSQL-Datenbank mit pg_stat_statements
Bei einer Webanwendung mit einer PostgreSQL-Datenbank stießen wir auf Performance-Probleme. Hier beschreibe ich, wie man Performance-Probleme in PostgreSQL mittels der Erweiterung pg_stat_statements analysieren kann. Da die Erweiterung nicht auf der Produktivdatenbank installiert ist, zeige ich, wie man eine lokale Testumgebung aufsetzt.
Überblick der Vorgehensweise
Backup der Produktivdatenbank erstellen
Lokale Testdatenbank mit Docker aufsetzen
pg_stat_statements installieren und konfigurieren
Performance-Analyse durchführen
Vorbereitung
Zuerst prüfen wir die Version der Datenbank, um die passende Docker-Umgebung zu wählen:
SELECT version();
-- PostgreSQL 13.4
Backup erstellen
Das Backup erfolgt mittels Docker, um eine konsistente Umgebung zu gewährleisten. Hier das Script backup.sh:
Verwendet wird Port 6432, um Konflikte mit einer möglicherweise laufenden lokalen PostgreSQL-Instanz zu vermeiden.
Daten importieren
Das Backup wird dann in die lokale Datenbank importiert, über das Script import.sh:
#!/bin/bash

# Check if arguments were passed
if [ $# -eq 0 ]; then
        echo "Error: No arguments provided"
            echo "Usage: $0 "
            exit 1
fi

# Check if file exists
if [ ! -f "$1" ]; then
      echo "Error: $1 is not a valid file."
        exit 1
fi
echo "File found: $1"

importfile=$(readlink -f "$1")
server=localhost
port=6432
username=myuser
password=PASSWORD
databasename=myuser

echo psql -h $server -U $username -d $databasename -f $importfile

docker run --rm \
  --network=host \
  -v $importfile:/script.sql \
  -e PGPASSWORD=$password \
  postgres:13.4-bullseye \
  psql -h $server -p $port -U $username -d $databasename -f script.sql
pg_stat_statements installieren
Um pg_stat_statements zu aktivieren, müssen wir die PostgreSQL-Konfiguration anpassen. Dazu bearbeiten wir die postgresql.conf. Da in dem Postgres Container kein Editor enthalten ist, ex- und importieren wir die Datei, um sie bearbeiten zu können:
I was on JCON 2024 and beside other interesting talks I heard one talk about cloud-based IDEs, and I wanted to try out, if GitHub Codespaces could work for me.
Explore the evolving landscape of cloud-based integrated development environments (IDEs), focusing on Gitpod, GitHub codespaces and Devpod. Compare and contrast these cloud IDEs with traditional counterparts, emphasizing the role of container technology, specifically the devcontainer specification. The discussion includes advances, existing limitations, and the potential for developing polyglot, container-based distributed applications. A live demo illustrates the rapid setup and coding process across various languages and frameworks, showcasing testing capabilities and seamless deployment to Kubernetes. Discover how custom additions enhance flexibility. Additionally, uncover the impact of cloud IDEs on teaching and team projects, ensuring consistent development setups for enhanced efficiency and streamlined processes.
[EN] Codespaces, Gitpod, Devpod ... what cloud and container-based IDEs can do for you by Matthias Haeussler (Novatec Consulting GmbH)
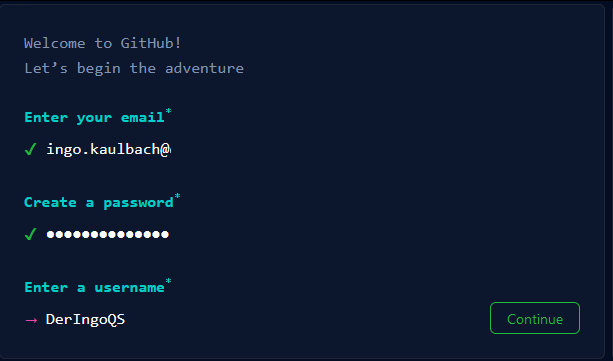
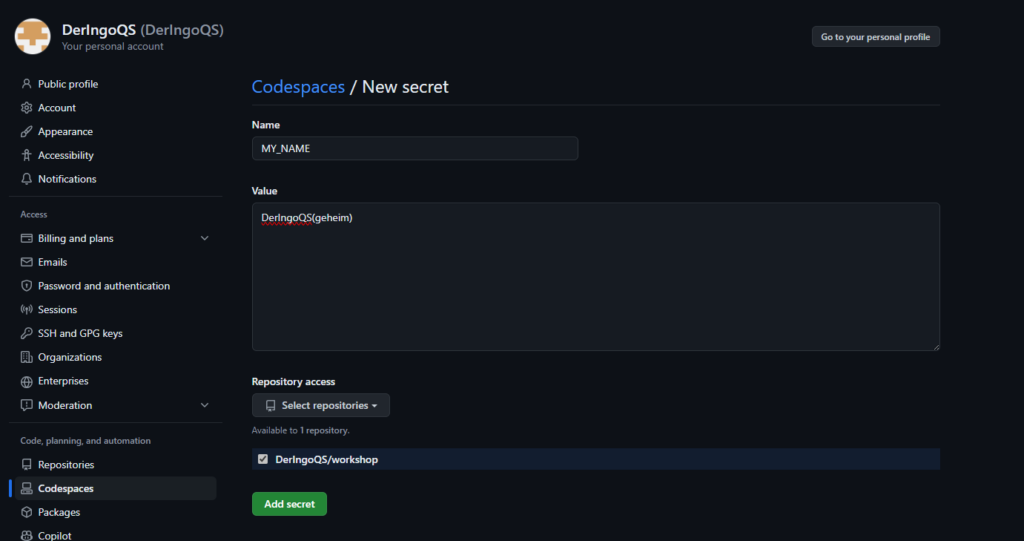
Create GitHub Account
Go to GitHub and create an account. Free plan is suitable.
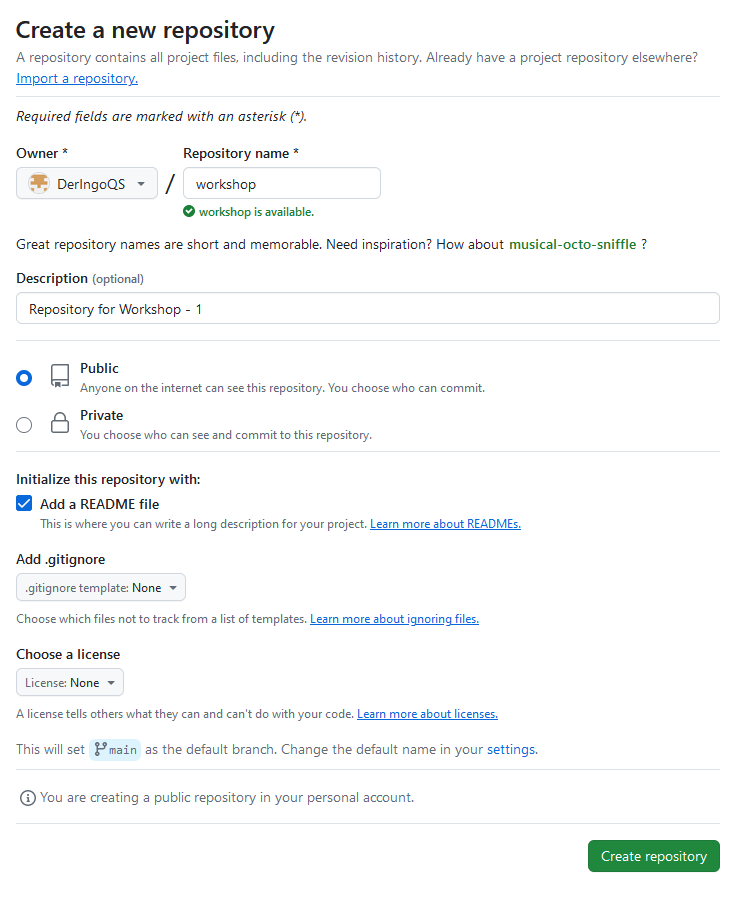
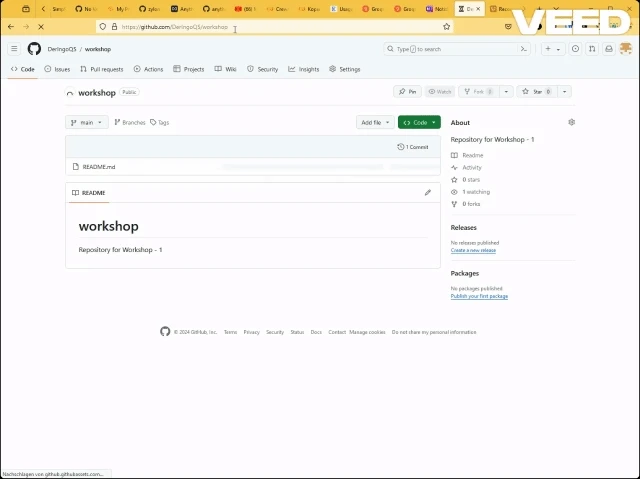
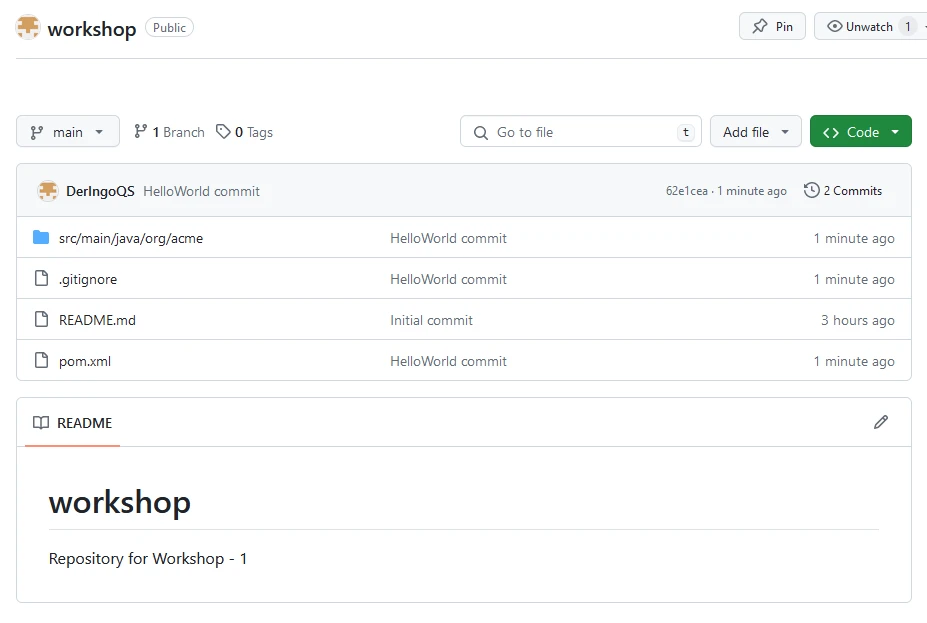
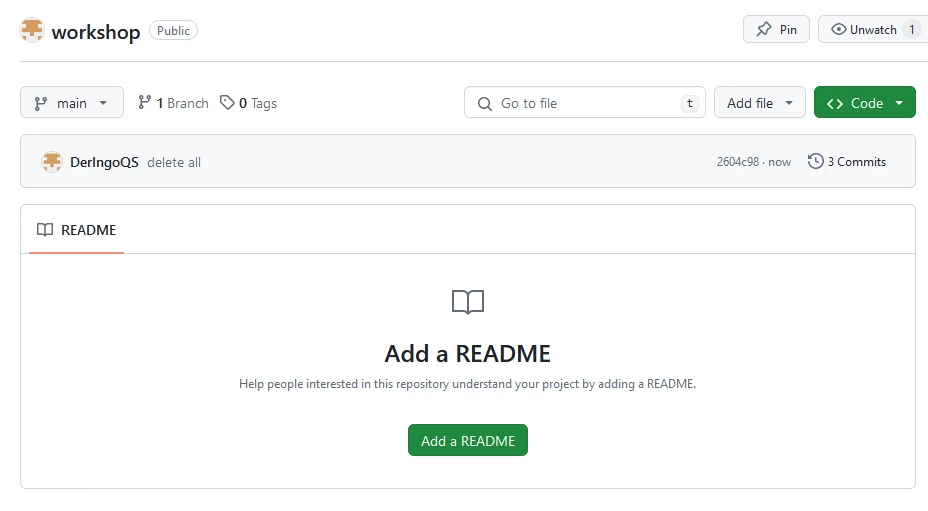
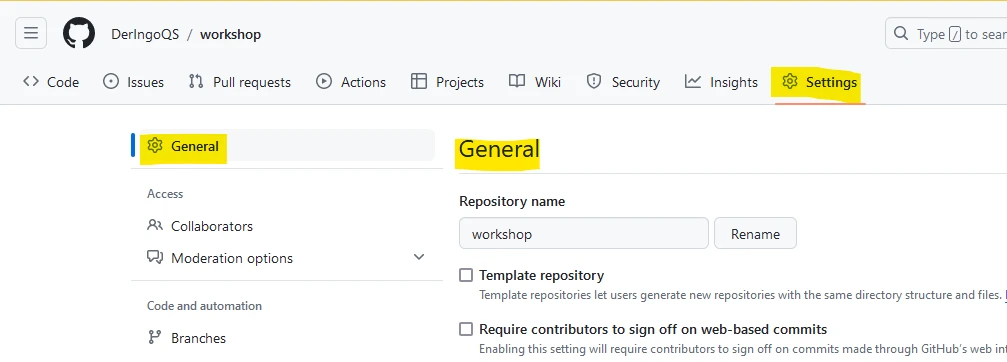
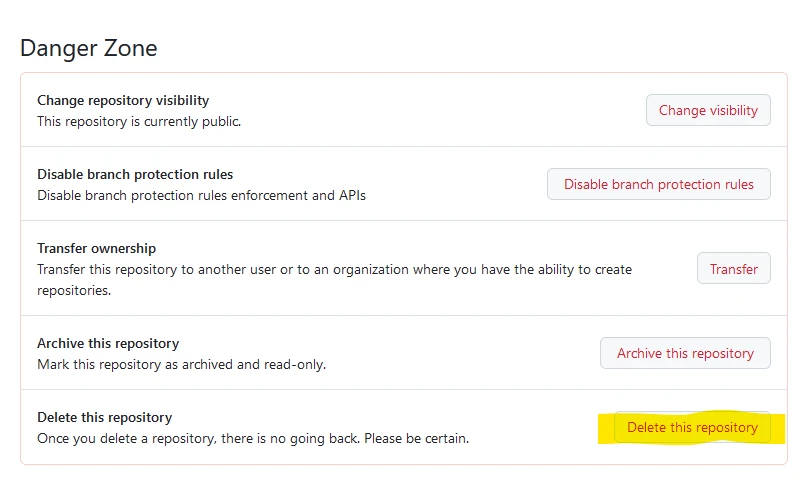
Create Repository
Create a new repository with name “workshop”. Add a README file.
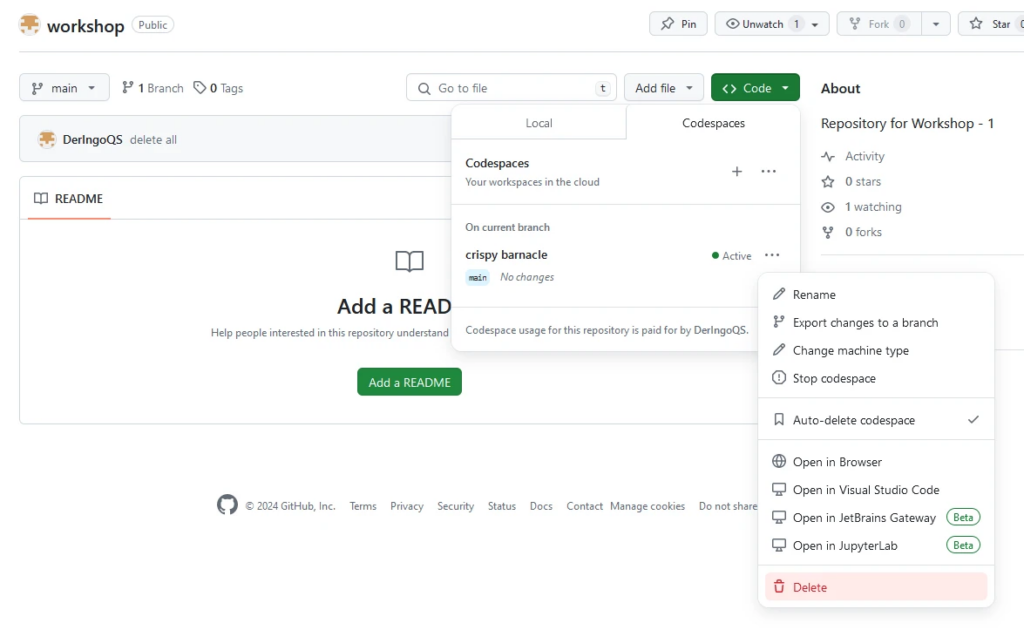
Create Codespace
TODO: funktioniert das GIF?
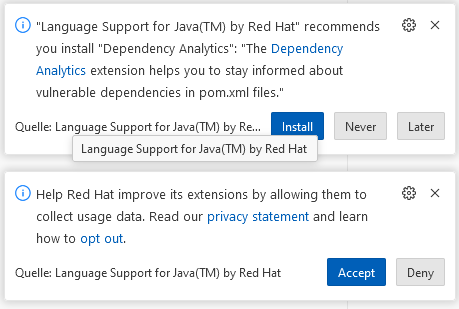
Change Keyboard Layout to German: In the lower right corner click on “Layout: US” and enter “German” in the upcoming window.
TODO: Ich hätte gerne die Sprache von Visual Code auf Englisch umgestellt. Wie?
Work in the Terminal
Copy & Paste
Type something into the terminal. Mark it with your mouse. One Right Click to copy into Clipboard. Another Right Click to paste from Clipboard.
Timezone
Set Timzone to Europe -> Berlin
sudo dpkg-reconfigure tzdata
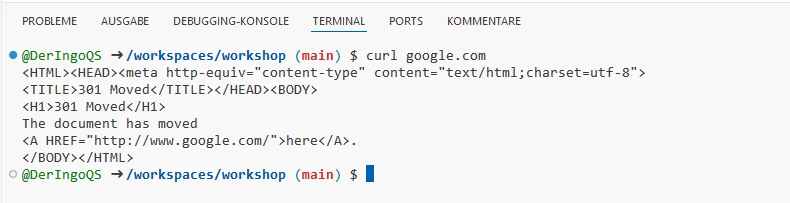
Internet
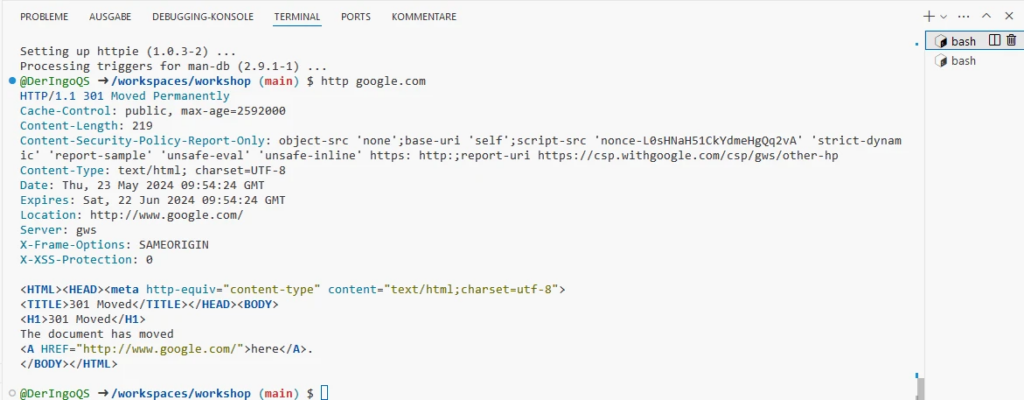
Do we have access to the Internet? Let’s try with curl:
This will take a few minutes. Meanwhile we can work in another Terminal window. Later we come back and test HTTPie:
http google.com
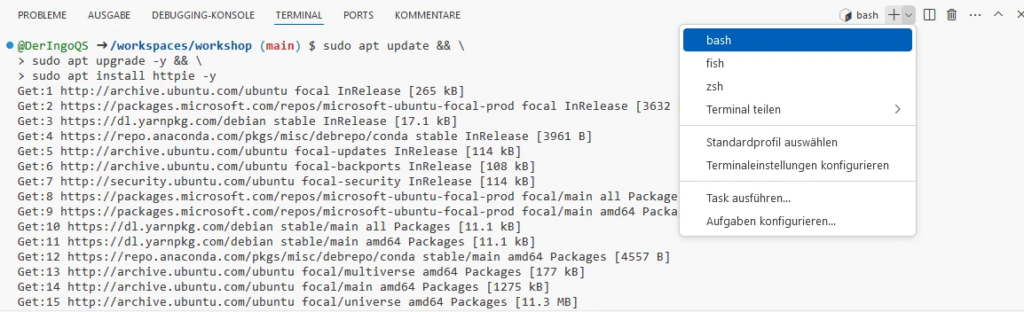
Additional Terminal window
Open a second Terminal with bash:
VIM
ls -lisah
touch test.sh
ls -lisah
vim test.sh
chmod +x test.sh
./test.sh
name=Ingo
echo "My name is $name"
echo "But here I am: $(whoami)"
Python
Do we have Python in our Codespace? Which version(s)?
python3 --version
python --version
vim hello_world.py
python hello_world.py
# Print "Hello World" to the console
print("Hello World")
Docker
docker --version
docker-compose --version
docker run hello-world
Apache HTTPD
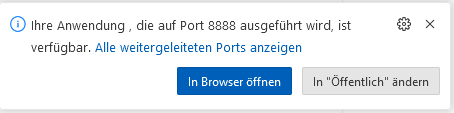
docker run -p 8888:80 httpd
Open in Browser:
Find all open Ports in the Ports-Tab:
Normally Port 8888 should be listed here. We need to add Port, just enter 8888:
Open Website just with a click on the Globus-Icon.
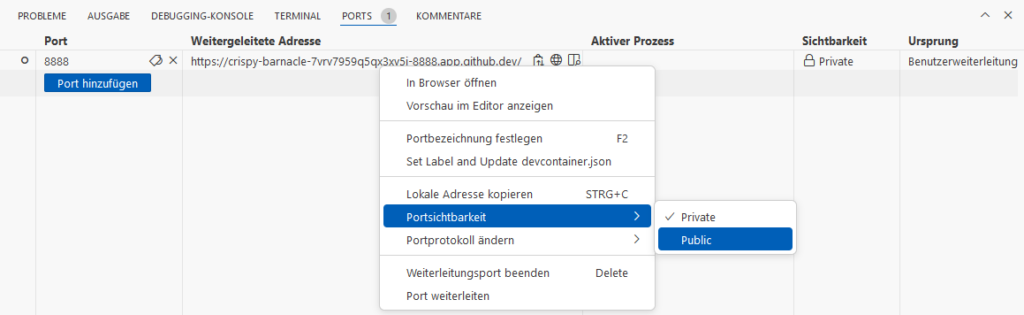
When we try to open the address in another browser, we will see a GitHub-Login. When we login with another GitHub-Account, we will get a 404-error. Because the page is Private. Switch to Public:
Now we can access the page in another brower.
At the end we can shutdown HTTPD with + in Terminal window. It should automatically disapear in the Ports-Tab. If not, you can remove it manually.
Microsoft Edge - Caching problem
Open the Public page in MS Edge. Make the page Private again. Try to open in a new browser, won’t work. Reload (the Public loaded) page in MS Edge: You can still see the site! This is a cached version and we need to force MS Edge to reload from server.
Open Developer Tools (F12 or ++), then you can Right Click on the reload button to have additional options:
Java
java --version
vim HelloWorld.java
javac HelloWorld.java
java HelloWorld
rm -f HelloWorld*
class HelloWorld {
  public static void main(String args[]) {
      System.out.println("Hello World");
  }
}
Run Java Source as Shell Scripts
type -a java
# java is /home/codespace/java/current/bin/java
# java is /usr/local/sdkman/candidates/java/current/bin/java

vim HelloWorld.sh
chmod +x HelloWorld.sh
./HelloWorld.sh
rm HelloWorld.sh
#!/home/codespace/java/current/bin/java --source 21

class HelloWorld {
  public static void main(String args[]) {
      System.out.println("Hello World");
  }
}
Maven
Start
We create a new pom.xml from scratch. We need a template. We will take “The Basics”-one from the Apache Maven POM Reference page.
4.0.0org.codehaus.mojomy-project1.0
mvn --version
vim pom.xml
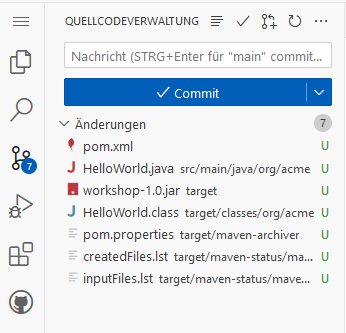
mvn clean verify
Sample Project
Open pom.xml in Explorer (GUI) and change:
org.codehaus.mojo to org.acme
my-project to workshop
No need to save: Changes are automatically saved
To doublecheck that everything is still ok run mvn clean verify again.
Dadurch werden die Logfiles mit dem User root geschrieben und ich kann sie mit meinem User ingo nicht lesen.
Auf der Console kann ich das leicht mit einem vorangestellten sudo lösen, aber um mal eben schnell in die Logfiles rein zu schauen würde ich gerne mein graphisches Tool WinSCP verwenden
Lösung
Man kann Docker / Docker Compose mit einem User starten und mit dem würden dann vermutlich auch die Logfiles geschrieben werden. Als ich das mit einem Tomcat Image getestet hatte, ist es daran gescheitert, dass mit meinem User ingo auf bestimmte Verzeichnisse im Container nicht zugegriffen werden konnte.
Gelöst habe ich es dann so, dass ich nicht den User, oder User und Gruppe, gesetzt habe, sondern nur die Gruppe. So wird mit dem root User gearbeitet, die Dateien gehören dem User root und für die gesetzte Gruppe sind sie lesbar. Mein User muss natürlich ebenfalls in der Gruppe sein.
Gruppe anlegen:
sudo groupadd -g 1001 logfilegroup
Die Group ID ist relativ willkürlich gesetzt. Eigentlich hatte ich groupadd ohne das -g Flag aufgerufen und dann mit cat /etc/group die Group ID rausgesucht. Hier wollte ich das Statement mit explizitem setzen der Group ID hinschreiben, da ich es auch im Projekt verwendet hatte, um auf jedem Server die selbe Group ID zu haben.
User der Gruppe hinzufügen:
sudo usermod --append --groups logfilegroup ingo
Mit den Befehlen groups oder id kann man die Gruppen seines Users sehen, die neue logfilegroup wird aber erst in einer neuen Shell hinzugefügt. Also entweder die Shell schließen und neu öffnen, oder mit su ingo weiter arbeiten.
ingo$ sudo usermod --append --groups logfilegroup ingo
ingo$ groups
ingo adm
ingo$ su ingo
Password:
ingo$ groups
ingo adm logfilegroup
Docker Compose File:
Im Docker Compose File muss die Group ID gesetzt werden, mit dem Namen der Gruppe geht es nicht.
Nachdem ich mich vor ca. zwei Jahren mal mit Redis auseinander gesetzt hatte, hat es sich jetzt ergeben, ein Beispielsetup in der Praxis umzusetzen.
Eine Anwendung, die auf einem Tomcat Server läuft, soll vorbereitet werden skalierbar gemacht zu werden. Dazu wird im ersten Schritt Redis als Session Cache für den Tomcat eingebunden und ein zweiter Tomcat daneben gestellt, der ebenfalls auf den Redis Session Cache zugreift. Zur Lastverteilung wird ein Reverse Proxy vor die beiden Tomcats gestellt.
Die Server laufen alle in Docker Containern und werden über eine Docker-Compose Datei gesteuert.
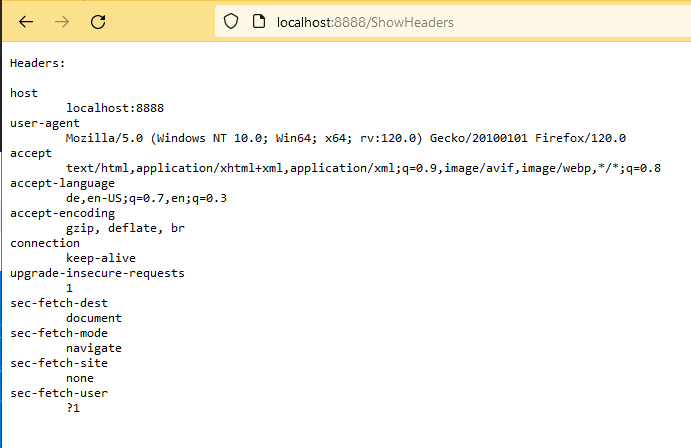
Als Beispielanwendung für dieses Projekt kommt mal wieder Show Headers zum Einsatz.
Die beiden Redisson Dateien von Redisson herunterladen und ebenfalls in das tomcat Verzeichnis kopieren.
Step 3
Es muss ein neues Tomcat Image inklusive Redisson gebaut werden, dazu ein neues Dockerfile im tomcat Ordner anlegen:
# https://hub.docker.com/_/tomcat
FROM tomcat:9.0.83-jre21

# Add Redis session manager dependencies
COPY ./redisson-all-3.22.0.jar $CATALINA_HOME/lib/
COPY ./redisson-tomcat-9-3.22.0.jar $CATALINA_HOME/lib/

# Replace the default Tomcat context.xml with custom context.xml
COPY ./context.xml $CATALINA_HOME/conf/

# Add Redisson configuration
COPY ./redisson.yaml $CATALINA_HOME/conf/

# Expose the port Tomcat will run on
EXPOSE 8080

# Start Tomcat
CMD ["catalina.sh", "run"]
Anstelle des image Eintrags in der docker-compose den build Eintrag setzen: "build: ./tomcat"
Testen
Erneut starten:
docker-compose up --detach
Und es läuft immer noch im Browser:
Redis
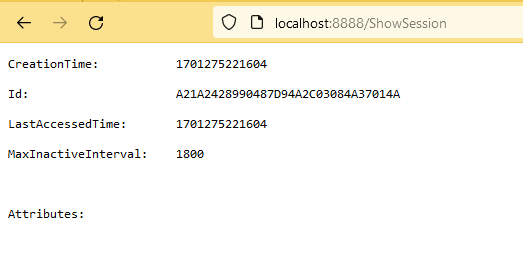
So weit so gut, aber wird auch wirklich der Redis Cache verwendet? Nein, denn bisher wurde noch gar keine Session erzeugt. Holen wir das nach, indem wir ShowSession aufrufen:
Schauen wir in der Redis Datenbank nach, indem wir uns zuerst in den Container connecten:
docker exec -it tomcatredissample-redis-1 bash
Dort die redis-cli starten und die Keys aller Einträge zeigen lassen mittels "keys *":
Dort ist ein Eintrag mit der Session ID aus meinem Browser zu finden. Es funktioniert!
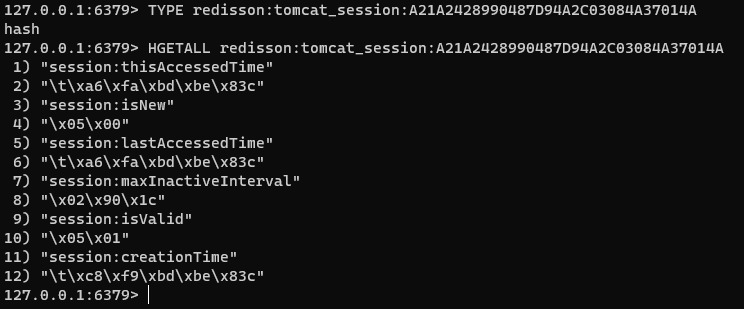
Welche Daten stehen in der Session? Um die Daten auslesen zu können, müssen wir erst den Datentyp mittels "TYPE" herausfinden, in diesem Fall ein "hash" und dann mit "HGETALL" anzeigen lassen:
Die seltsamen oder unlesbaren Informationen, die man sieht, wie z.B. "\t\xa6\xfa\xbd\xbe\x83c" für "session:thisAccessedTime", sind wahrscheinlich auf die Art und Weise zurückzuführen, wie Sitzungsdaten serialisiert werden, bevor sie in Redis gespeichert werden. Viele auf Java basierende Systeme, einschließlich solcher, die Tomcat für die Sitzungsverwaltung verwenden, serialisieren Objekte in ein binäres Format, bevor sie in einem Sitzungsspeicher wie Redis gespeichert werden. Diese binären Daten sind nicht direkt lesbar, wenn Sie sie mit Redis-Befehlen abrufen.
Um diese Daten zu interpretieren, müssen sie in ein lesbares Format deserialisiert werden. Darauf gehe ich hier aber nicht weiter ein.
Reverse Proxy
Der Reverse Proxy basiert auf Apache HTTPD 2.4 und wird der docker-compose Datei hinzugefügt.
Die httpd.conf Datei aus dem Container wird in den reverseproxy Ordner kopiert und am Ende erweitert:
Der anschließende Aufruf von http://localhost:8888/ShowSession funktioniert immer noch, Test bestanden.
Load Balancer
Im nächsten Schritt fügen wir einen Load Balancer hinzu, der erstmal auf genau den einen Tomcat "loadbalanced". Nach erfolgreichem Test wissen wir dann, dass der Load Balancer generell funktioniert und können dann weitere Server hinzufügen. Die erweiterte Apache Konfiguration:
Die einfachste Möglichkeit, mehrere Tomcat Server zu erzeugen, ist im Docker Compose weitere Replicas zu starten.
Docker Compose managed dann auch das Load Balancing, so dass alle Tomcat Instanzen über den Service Namen "tomcat" ansprechbar sind.
Wir haben damit ein doppeltes Load Balancing: Zuerst der Apache HTTPD der immer auf den "tomcat" loadbalanced und dann das wirkliche Load Balancing durch Docker auf die Replikas.
Jetzt die Variante ohne Replikas und mit zwei dedizierten Tomcat Servern. Die Zuteilung zum Server erfolgt beim Sessionaufbau sticky, aber wir können über Manipulation des Session Cookies den Server wechseln und so gezielt ansteuern.
In Docker Compose legen wir zwei Tomcat Server an:
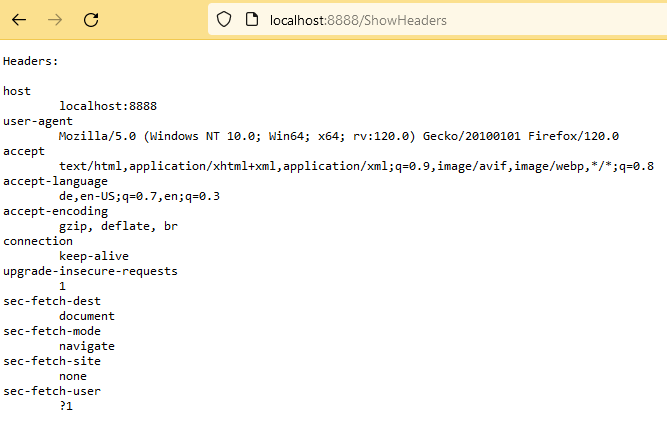
Ggf. Session Cookies im Browser löschen, dann http://localhost:8888/ShowServer bzw. http://localhost:8888/ShowHeaders aufrufen. Man kann erkennen, dass bei jedem Aufruf der Server gewechselt wird.
Beim erstmaligen Aufruf von http://localhost:8888/ShowSession wird die Session erzeugt und man wird einem Server zugewiesen.
Man kann sehen, dass die Session ID ein Postfix ".tomcat-1" bzw. ".tomcat-2" hat.
Man kann im Browser den Session Cookie editieren und den Postfix auf den anderen Server ändern, zb von "SESSIONID.tomcat-1" auf "SESSIONID.tomcat-2". Dadurch kann man dann den Server auswählen, auf den man gelangen möchte. Eigentlich zumindest, denn leider hat es nicht funktioniert.
Entweder muss noch irgendwo irgendwas konfiguriert werden, oder es könnte auch ein Bug in Redisson sein: Der Postfix wird als Teil der Session ID durch Redisson in Redis als Key gespeichert. Wenn man nun also lediglich den Postfix verändert, hat man eine ungültige Session ID und es wird eine neue Session generiert. Und so kann es irgendwie passieren, dass man wieder auf dem ursprünglichen Server landet, mit einer neuen Session. Es könnte auch am Reverse Proxy liegen, dass dort der Postfix abgeschnitten werden muss, bei der Kommunikation RP zu Tomcat und lediglich auf der Strecke RP zum Browser gesetzt werden muss.
Vielleicht werde ich die Ursache des Problems und deren Behebung ermitteln können, dann gibt es hier ein Update. Allerdings werde ich nicht allzuviel Energie hineinstecken können, da andere Sachen wichtiger sind, zumal die Lösung mit den Replikas und dem durch Docker bereitgestellten Load Balancing durchaus ausreichend sein sollten.
Everyone talks about Kubernetes, therefore I thought, it might be a good idea to get some experiences with this tool and install it on my developer machine.
To run a single node cluster of Kubernetes on my machine I will install Minikube.
My developer machine is a Windows computer with Ubuntu 20.04 on WSL 2.
$ minikube start
😄  minikube v1.30.1 on Ubuntu 20.04
✨  Automatically selected the docker driver. Other choices: none, ssh
📌  Using Docker driver with root privileges
👍  Starting control plane node minikube in cluster minikube
🚜  Pulling base image ...
💾  Downloading Kubernetes v1.26.3 preload ...
    > preloaded-images-k8s-v18-v1...:  397.02 MiB / 397.02 MiB  100.00% 3.21 Mi
    > gcr.io/k8s-minikube/kicbase...:  373.53 MiB / 373.53 MiB  100.00% 2.76 Mi
🔥  Creating docker container (CPUs=2, Memory=6300MB) ...
🐳  Preparing Kubernetes v1.26.3 on Docker 23.0.2 ...
    ▪ Generating certificates and keys ...
    ▪ Booting up control plane ...
    ▪ Configuring RBAC rules ...
🔗  Configuring bridge CNI (Container Networking Interface) ...
    ▪ Using image gcr.io/k8s-minikube/storage-provisioner:v5
🔎  Verifying Kubernetes components...
🌟  Enabled addons: default-storageclass, storage-provisioner
🏄  Done! kubectl is now configured to use "minikube" cluster and "default" namespace by default
Step 6: Minikube Basic operations
To check cluster status, run:
$ kubectl cluster-info
Kubernetes control plane is running at https://127.0.0.1:32769
CoreDNS is running at https://127.0.0.1:32769/api/v1/namespaces/kube-system/services/kube-dns:dns/proxy

To further debug and diagnose cluster problems, use 'kubectl cluster-info dump'.
Note that Minikube configuration file is located under ~/.minikube/machines/minikube/config.json
Let's doublecheck that minikube is a running Docker container:
$ sudo docker container ls
CONTAINER ID   IMAGE                                 COMMAND                  CREATED          STATUS          PORTS                                                                                                                                  NAMES
e36590b3ea7e   gcr.io/k8s-minikube/kicbase:v0.0.39   "/usr/local/bin/entr…"   28 minutes ago   Up 28 minutes   127.0.0.1:32772->22/tcp, 127.0.0.1:32771->2376/tcp, 127.0.0.1:32770->5000/tcp, 127.0.0.1:32769->8443/tcp, 127.0.0.1:32768->32443/tcp   minikube
ingo:~$ minikube dashboard --port=42827 &
[6] 55787
ingo:~$ 🤔  Verifying dashboard health ...
🚀  Launching proxy ...
🤔  Verifying proxy health ...
🎉  Opening http://127.0.0.1:42827/api/v1/namespaces/kubernetes-dashboard/services/http:kubernetes-dashboard:/proxy/ in your default browser...
👉  http://127.0.0.1:42827/api/v1/namespaces/kubernetes-dashboard/services/http:kubernetes-dashboard:/proxy/
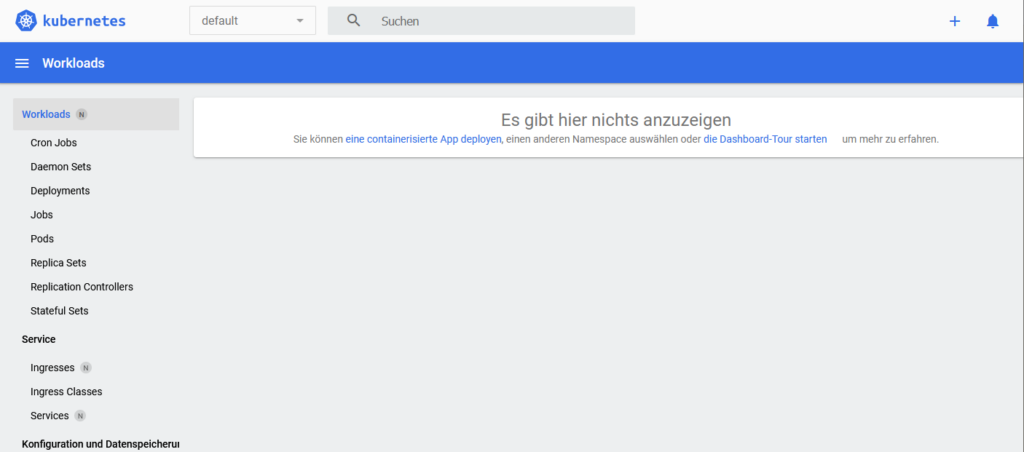
Open URL in Browser:
kubernetes dashboard
To enable a module use command:
minikube addons enable
Example:
$ minikube addons enable portainer
❗  portainer is a 3rd party addon and is not maintained or verified by minikube maintainers, enable at your own risk.
❗  portainer does not currently have an associated maintainer.
    ▪ Using image docker.io/portainer/portainer-ce:2.15.1
🌟  The 'portainer' addon is enabled
But I have no clue, what to do with the enabled 'portainer' addon. 🤷♂️
Deployments are the recommended way to manage the creation and scaling of Pods.
Use the kubectl create command to create a Deployment that manages a Pod. The Pod runs a Container based on the provided Docker image.
# Run a test container image that includes a webserver
kubectl create deployment hello-node --image=registry.k8s.io/e2e-test-images/agnhost:2.39 -- /agnhost netexec --http-port=8080
2. View the Deployment:
$ kubectl get deployments
NAME         READY   UP-TO-DATE   AVAILABLE   AGE
hello-node   0/1     1            0           9s
3. View the Pod:
$ kubectl get pods
NAME                          READY   STATUS    RESTARTS   AGE
hello-node-7b87cd5f68-rj79x   1/1     Running   0          67s
4. View cluster events:
kubectl get events
5. View the kubectl configuration:
kubectl config view
Create a Service
By default, the Pod is only accessible by its internal IP address within the Kubernetes cluster. To make the hello-node Container accessible from outside the Kubernetes virtual network, you have to expose the Pod as a Kubernetes Service.
Expose the Pod to the public internet using the kubectl expose command:
The --type=LoadBalancer flag indicates that you want to expose your Service outside of the cluster.
The application code inside the test image only listens on TCP port 8080. If you used kubectl expose to expose a different port, clients could not connect to that other port.
2. View the Service you created:
$ kubectl get services
NAME         TYPE           CLUSTER-IP       EXTERNAL-IP   PORT(S)          AGE
hello-node   LoadBalancer   10.101.148.235        8080:31331/TCP   2m52s
kubernetes   ClusterIP      10.96.0.1                443/TCP          71m
On cloud providers that support load balancers, an external IP address would be provisioned to access the Service. On minikube, the LoadBalancer type makes the Service accessible through the minikube service command.
3. Run the following command:
$ minikube service hello-node
|-----------|------------|-------------|---------------------------|
| NAMESPACE |    NAME    | TARGET PORT |            URL            |
|-----------|------------|-------------|---------------------------|
| default   | hello-node |        8080 | http://192.168.49.2:31331 |
|-----------|------------|-------------|---------------------------|
🏃  Starting tunnel for service hello-node.
|-----------|------------|-------------|------------------------|
| NAMESPACE |    NAME    | TARGET PORT |          URL           |
|-----------|------------|-------------|------------------------|
| default   | hello-node |             | http://127.0.0.1:34597 |
|-----------|------------|-------------|------------------------|
🎉  Opening service default/hello-node in default browser...
👉  http://127.0.0.1:34597
❗  Because you are using a Docker driver on linux, the terminal needs to be open to run it.
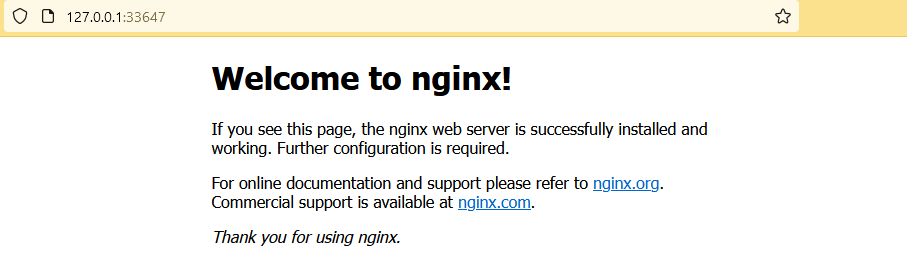
Open http://127.0.0.1:34597/ in a browser:
hello-node
4. View Pods and Services created in 'default' namespace:
$ kubectl get pod,svc -n default
NAME                              READY   STATUS    RESTARTS   AGE
pod/hello-node-7b87cd5f68-rj79x   1/1     Running   0          12m

NAME                 TYPE           CLUSTER-IP       EXTERNAL-IP   PORT(S)          AGE
service/hello-node   LoadBalancer   10.101.148.235        8080:31331/TCP   8m54s
service/kubernetes   ClusterIP      10.96.0.1                443/TCP          77m
5. Cleanup
$ kubectl delete service hello-node
service "hello-node" deleted
$ kubectl delete deployment hello-node
deployment.apps "hello-node" deleted
Lorem ipsum dolor sit amet, consetetur sadipscing elitr, sed diam nonumy eirmod tempor invidunt ut labore et dolore magna aliquyam erat, sed diam voluptua. At vero eos et accusam et justo duo dolores et ea rebum. Stet clita kasd gubergren, no sea takimata sanctus est Lorem ipsum dolor sit amet. Lorem ipsum dolor sit amet, consetetur sadipscing elitr, sed diam nonumy eirmod tempor invidunt ut labore et dolore magna aliquyam erat, sed diam voluptua. At vero eos et accusam et justo duo dolores et ea rebum. Stet clita kasd gubergren, no sea takimata sanctus est Lorem ipsum dolor sit amet.
Dockerfile for an nginx webserver to deliver this website:
FROM nginx
COPY index.html /usr/share/nginx/html
EXPOSE 80
Build, run and test image:
docker build -t myweb-image .
docker run -it -p 80:80 --name myweb-container myweb-image
$ http http://localhost
HTTP/1.1 200 OK
Accept-Ranges: bytes
Connection: keep-alive
Content-Length: 763
Content-Type: text/html
Date: Thu, 29 Jun 2023 15:57:54 GMT
ETag: "649da8a5-2fb"
Last-Modified: Thu, 29 Jun 2023 15:52:05 GMT
Server: nginx/1.25.1
Page Title


This is a Heading
This is a paragraph.
Lorem ipsum dolor sit amet, consetetur sadipscing elitr, sed diam nonumy eirmod tempor invidunt ut labore et dolore magna aliquyam erat, sed diam voluptua. At vero eos et accusam et justo duo dolores et ea rebum. Stet clita kasd gubergren, no sea takimata sanctus est Lorem ipsum dolor sit amet. Lorem ipsum dolor sit amet, consetetur sadipscing elitr, sed diam nonumy eirmod tempor invidunt ut labore et dolore magna aliquyam erat, sed diam voluptua. At vero eos et accusam et justo duo dolores et ea rebum. Stet clita kasd gubergren, no sea takimata sanctus est Lorem ipsum dolor sit amet.
kubectl apply -f myweb.yaml
kubectl get deployment
kubectl get service
Start Service:
minikube service myweb-service &
Check in Terminal:
$ http http://127.0.0.1:38915
HTTP/1.1 200 OK
Accept-Ranges: bytes
Connection: keep-alive
Content-Length: 763
Content-Type: text/html
Date: Thu, 29 Jun 2023 16:19:18 GMT
ETag: "649da8a5-2fb"
Last-Modified: Thu, 29 Jun 2023 15:52:05 GMT
Server: nginx/1.25.1


Page Title


This is a Heading
This is a paragraph.
Lorem ipsum dolor sit amet, consetetur sadipscing elitr, sed diam nonumy eirmod tempor invidunt ut labore et dolore magna aliquyam erat, sed diam voluptua. At vero eos et accusam et justo duo dolores et ea rebum. Stet clita kasd gubergren, no sea takimata sanctus est Lorem ipsum dolor sit amet. Lorem ipsum dolor sit amet, consetetur sadipscing elitr, sed diam nonumy eirmod tempor invidunt ut labore et dolore magna aliquyam erat, sed diam voluptua. At vero eos et accusam et justo duo dolores et ea rebum. Stet clita kasd gubergren, no sea takimata sanctus est Lorem ipsum dolor sit amet.
Cleanup:
$ kubectl delete -f myweb.yaml
Work in a pod
Start some pods & service and display them:
kubectl apply -f myweb.yaml
kubectl get all -o wide
Output:
NAME                                    READY   STATUS    RESTARTS   AGE     IP            NODE       NOMINATED NODE   READINESS GATES
pod/myweb-deployment-565b64686c-2nnrl   1/1     Running   0          3m42s   10.244.0.39   minikube
pod/myweb-deployment-565b64686c-m4p4c   1/1     Running   0          3m42s   10.244.0.41   minikube
pod/myweb-deployment-565b64686c-sx6sx   1/1     Running   0          3m42s   10.244.0.40   minikube

NAME                    TYPE        CLUSTER-IP      EXTERNAL-IP   PORT(S)        AGE     SELECTOR
service/kubernetes      ClusterIP   10.96.0.1               443/TCP        23h
service/myweb-service   NodePort    10.97.251.106           80:32715/TCP   3m42s   app=myweb-app

NAME                               READY   UP-TO-DATE   AVAILABLE   AGE     CONTAINERS        IMAGES            SELECTOR
deployment.apps/myweb-deployment   3/3     3            3           3m42s   myweb-container   myweb-image:1.0   app=myweb-app

NAME                                          DESIRED   CURRENT   READY   AGE     CONTAINERS        IMAGES            SELECTOR
replicaset.apps/myweb-deployment-565b64686c   3         3         3       3m42s   myweb-container   myweb-image:1.0   app=myweb-app,pod-template-hash=565b64686c
i
apt update
apt install httpie inetutils-ping -y

# Connect to another Pod via IP
http 10.244.0.39
# Connect to Service via IP
http 10.97.251.106
# Connect to Service via Service Name
http myweb-service

# Check IP of Service
ping myweb-service
## OUTPUT:
# PING myweb-service.default.svc.cluster.local (10.97.251.106): 56 data bytes

exit
Cleanup:
$ kubectl delete -f myweb.yaml
Environment Variable
Sample how to set an environment variable via deployment file:
Add env section to deployment file:
[...]
    spec:
      containers:
      - name: myweb-container
        image: myweb-image:1.0
        ports:
        - containerPort: 80
        env:
        - name: MY_ENV_1
          value: My Value No 1
        - name: MY_ENV_2
          value: My Value No 2
---
[...]
Start Pods, jump into Pod and check values:
kubectl apply -f myweb.yaml
kubectl get all -o wide

kubectl exec -it myweb-deployment-864984686b-5p7dn -- /bin/bash

## Inside Pod:
echo $MY_ENV_1
# Output: My Value No 1
echo $MY_ENV_2
# Output: My Value No 2
exit

# Cleanup:
kubectl delete -f myweb.yaml
Ich möchte eine lokale Oracle Datenbank mit Docker laufen lassen um so einige Sachen schnell lokal testen zu können. Hintergrund ist eine anstehende Cloud zu Cloud Migration einer bestehenden Anwendung, bei der zugleich die Oracle DB und Java aktualisiert werden wird.
Docker Image
Bei PostgreSQL war das mit der gedockerten Datenbank relativ einfach. Oracle macht es etwas schwieriger. Einfache Images, die man auf dem Docker Hub finden kann, existieren nicht. Statt dessen muss man ein GitHub Repository clonen und ein Shell Script ausführen, um ein Image zu erzeugen und in die lokale Registry zu schieben.
Frei verfügbar sind nur die Versionen Oracle Database 18c XE, 21c XE and 23c FREE. Ich entscheide mich, für die beiden Versionen 21c XE und 23c FREE das Image zu erzeugen und dann zuerst mit Version 23c FREE zu testen und ggf. später weitere Tests mit Version 21c XE machen zu können.
cd
mkdir oracle
cd oracle
git clone https://github.com/oracle/docker-images.git
cd docker-images/OracleDatabase/SingleInstance/dockerfiles/
./buildContainerImage.sh -h
./buildContainerImage.sh -f 23.2.0
# Oracle Database container image for 'free' version 23.2.0 is ready to be extended:
#
#    --> oracle/database:23.2.0-free
#
#  Build completed in 608 seconds.
./buildContainerImage.sh -x 21.3.0
# Version 23.2.0 does not have Express Edition available.
Die Erzeugung des zweiten Images hat leider nicht funktioniert. Da das erste Image schon so lange gebraucht hat und ich das zweite Image nur proaktiv anlegen wollte, bin ich auch momentan nicht großartig motiviert, dem jetzt weiter nachzugehen. Version 23c FREE reicht erst einmal.
Image direkt von Oracle
Nach dieser Doku kann man das Image auch direkt aus der Oracle Registry ziehen. Zumindest für Oracle Database 23c Free – Developer Release.
Docker Container
Die Dokumentation hat einen speziellen Abschnitt für 23c FREE
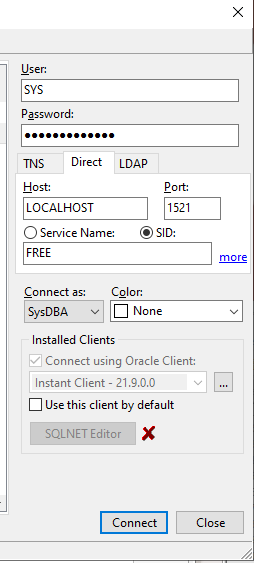
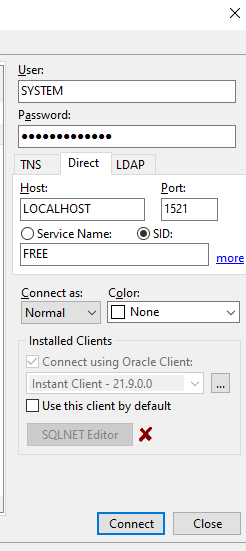
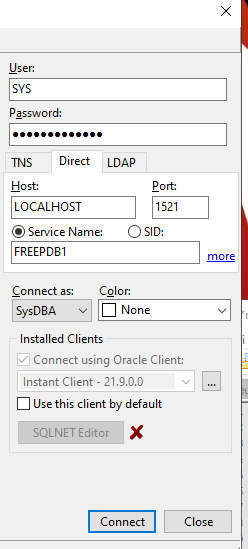
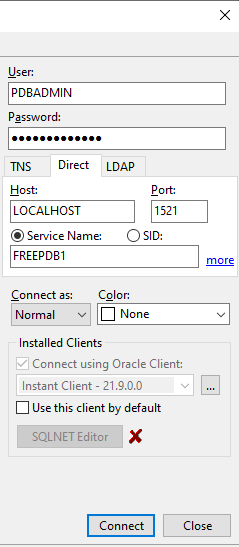
Den Abschnitt auf jeden Fall gut ansehen, ich habe den Container mit folgendem Befehl erzeugt:
Mit nachfolgenden Einstellungen konnte ich jeweils eine Verbindung aufbauen:
Java
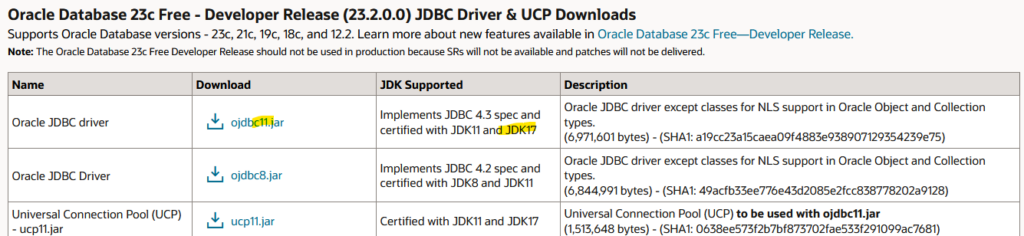
Auf der Seite für JDBC Download von Oracle können wir sehen, das der OJDBC11-Treiber für JDK17 zertifiziert ist:
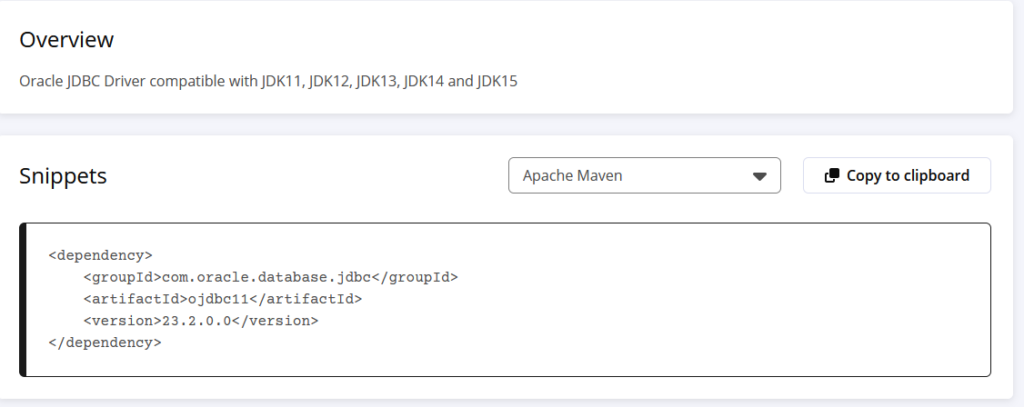
Anstelle des direkten Downloads kann man auch Maven verwenden, dort wird allerdings Kompatibilität nur bis JDK15 angegeben:
Ich vertraue da mehr der Oracle Seite und werde den Treiber verwenden und das Java Projekt mit JDK17 konfigurieren.
Testprojekt
Die pom.xml des Test Projektes:
4.0.0deringotestproject0.0.1-SNAPSHOTTest ProjectProjekt zum Testen von Sachen17UTF-8com.oracle.database.jdbcojdbc1123.2.0.0org.apache.maven.pluginsmaven-compiler-plugin3.11.0${java.version}${java.version}
Die Test Klasse, basierend auf dem Code-Snippet von Oracle:
package deringo.testproject;

import java.sql.Connection;
import java.sql.PreparedStatement;
import java.sql.ResultSet;

import oracle.jdbc.datasource.impl.OracleDataSource;

public class TestMain {

    public static void main(String[] args) throws Exception {
        OracleDataSource ods = new OracleDataSource();
        ods.setURL("jdbc:oracle:thin:@localhost:1521/FREEPDB1"); // jdbc:oracle:thin@[hostname]:[port]/[DB service name]
        ods.setUser("PDBADMIN");
        ods.setPassword("ingo5Password");
        Connection conn = ods.getConnection();

        PreparedStatement stmt = conn.prepareStatement("SELECT 'Hello World!' FROM dual");
        ResultSet rslt = stmt.executeQuery();
        while (rslt.next()) {
            System.out.println(rslt.getString(1));
        }
    }

}
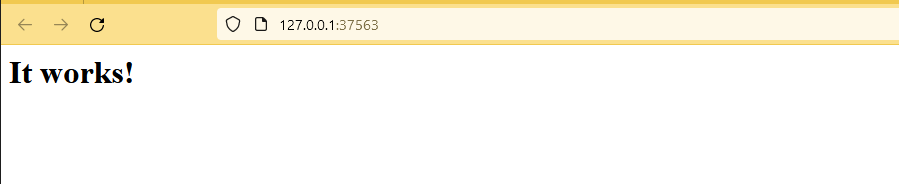
Nach dem Starten des Programmes lautet die Ausgabe auf der Console dann auch "Hello World!".
We have a very, very old application that needs to be migrated into AWS. So we copied all files into AWS EC2 instance and tried to start the application. After fixing a lot of minor problems we faced a tough challenge with a SAPJCO RFC Call.
The Exception message was something like this:
Exception in thread "main" java.lang.ExceptionInInitializerError: JCO.classInitialize(): Could not load middleware layer 'com.sap.mw.jco.rfc.MiddlewareRFC'
JCO.nativeInit(): Could not initialize dynamic link library sapjcorfc [sapjcorfc (Not found in java.library.path)]. java.library.path [/usr/lib/jvm/java-1.6.0-ibm.x86_64/jre/lib/amd64/default:/usr/lib/jvm/java-1.6.0-ibm.x86_64/jre/lib/amd64:/usr/lib]
        at com.sap.mw.jco.JCO.(JCO.java:871)
        at java.lang.J9VMInternals.initializeImpl(Native Method)
        at java.lang.J9VMInternals.initialize(J9VMInternals.java:199)
I guess, with a JCO Version 3 we would not have much trouble, but in this ancient application JCO Version 2 is used and we cannot update to Version 3 without a huge efford. In other projects I had the luck that I could migrate to Version.
The application is running on a Linux system. But belive me: it would have been much harder on a Windows machine.
Analysis
To find the cause of the problem I wrote the simpliest JCO Test Programm I can image:
import com.sap.mw.jco.JCO;

public class TestMain {

    public static void main(String[] args) {
        System.out.println(JCO.getVersion());
    }

}
Exception in thread "main" java.lang.ExceptionInInitializerError: JCO.classInitialize(): Could not load middleware layer 'com.sap.mw.jco.rfc.MiddlewareRFC'
JCO.nativeInit(): Could not initialize dynamic link library sapjcorfc [/app/JCo/libsapjcorfc.so: librfccm.so: cannot open shared object file: No such file or directory]. java.library.path [/app/JCo]
        at com.sap.mw.jco.JCO.(JCO.java:871)
        at TestMain.main(TestMain.java:11)
Need to set an environment property first:
export LD_LIBRARY_PATH=/app/JCo
Run command line to start programm again and got another error:
Exception in thread "main" java.lang.ExceptionInInitializerError: JCO.classInitialize(): Could not load middleware layer 'com.sap.mw.jco.rfc.MiddlewareRFC'
JCO.nativeInit(): Could not initialize dynamic link library sapjcorfc [/app/JCo/libsapjcorfc.so: libstdc++.so.5: cannot open shared object file: No such file or directory]. java.library.path [/app/JCo]
        at com.sap.mw.jco.JCO.(JCO.java:871)
        at TestMain.main(TestMain.java:11)
The interesting part of the error message:
Could not initialize dynamic link library sapjcorfc [/app/JCo/libsapjcorfc.so: libstdc++.so.5
Solution
We need the libstdc++.so.5 library, but installed is libstdc++.so.6
To get libstdc++.so.5 we installed package compat-libstdc++-33-3.2.3-66.x86_64:
yum install compat-libstdc++-33-3.2.3-66.x86_64

## to be honest, I am not exactly 100% sure, what I did in my investigations, so the command may be a little differend, ex:
# yum install compat-libstdc++-33-3
# yum install compat-libstdc++-33
# yum install compat-libstdc++-33 libstdc++.so.5
Test
Run from command line:
java -cp ".:/app/JCo/sapjco.jar" TestMain
That gave me no error, but SAPJCo Version number.:
libstdc++.so.5 is a very old version of the standard c++ library.
Some Analysis Details
Writing this article is giving me the feeling, that this was all super easy. But in reality it was a real pain in the allerwertesten.
To isolate the source of the problem, I did not only write the small Java (JCO.getVersion) application, I also set up a Docker environment.
One challenge was to find a useful Docker image to start from. I started with an OpenJDK Image that was already deprecated. Deprecated was not the problem, but I could not install libstdc++.so.5.
Next I tried to use the newer, undeprecated Eclipse-Temurin Image. But still could not install libstdc++.so.5
So I finally ended in a Debian Image and self installed Java where I was able to install libstdc++5.
But there is one problem: You can only interact with a running container. But the TestMain-Programm is executed and immediately closed.
So I wrote another Test Programm, that keeps running, so I can enter the running container and test stuff (install packages, compile Java programm, etc.):
import java.io.BufferedReader;
import java.io.InputStreamReader;

import com.sap.mw.jco.JCO;

public class TestMain {

    public static void main(String[] args) {
        System.out.println("Hello World");
        //System.out.println("JCO Version: " + JCO.getVersion());

        while (true) {
            BufferedReader br = new BufferedReader(new InputStreamReader(System.in));
            System.out.println("Enter Input : ");
            try {
                String s = br.readLine();
                System.out.println(s);
            }catch(Exception e) {
                System.out.println(e);
            }
        }

    }

}