Everyone talks about Kubernetes, therefore I thought, it might be a good idea to get some experiences with this tool and install it on my developer machine.
To run a single node cluster of Kubernetes on my machine I will install Minikube.
My developer machine is a Windows computer with Ubuntu 20.04 on WSL 2.
Here my notes while I go along this tutorial: How To Install Minikube on Ubuntu 22.04|20.04|18.04
Step 3: Download minikube on Ubuntu
I will put the minikube binary under /usr/local/bin directory since it is inside $PATH.
wget https://storage.googleapis.com/minikube/releases/latest/minikube-linux-amd64
chmod +x minikube-linux-amd64
sudo mv minikube-linux-amd64 /usr/local/bin/minikube
Confirm version installed
$ minikube version
minikube version: v1.30.1
commit: 08896fd1dc362c097c925146c4a0d0dac715ace0
Step 4: Install kubectl on Ubuntu
We need kubectl which is a command line tool used to deploy and manage applications on Kubernetes:
curl -LO https://storage.googleapis.com/kubernetes-release/release/`curl -s https://storage.googleapis.com/kubernetes-release/release/stable.txt`/bin/linux/amd64/kubectl
chmod +x ./kubectl
sudo mv ./kubectl /usr/local/bin/kubectl
Check version:
$ kubectl version -o json  --client
{
  "clientVersion": {
    "major": "1",
    "minor": "27",
    "gitVersion": "v1.27.3",
    "gitCommit": "25b4e43193bcda6c7328a6d147b1fb73a33f1598",
    "gitTreeState": "clean",
    "buildDate": "2023-06-14T09:53:42Z",
    "goVersion": "go1.20.5",
    "compiler": "gc",
    "platform": "linux/amd64"
  },
  "kustomizeVersion": "v5.0.1"
}
Step 5: Starting minikube on Ubuntu
$ minikube start
😄  minikube v1.30.1 on Ubuntu 20.04
✨  Automatically selected the docker driver. Other choices: none, ssh
📌  Using Docker driver with root privileges
👍  Starting control plane node minikube in cluster minikube
🚜  Pulling base image ...
💾  Downloading Kubernetes v1.26.3 preload ...
    > preloaded-images-k8s-v18-v1...:  397.02 MiB / 397.02 MiB  100.00% 3.21 Mi
    > gcr.io/k8s-minikube/kicbase...:  373.53 MiB / 373.53 MiB  100.00% 2.76 Mi
🔥  Creating docker container (CPUs=2, Memory=6300MB) ...
🐳  Preparing Kubernetes v1.26.3 on Docker 23.0.2 ...
    ▪ Generating certificates and keys ...
    ▪ Booting up control plane ...
    ▪ Configuring RBAC rules ...
🔗  Configuring bridge CNI (Container Networking Interface) ...
    ▪ Using image gcr.io/k8s-minikube/storage-provisioner:v5
🔎  Verifying Kubernetes components...
🌟  Enabled addons: default-storageclass, storage-provisioner
🏄  Done! kubectl is now configured to use "minikube" cluster and "default" namespace by default
Step 6: Minikube Basic operations
To check cluster status, run:
$ kubectl cluster-info
Kubernetes control plane is running at https://127.0.0.1:32769
CoreDNS is running at https://127.0.0.1:32769/api/v1/namespaces/kube-system/services/kube-dns:dns/proxy

To further debug and diagnose cluster problems, use 'kubectl cluster-info dump'.
Note that Minikube configuration file is located under ~/.minikube/machines/minikube/config.json
To View Config, use:
$ # cat ~/.minikube/machines/minikube/config.json
$ kubectl config view
apiVersion: v1
clusters:
- cluster:
    certificate-authority: /home/ingo/.minikube/ca.crt
    extensions:
    - extension:
        last-update: Thu, 29 Jun 2023 12:34:35 CEST
        provider: minikube.sigs.k8s.io
        version: v1.30.1
      name: cluster_info
    server: https://127.0.0.1:32769
  name: minikube
contexts:
- context:
    cluster: minikube
    extensions:
    - extension:
        last-update: Thu, 29 Jun 2023 12:34:35 CEST
        provider: minikube.sigs.k8s.io
        version: v1.30.1
      name: context_info
    namespace: default
    user: minikube
  name: minikube
current-context: minikube
kind: Config
preferences: {}
users:
- name: minikube
  user:
    client-certificate: /home/ingo/.minikube/profiles/minikube/client.crt
    client-key: /home/ingo/.minikube/profiles/minikube/client.key
To check running nodes:
$ kubectl get nodes
NAME       STATUS   ROLES           AGE   VERSION
minikube   Ready    control-plane   26m   v1.26.3
Access minikube VM using ssh:
$ minikube ssh
docker@minikube:~$
docker@minikube:~$ exit
logout
Let's doublecheck that minikube is a running Docker container:
$ sudo docker container ls
CONTAINER ID   IMAGE                                 COMMAND                  CREATED          STATUS          PORTS                                                                                                                                  NAMES
e36590b3ea7e   gcr.io/k8s-minikube/kicbase:v0.0.39   "/usr/local/bin/entr…"   28 minutes ago   Up 28 minutes   127.0.0.1:32772->22/tcp, 127.0.0.1:32771->2376/tcp, 127.0.0.1:32770->5000/tcp, 127.0.0.1:32769->8443/tcp, 127.0.0.1:32768->32443/tcp   minikube
To stop a running local kubernetes cluster, run:
minikube stop
To delete a local kubernetes cluster, use:
minikube delete
To start local kubernetes cluster:
minikube start
Step 7: Minikube Addons
Display installed and enabled Minikube addons:
$ minikube addons list
|-----------------------------|----------|--------------|--------------------------------|
|         ADDON NAME          | PROFILE  |    STATUS    |           MAINTAINER           |
|-----------------------------|----------|--------------|--------------------------------|
| ambassador                  | minikube | disabled     | 3rd party (Ambassador)         |
| auto-pause                  | minikube | disabled     | Google                         |
| cloud-spanner               | minikube | disabled     | Google                         |
| csi-hostpath-driver         | minikube | disabled     | Kubernetes                     |
| dashboard                   | minikube | enabled ✅   | Kubernetes                     |
| default-storageclass        | minikube | enabled ✅   | Kubernetes                     |
| efk                         | minikube | disabled     | 3rd party (Elastic)            |
| freshpod                    | minikube | disabled     | Google                         |
| gcp-auth                    | minikube | disabled     | Google                         |
| gvisor                      | minikube | disabled     | Google                         |
| headlamp                    | minikube | disabled     | 3rd party (kinvolk.io)         |
| helm-tiller                 | minikube | disabled     | 3rd party (Helm)               |
| inaccel                     | minikube | disabled     | 3rd party (InAccel             |
|                             |          |              | [info@inaccel.com])            |
| ingress                     | minikube | disabled     | Kubernetes                     |
| ingress-dns                 | minikube | disabled     | Google                         |
| istio                       | minikube | disabled     | 3rd party (Istio)              |
| istio-provisioner           | minikube | disabled     | 3rd party (Istio)              |
| kong                        | minikube | disabled     | 3rd party (Kong HQ)            |
| kubevirt                    | minikube | disabled     | 3rd party (KubeVirt)           |
| logviewer                   | minikube | disabled     | 3rd party (unknown)            |
| metallb                     | minikube | disabled     | 3rd party (MetalLB)            |
| metrics-server              | minikube | disabled     | Kubernetes                     |
| nvidia-driver-installer     | minikube | disabled     | Google                         |
| nvidia-gpu-device-plugin    | minikube | disabled     | 3rd party (Nvidia)             |
| olm                         | minikube | disabled     | 3rd party (Operator Framework) |
| pod-security-policy         | minikube | disabled     | 3rd party (unknown)            |
| portainer                   | minikube | enabled ✅   | 3rd party (Portainer.io)       |
| registry                    | minikube | disabled     | Google                         |
| registry-aliases            | minikube | disabled     | 3rd party (unknown)            |
| registry-creds              | minikube | disabled     | 3rd party (UPMC Enterprises)   |
| storage-provisioner         | minikube | enabled ✅   | Google                         |
| storage-provisioner-gluster | minikube | disabled     | 3rd party (Gluster)            |
| volumesnapshots             | minikube | disabled     | Kubernetes                     |
|-----------------------------|----------|--------------|--------------------------------|
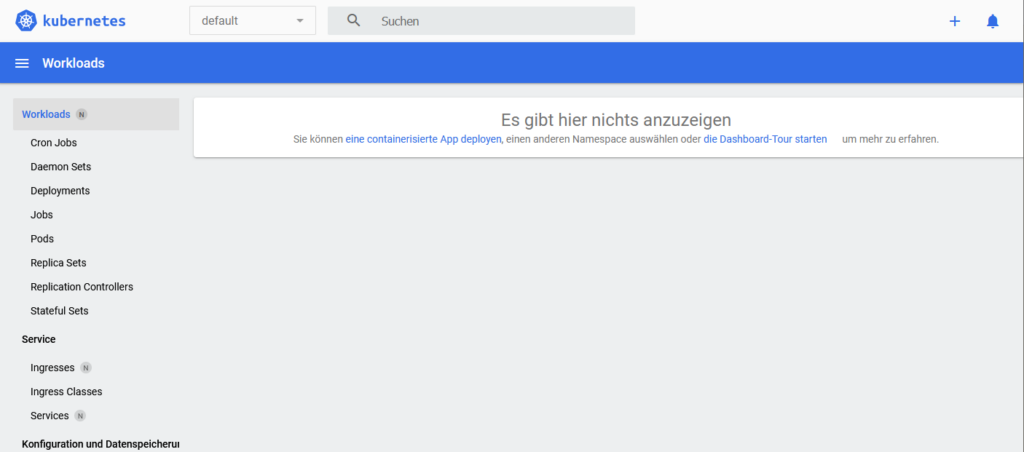
Start dashboard:
ingo:~$ minikube dashboard --port=42827 &
[6] 55787
ingo:~$ 🤔  Verifying dashboard health ...
🚀  Launching proxy ...
🤔  Verifying proxy health ...
🎉  Opening http://127.0.0.1:42827/api/v1/namespaces/kubernetes-dashboard/services/http:kubernetes-dashboard:/proxy/ in your default browser...
👉  http://127.0.0.1:42827/api/v1/namespaces/kubernetes-dashboard/services/http:kubernetes-dashboard:/proxy/
Open URL in Browser:
To enable a module use command:
minikube addons enable <module>
Example:
$ minikube addons enable portainer
❗  portainer is a 3rd party addon and is not maintained or verified by minikube maintainers, enable at your own risk.
❗  portainer does not currently have an associated maintainer.
    ▪ Using image docker.io/portainer/portainer-ce:2.15.1
🌟  The 'portainer' addon is enabled
But I have no clue, what to do with the enabled 'portainer' addon. 🤷♂️
For the next steps I used a tutorial from kubernetes:
Create a Deployment
Deployments are the recommended way to manage the creation and scaling of Pods.
- Use the
kubectl createcommand to create a Deployment that manages a Pod. The Pod runs a Container based on the provided Docker image.
# Run a test container image that includes a webserver
kubectl create deployment hello-node --image=registry.k8s.io/e2e-test-images/agnhost:2.39 -- /agnhost netexec --http-port=8080
2. View the Deployment:
$ kubectl get deployments
NAME         READY   UP-TO-DATE   AVAILABLE   AGE
hello-node   0/1     1            0           9s
3. View the Pod:
$ kubectl get pods
NAME                          READY   STATUS    RESTARTS   AGE
hello-node-7b87cd5f68-rj79x   1/1     Running   0          67s
4. View cluster events:
kubectl get events
5. View the kubectl configuration:
kubectl config view
Create a Service
By default, the Pod is only accessible by its internal IP address within the Kubernetes cluster. To make the hello-node Container accessible from outside the Kubernetes virtual network, you have to expose the Pod as a Kubernetes Service.
- Expose the Pod to the public internet using the
kubectl exposecommand:
kubectl expose deployment hello-node --type=LoadBalancer --port=8080
The --type=LoadBalancer flag indicates that you want to expose your Service outside of the cluster.
The application code inside the test image only listens on TCP port 8080. If you used kubectl expose to expose a different port, clients could not connect to that other port.
2. View the Service you created:
$ kubectl get services
NAME         TYPE           CLUSTER-IP       EXTERNAL-IP   PORT(S)          AGE
hello-node   LoadBalancer   10.101.148.235   <pending>     8080:31331/TCP   2m52s
kubernetes   ClusterIP      10.96.0.1        <none>        443/TCP          71m
On cloud providers that support load balancers, an external IP address would be provisioned to access the Service. On minikube, the LoadBalancer type makes the Service accessible through the minikube service command.
3. Run the following command:
$ minikube service hello-node
|-----------|------------|-------------|---------------------------|
| NAMESPACE |    NAME    | TARGET PORT |            URL            |
|-----------|------------|-------------|---------------------------|
| default   | hello-node |        8080 | http://192.168.49.2:31331 |
|-----------|------------|-------------|---------------------------|
🏃  Starting tunnel for service hello-node.
|-----------|------------|-------------|------------------------|
| NAMESPACE |    NAME    | TARGET PORT |          URL           |
|-----------|------------|-------------|------------------------|
| default   | hello-node |             | http://127.0.0.1:34597 |
|-----------|------------|-------------|------------------------|
🎉  Opening service default/hello-node in default browser...
👉  http://127.0.0.1:34597
❗  Because you are using a Docker driver on linux, the terminal needs to be open to run it.
Open http://127.0.0.1:34597/ in a browser:

4. View Pods and Services created in 'default' namespace:
$ kubectl get pod,svc -n default
NAME                              READY   STATUS    RESTARTS   AGE
pod/hello-node-7b87cd5f68-rj79x   1/1     Running   0          12m

NAME                 TYPE           CLUSTER-IP       EXTERNAL-IP   PORT(S)          AGE
service/hello-node   LoadBalancer   10.101.148.235   <pending>     8080:31331/TCP   8m54s
service/kubernetes   ClusterIP      10.96.0.1        <none>        443/TCP          77m
5. Cleanup
$ kubectl delete service hello-node
service "hello-node" deleted
$ kubectl delete deployment hello-node
deployment.apps "hello-node" deleted
Next Steps from Crash-Kurs Kubernetes.
Filebased Deployment
Create deployment file:
apiVersion: apps/v1
kind: Deployment
metadata:
  name: nginx-deployment
  labels:
    app: nginx
spec:
  replicas: 3
  selector:
    matchLabels:
      app: nginx
  template:
    metadata:
      labels:
        app: nginx
    spec:
      containers:
      - name: nginx
        image: nginx:latest
        ports:
        - containerPort: 8080
Create Deployment:
kubectl apply -f deployment.yaml
kubectl get deployment
Create & Start Service:
kubectl expose deployment nginx-deployment --type=LoadBalancer --port=80
kubectl list service

minikube service nginx-deployment &
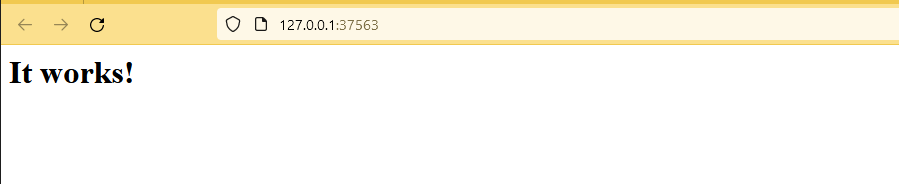
Check in Browser:
Cleanup:
kubectl delete service nginx-deployment
kubectl delete deployment nginx-deployment
Update deployment from nginx to httpd:
apiVersion: apps/v1
kind: Deployment
metadata:
  name: nginx-deployment
  labels:
    app: nginx
spec:
  replicas: 3
  selector:
    matchLabels:
      app: nginx
  template:
    metadata:
      labels:
        app: nginx
    spec:
      containers:
      - name: httpd
        image: httpd:latest
        ports:
        - containerPort: 8080
Create Deployment:
kubectl apply -f deployment.yaml
kubectl get deployment
Create & Start Service:
kubectl expose deployment nginx-deployment --type=LoadBalancer --port=80
kubectl list service

minikube service nginx-deployment &
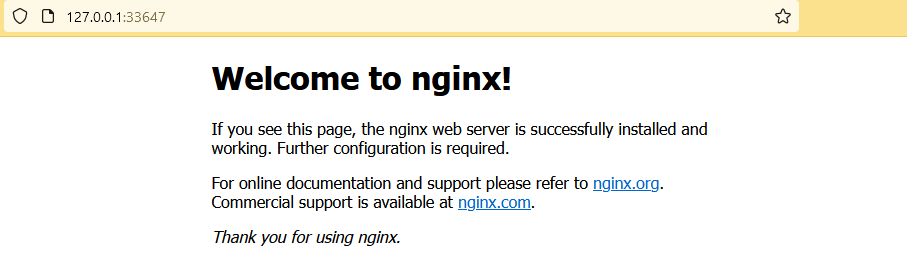
Check in Browser:
Also check in Terminal:
$ http http://127.0.0.1:37563
HTTP/1.1 200 OK
Accept-Ranges: bytes
Connection: Keep-Alive
Content-Length: 45
Content-Type: text/html
Date: Thu, 29 Jun 2023 14:39:47 GMT
ETag: "2d-432a5e4a73a80"
Keep-Alive: timeout=5, max=100
Last-Modified: Mon, 11 Jun 2007 18:53:14 GMT
Server: Apache/2.4.57 (Unix)

<html><body><h1>It works!</h1></body></html>
Cleanup:
kubectl delete service nginx-deployment
kubectl delete deployment nginx-deployment
Filebased Service
Create deployment file:
apiVersion: apps/v1
kind: Deployment
metadata:
  name: nginx-deployment
  labels:
    app: nginx
    version: "1.0"
spec:
  replicas: 3
  selector:
    matchLabels:
      app: nginx
  template:
    metadata:
      labels:
        app: nginx
    spec:
      containers:
      - name: nginx
        image: nginx:latest
        ports:
        - containerPort: 80
---
apiVersion: v1
kind: Service
metadata:
  name: nginx-service
  labels:
    app: nginx
spec:
  type: NodePort
  ports:
  - port: 80
    targetPort: 80
    protocol: TCP
  selector:
    app: nginx
Create Deployment & Service:
kubectl apply -f deployment.yaml
kubectl get deployment
kubectl get service
Start Service:
minikube service nginx-service &
Check in Terminal:
$ http http://127.0.0.1:45137
HTTP/1.1 200 OK
Accept-Ranges: bytes
Connection: keep-alive
Content-Length: 615
Content-Type: text/html
Date: Thu, 29 Jun 2023 14:57:23 GMT
ETag: "6488865a-267"
Last-Modified: Tue, 13 Jun 2023 15:08:10 GMT
Server: nginx/1.25.1

<!DOCTYPE html>
<html>
<head>
<title>Welcome to nginx!</title>
<style>
html { color-scheme: light dark; }
body { width: 35em; margin: 0 auto;
font-family: Tahoma, Verdana, Arial, sans-serif; }
</style>
</head>
<body>
<h1>Welcome to nginx!</h1>
<p>If you see this page, the nginx web server is successfully installed and
working. Further configuration is required.</p>

<p>For online documentation and support please refer to
<a href="http://nginx.org/">nginx.org</a>.<br/>
Commercial support is available at
<a href="http://nginx.com/">nginx.com</a>.</p>

<p><em>Thank you for using nginx.</em></p>
</body>
</html>
Cleanup:
$ kubectl delete -f deployment.yaml
deployment.apps "nginx-deployment" deleted
service "nginx-service" deleted
Website from nginx-Webserver
Build Docker Image
Simple Website:
<!DOCTYPE html>
<html>
<head>
<title>Page Title</title>
</head>
<body>
<h1>This is a Heading</h1>
<p style="color: green;">This is a paragraph.</p>
<p>Lorem ipsum dolor sit amet, consetetur sadipscing elitr, sed diam nonumy eirmod tempor invidunt ut labore et dolore magna aliquyam erat, sed diam voluptua. At vero eos et accusam et justo duo dolores et ea rebum. Stet clita kasd gubergren, no sea takimata sanctus est Lorem ipsum dolor sit amet. Lorem ipsum dolor sit amet, consetetur sadipscing elitr, sed diam nonumy eirmod tempor invidunt ut labore et dolore magna aliquyam erat, sed diam voluptua. At vero eos et accusam et justo duo dolores et ea rebum. Stet clita kasd gubergren, no sea takimata sanctus est Lorem ipsum dolor sit amet.</p>
</body>
</html>
Dockerfile for an nginx webserver to deliver this website:
FROM nginx

COPY index.html /usr/share/nginx/html

EXPOSE 80
Build, run and test image:
docker build -t myweb-image .
docker run -it -p 80:80 --name myweb-container myweb-image


$ http http://localhost
HTTP/1.1 200 OK
Accept-Ranges: bytes
Connection: keep-alive
Content-Length: 763
Content-Type: text/html
Date: Thu, 29 Jun 2023 15:57:54 GMT
ETag: "649da8a5-2fb"
Last-Modified: Thu, 29 Jun 2023 15:52:05 GMT
Server: nginx/1.25.1

<!DOCTYPE html>
<html>
<head>
<title>Page Title</title>
</head>
<body>
<h1>This is a Heading</h1>
<p style="color: green;">This is a paragraph.</p>
<p>Lorem ipsum dolor sit amet, consetetur sadipscing elitr, sed diam nonumy eirmod tempor invidunt ut labore et dolore magna aliquyam erat, sed diam voluptua. At vero eos et accusam et justo duo dolores et ea rebum. Stet clita kasd gubergren, no sea takimata sanctus est Lorem ipsum dolor sit amet. Lorem ipsum dolor sit amet, consetetur sadipscing elitr, sed diam nonumy eirmod tempor invidunt ut labore et dolore magna aliquyam erat, sed diam voluptua. At vero eos et accusam et justo duo dolores et ea rebum. Stet clita kasd gubergren, no sea takimata sanctus est Lorem ipsum dolor sit amet.</p>
</body>
</html>
Cleanup:
docker container rm myweb-container
docker image rm myweb-image
Use Docker Image in Minikube
Minikube runs on an own Docker Daemon, so we can not use 'standard' local Docker Image Repository, but the Minikube one.
Change current Shell environment to Minikube-Docker and build Docker Image:
eval $(minikube docker-env)

docker build -t myweb-image .
# set additional Tag
docker image tag myweb-image:latest myweb-image:1.0
Doublecheck in Minikube:
$ minikube ssh

docker@minikube:~$ docker images
REPOSITORY                                TAG       IMAGE ID       CREATED              SIZE
myweb-image                               latest    5193eeef7975   About a minute ago   187MB
Kubernetes Configuration
apiVersion: apps/v1
kind: Deployment
metadata:
  name: myweb-deployment
  labels:
    app: nginx
    version: "1.0"
spec:
  replicas: 3
  selector:
    matchLabels:
      app: myweb-app
  template:
    metadata:
      labels:
        app: myweb-app
    spec:
      containers:
      - name: myweb-container
        image: myweb-image:1.0
        ports:
        - containerPort: 80
---
apiVersion: v1
kind: Service
metadata:
  name: myweb-service
  labels:
    app: myweb-app
spec:
  type: NodePort
  ports:
  - port: 80
    targetPort: 80
    protocol: TCP
  selector:
    app: myweb-app
Create Deployment & Service:
kubectl apply -f myweb.yaml
kubectl get deployment
kubectl get service
Start Service:
minikube service myweb-service &
Check in Terminal:
$ http http://127.0.0.1:38915
HTTP/1.1 200 OK
Accept-Ranges: bytes
Connection: keep-alive
Content-Length: 763
Content-Type: text/html
Date: Thu, 29 Jun 2023 16:19:18 GMT
ETag: "649da8a5-2fb"
Last-Modified: Thu, 29 Jun 2023 15:52:05 GMT
Server: nginx/1.25.1

<!DOCTYPE html>
<html>
<head>
<title>Page Title</title>
</head>
<body>
<h1>This is a Heading</h1>
<p style="color: green;">This is a paragraph.</p>
<p>Lorem ipsum dolor sit amet, consetetur sadipscing elitr, sed diam nonumy eirmod tempor invidunt ut labore et dolore magna aliquyam erat, sed diam voluptua. At vero eos et accusam et justo duo dolores et ea rebum. Stet clita kasd gubergren, no sea takimata sanctus est Lorem ipsum dolor sit amet. Lorem ipsum dolor sit amet, consetetur sadipscing elitr, sed diam nonumy eirmod tempor invidunt ut labore et dolore magna aliquyam erat, sed diam voluptua. At vero eos et accusam et justo duo dolores et ea rebum. Stet clita kasd gubergren, no sea takimata sanctus est Lorem ipsum dolor sit amet.</p>
</body>
</html>
Cleanup:
$ kubectl delete -f myweb.yaml
Work in a pod
Start some pods & service and display them:
kubectl apply -f myweb.yaml
kubectl get all -o wide
Output:
NAME                                    READY   STATUS    RESTARTS   AGE     IP            NODE       NOMINATED NODE   READINESS GATES
pod/myweb-deployment-565b64686c-2nnrl   1/1     Running   0          3m42s   10.244.0.39   minikube   <none>           <none>
pod/myweb-deployment-565b64686c-m4p4c   1/1     Running   0          3m42s   10.244.0.41   minikube   <none>           <none>
pod/myweb-deployment-565b64686c-sx6sx   1/1     Running   0          3m42s   10.244.0.40   minikube   <none>           <none>

NAME                    TYPE        CLUSTER-IP      EXTERNAL-IP   PORT(S)        AGE     SELECTOR
service/kubernetes      ClusterIP   10.96.0.1       <none>        443/TCP        23h     <none>
service/myweb-service   NodePort    10.97.251.106   <none>        80:32715/TCP   3m42s   app=myweb-app

NAME                               READY   UP-TO-DATE   AVAILABLE   AGE     CONTAINERS        IMAGES            SELECTOR
deployment.apps/myweb-deployment   3/3     3            3           3m42s   myweb-container   myweb-image:1.0   app=myweb-app

NAME                                          DESIRED   CURRENT   READY   AGE     CONTAINERS        IMAGES            SELECTOR
replicaset.apps/myweb-deployment-565b64686c   3         3         3       3m42s   myweb-container   myweb-image:1.0   app=myweb-app,pod-template-hash=565b64686c
i
Start a Shell in pod on IP: 10.244.0.41:
kubectl exec -it myweb-deployment-565b64686c-m4p4c -- /bin/bash
apt update
apt install httpie inetutils-ping -y

# Connect to another Pod via IP
http 10.244.0.39
# Connect to Service via IP
http 10.97.251.106
# Connect to Service via Service Name
http myweb-service

# Check IP of Service
ping myweb-service
## OUTPUT:
# PING myweb-service.default.svc.cluster.local (10.97.251.106): 56 data bytes

exit
Cleanup:
$ kubectl delete -f myweb.yaml
Environment Variable
Sample how to set an environment variable via deployment file:
Add env section to deployment file:
[...]
    spec:
      containers:
      - name: myweb-container
        image: myweb-image:1.0
        ports:
        - containerPort: 80
        env:
        - name: MY_ENV_1
          value: My Value No 1
        - name: MY_ENV_2
          value: My Value No 2
---
[...]
Start Pods, jump into Pod and check values:
kubectl apply -f myweb.yaml
kubectl get all -o wide

kubectl exec -it myweb-deployment-864984686b-5p7dn -- /bin/bash

## Inside Pod:
echo $MY_ENV_1
# Output: My Value No 1
echo $MY_ENV_2
# Output: My Value No 2
exit

# Cleanup:
kubectl delete -f myweb.yaml