Im letzten Post musste ich CVS in Eclipse nachinstallieren.
Der Download über die Update Seite hatte aber nicht auf Anhieb geklappt, denn Eclipse konnte sich nicht mit dem Update Server verbinden. Es gab ein Problem mit SSL: "PKIX path building failed"
Hintergrund ist, dass die Verbindung aus dem Firmen Intranet hinaus in das Internet über einen Proxy von ZScaler läuft, der eigene Zertifikate ausstellt und diese sind nicht im Java Truststore.
Ich hatte schon mal in einem anderen Setup das gleiche Problem: Man In The Middle (ZScaler) aber mit anderen Anforderungen und anderer Lösung.
Für mein Eclipse Problem muss ich zuerst die Zertifikate finden, dann den Eclipse Truststore und dann diesem die Zertifikate hinzufügen.
Zertifikate
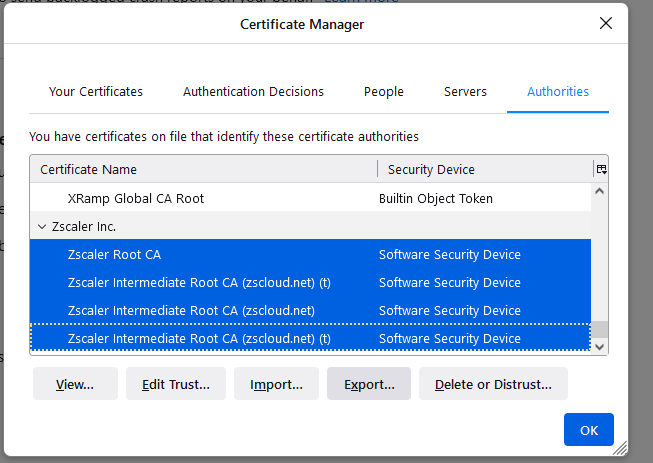
Die Zertifikate habe ich ganz einfach aus dem Firefox gezogen: Über Settings -> Privacy & Security -> Certificates exportieren:
Truststore
Der Pfad zum Truststore des von Eclipse verwendeten Javas findet sich in der eclipse.ini Datei:
Allerdings nicht im /bin Folder, sondern in der Datei /lib/security/cacerts
Das Standart Passwort lautet: changeit
KeyStore Explorer
Man könnte die Zertifikate händisch per Command Line hinzufügen.
Oder man macht es sich leicht und verwendet ein Tool mit GUI. Da bietet sich der KeyStore Explorer an.
Einfach den KeyStore Explorer öffnen, cacerts-Datei hinein ziehen, Passwort (changeit) eingeben und anschließend die aus dem Firefox heruntergeladenen Zertifikate hineinziehen und importieren. Anschließend speichern und ggf. Eclipse neu starten.
Bei der Mutual SSL Authentication authentifizieren sich der Server und der Client gegenseitig.
PoC Setup
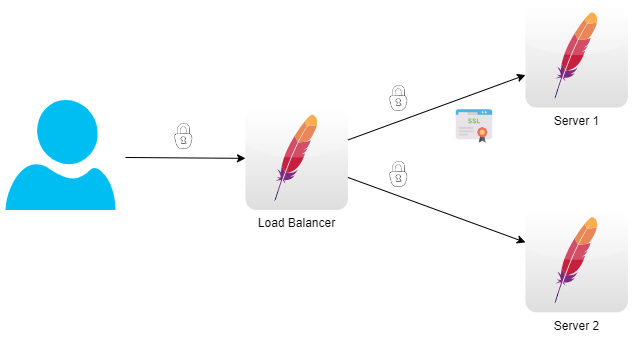
In diesem PoC authentifizieren sich der Load Balancer und der Server 1, bzw. Load Balancer und der Server 2, gegenseitig.
Der User kann durch den Load Balancer die Seite des Server 1, bzw. Server 2, aufrufen.
Ein direkter Aufruf der Seite auf den Servern, also ohne Load Balancer, ist nicht möglich, da nur der Load Balancer sich an den Servern 1&2 authentifizieren kann.
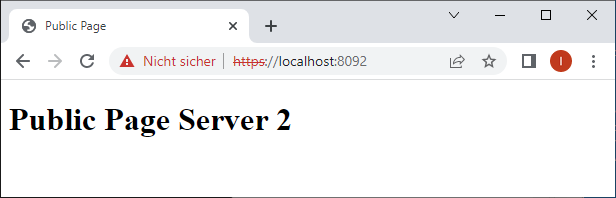
Zu Testzwecken wird allerdings Server 2 offen gehalten, eine Authentifizierung ist nicht erforderlich.
Keys und Zertifikate
Es wird eine eigene CA zum signieren der Zertifikate benötigt.
Für jeden Server wird ein Private Key und signierter Public Key benötigt.
Der LoadBalancer benötigt noch einen kombinierten Key aus seinem Private und Public Key.
Alle Dateien werden im Ordner certs abgelegt.
## Create CA
# Generate CA Key:
openssl genrsa -out ca-key.pem 2048
# Generate CA Certificate:
openssl req -x509 -new -nodes -extensions v3_ca -key ca-key.pem -days 1024 -out ca-root.pem -sha512 -subj "/C=DE/ST=NRW/L=Leverkusen/O=DerIngo/OU=IT Department/CN=deringo.de"


## Generate LoadBalancer
# Generate LoadBalancer Key:
openssl genrsa -out loadbalancer-key.pem 2048

## Generate CSR LoadBalancer
vim loadbalancer_csr_details.txt
openssl req -new -key loadbalancer-key.pem -out loadbalancer.csr -config loadbalancer_csr_details.txt

## Sign CSR
vim loadbalancer_ssl-extensions-x509.conf
openssl x509 -req -in loadbalancer.csr -CA ca-root.pem -CAkey ca-key.pem -CAcreateserial -out loadbalancer.crt -days 365 -sha512  -extensions v3_ca -extfile loadbalancer_ssl-extensions-x509.conf

## Mutual SSL - Reverse Proxy
## Create a file with the private and the signed public key:
# copy private key
cp loadbalancer-key.pem loadbalancer-combined.key
# copy public key (without public key of CA)
cat loadbalancer.crt >> loadbalancer-combined.key

## Add Public Key of CA to Public Key of RP
cat ca-root.pem >> loadbalancer.crt


## Generate Server_1
# Generate Server_1 Key:
openssl genrsa -out server_1-key.pem 2048

## Generate CSR Server_1
vim server_1_csr_details.txt
openssl req -new -key server_1-key.pem -out server_1.csr -config server_1_csr_details.txt

## Sign CSR
vim server_1_ssl-extensions-x509.conf
openssl x509 -req -in server_1.csr -CA ca-root.pem -CAkey ca-key.pem -CAcreateserial -out server_1.crt -days 365 -sha512  -extensions v3_ca -extfile server_1_ssl-extensions-x509.conf

## Add Public Key of CA to Public Key of RP
cat ca-root.pem >> server_1.crt


## Generate Server_2
# Generate Server_2 Key:
openssl genrsa -out server_2-key.pem 2048

## Generate CSR Server_2
vim server_2_csr_details.txt
openssl req -new -key server_2-key.pem -out server_2.csr -config server_2_csr_details.txt

## Sign CSR
vim server_2_ssl-extensions-x509.conf
openssl x509 -req -in server_2.csr -CA ca-root.pem -CAkey ca-key.pem -CAcreateserial -out server_2.crt -days 365 -sha512  -extensions v3_ca -extfile server_2_ssl-extensions-x509.conf

## Add Public Key of CA to Public Key of RP
cat ca-root.pem >> server_2.crt
Mutual SSL
LoadBalancer
Create a file with the private and the signed public key (bereits im Schritt zuvor erfolgt):
## Mutual SSL - Reverse Proxy
## Create a file with the private and the signed public key:
# copy private key
cp loadbalancer-key.pem loadbalancer-combined.key
# copy public key (without public key of CA)
cat loadbalancer.crt >> loadbalancer-combined.key
To communicate to the application server with SSL we need this lines in our HTTP configuration:
SSLProxyEngine On
SSLProxyMachineCertificateFile /usr/local/apache2/conf/combined.key
Der Fehler trat auf, nachdem ich meinen PoC von meinem Entwicklungsrechner in die Cloud transferierte und dort laufen ließ und dort testen wollte.
Auf der Console des Servers sieht der Aufruf mittels "curl http://localhost/private/index.html" auch erstmal gut aus.
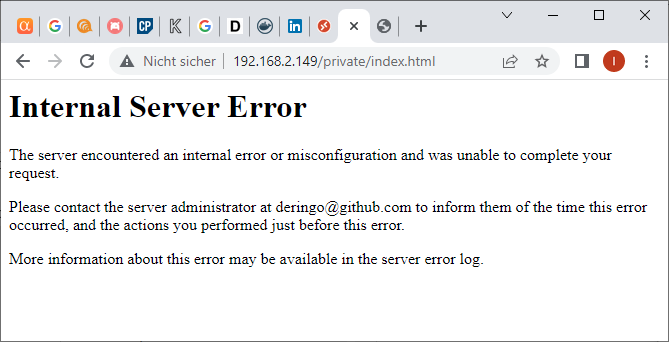
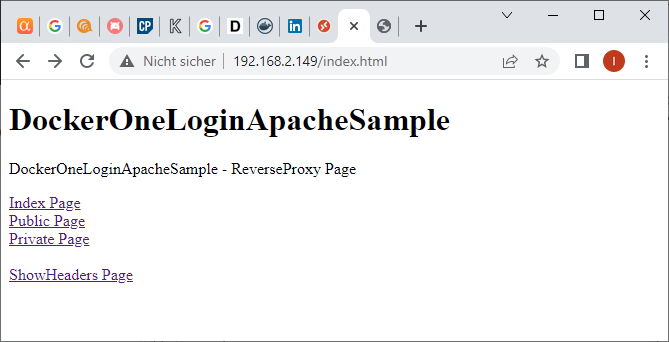
Der Zugriff aus dem Browser mittels IP "http://<server-ip>/private/index.html" schlägt mit obiger Fehlermeldung komplett fehl.
Lokal nachstellen
Um das Problem lokal auf dem Entwicklerlaptop nachstellen zu können, muss erstmal die lokale (Docker-)IP ermittelt werden:
ping host.docker.internal

Ping wird ausgeführt für host.docker.internal [192.168.2.149] mit 32 Bytes Daten:
Antwort von 192.168.2.149: Bytes=32 Zeit<1ms TTL=128
Antwort von 192.168.2.149: Bytes=32 Zeit<1ms TTL=128
Antwort von 192.168.2.149: Bytes=32 Zeit<1ms TTL=128
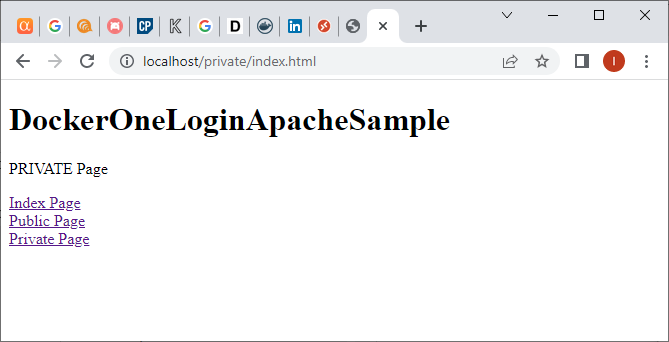
Der Aufruf der PRIVATE Page, nach OneLogin Login versteht sich, funktioniert über localhost:
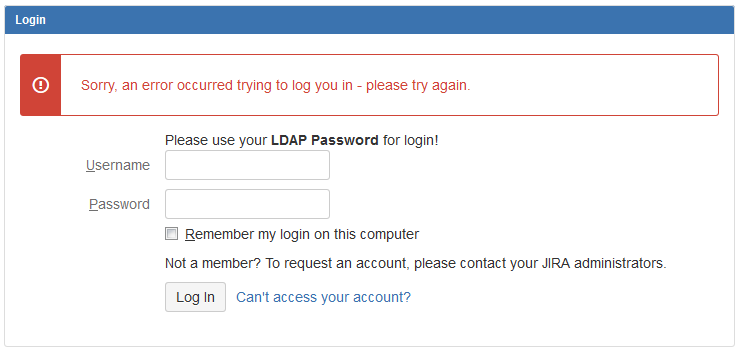
Der Aufruf der PRIVATE Page funktioniert nicht über die IP:
Auszug aus dem Logfile des Apache HTTP Servers:
reverseproxy_1  | [Thu Jun 09 13:00:54.048377 2022] [auth_openidc:error] [pid 256:tid 140563693147904] [client 172.24.0.1:33902] oidc_authenticate_user:
 the URL hostname (localhost) of the configured OIDCRedirectURI does not match the URL hostname of the URL being accessed (192.168.2.149): the "state" a
nd "session" cookies will not be shared between the two!, referer: http://192.168.2.149/
reverseproxy_1  | 172.24.0.1 - - [09/Jun/2022:13:00:54 +0000] "GET /private/index.html HTTP/1.1" 500 531
Der Fehler besagt also, "the URL hostname (localhost) of the configured OIDCRedirectURI does not match the URL hostname of the URL being accessed (192.168.2.149)".
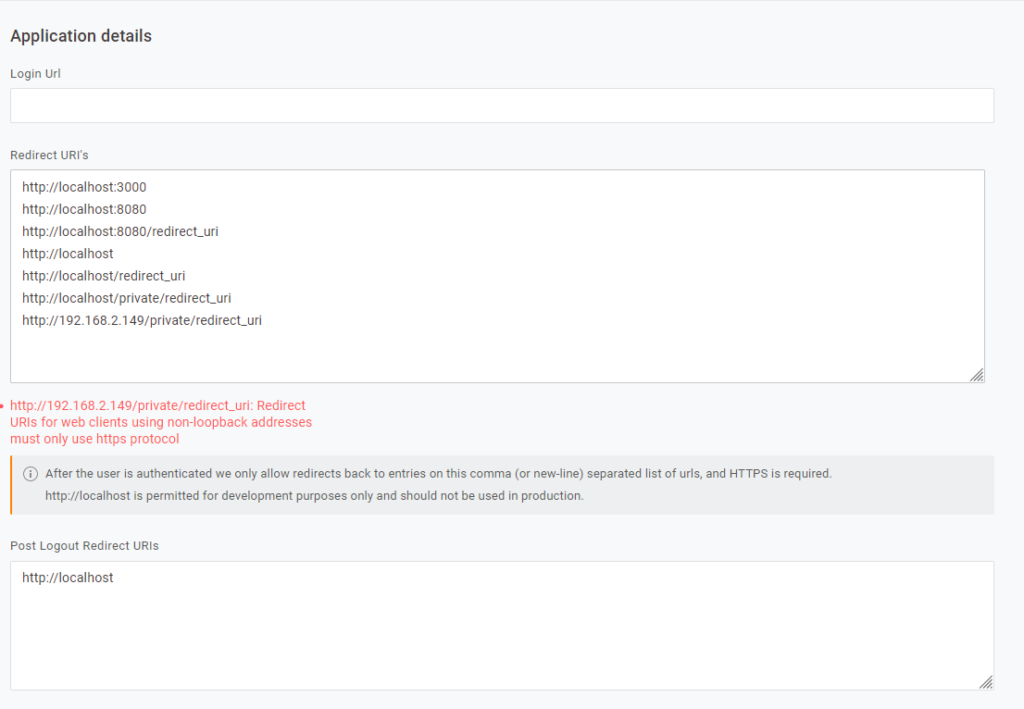
OneLogin Konfigurationsanpassung
Die Redirect URIs Liste muss um die IP des Servers erweitert werden:
Allerdings ist http als Protokoll lediglich für localhost zugelassen, nicht aber für alle anderen URIs, wie zB unsere Server IP oder später der Domain Name des Servers.
Die Redirect URI muss also mit https eingetragen werden.
Daraus ergibt sich allerdings auch, dass unser Server über https erreichbar sein muss!
Apache mit HTTPS
Ein selbstsigniertes Zertifikat ist für unseren PoC vollkommen ausreichend. Eine Signierung durch zB Let's Encrypt ist nicht notwendig.
Für diesen PoC brauchen wir lediglich den Reverse Proxy, der im ersten Schritt eine Seite über http und https ausliefern kann. Später kommt dann die Authentifizierung mit OneLogin hinzu.
Schritt 1: http
Das Dockerfile des Apache aus den vorherigen PoCs uA schon mit OpenID Module:
FROM httpd:2.4
RUN apt update && apt install -y \
	libapache2-mod-auth-openidc \
	ca-certificates
RUN cp /usr/lib/apache2/modules/mod_auth_openidc.so /usr/local/apache2/modules/
RUN mv conf/httpd.conf conf/container_httpd.conf
CMD ["httpd-foreground"]
Die Einbindung der Konfigurationsdateien erfolgt über reverseproxy_httpd.conf, die in den Container als httpd.conf hineinkopiert wird:
# load original configuration first
Include conf/container_httpd.conf

# customized configuration
ServerName reverseproxy
Include conf/reverseproxy.conf
Include conf/reverseproxy-ssl.conf
Die Konfiguration für http erfolgt in reverseproxy.conf:
Die Seite ist über http://localhost:443 erreichbar. Richtig: http, nicht https! Verschlüsselt wird hier noch nix.
Schritt 3: https
Als ersten Teilschritt wird die reverseproxy-ssl.conf mit der Default-SSL-Konfiguration überschrieben und alle Kommentare gelöscht.
Folgende Änderungen werden gemacht:
ServerName localhost:443
ServerAdmin deringo@github.com

SSLEngine off

#SSLCertificateFile "/usr/local/apache2/conf/server.crt"
#SSLCertificateKeyFile "/usr/local/apache2/conf/server.key"
Server neu starten, anschließend ist die Seite weiterhin unverschlüsselt über http://localhost:443 erreichbar.
Als nächster Teilschritt wird SSLEngine on gestellt und die beiden CertificateFile Einträge wieder ent-kommentiert. Außerdem müssen die Module mod_socache_shmcb.so und mod_ssl.so geladen werden.
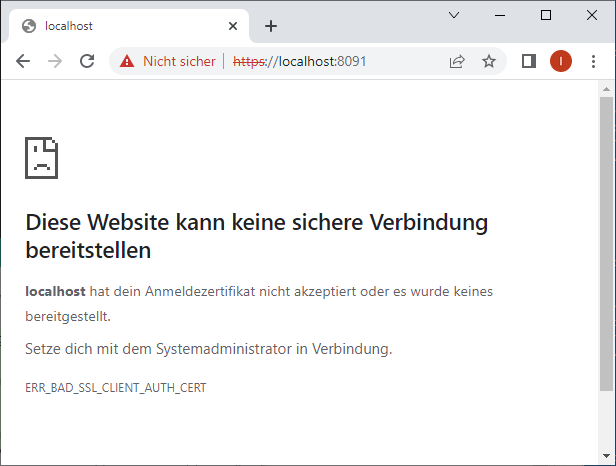
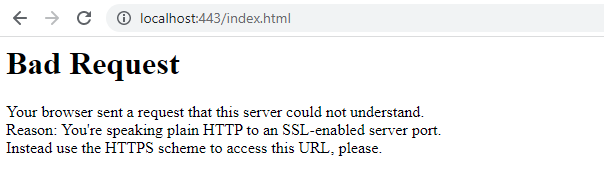
Server neu durchstarten und der unverschlüsselte Aufruf wird abgewiesen:
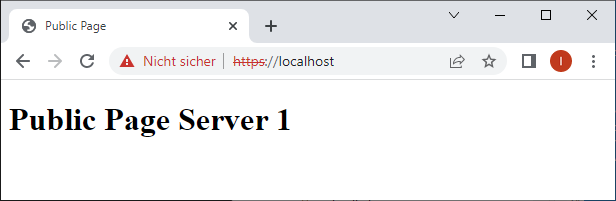
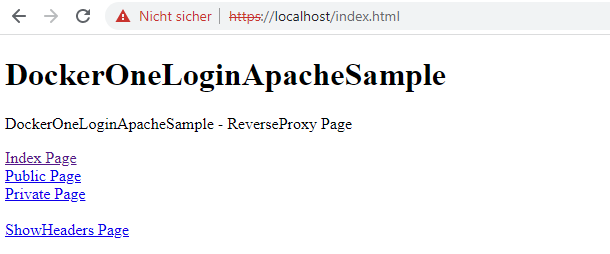
Der verschlüsselte Aufruf über https://localhost funktioniert:
Allerdings wird die Seite als "Nicht sicher" angezeigt und es musste einmalig ein entsprechender Hinweis weggeklickt werden, da das Zertifikat nicht von einer vertrauenswürdigen Stelle signiert wurde.
Da am Ende praktisch nichts von der Standard-Konfiguration für SSL geändert wurde, wird die Konfiguration wieder vereinfacht:
LoadModule socache_shmcb_module modules/mod_socache_shmcb.so
LoadModule ssl_module modules/mod_ssl.so

Include conf/extra/httpd-ssl.conf
Schritt 4: OneLogin
Die OneLogin Konfiguration wird hinzugefügt:
## Default SSL
LoadModule socache_shmcb_module modules/mod_socache_shmcb.so
LoadModule ssl_module modules/mod_ssl.so

Include conf/extra/httpd-ssl.conf

##
LoadModule proxy_module modules/mod_proxy.so
LoadModule xml2enc_module modules/mod_xml2enc.so
LoadModule proxy_html_module modules/mod_proxy_html.so
LoadModule proxy_connect_module modules/mod_proxy_connect.so
LoadModule proxy_http_module modules/mod_proxy_http.so

LoadModule auth_openidc_module modules/mod_auth_openidc.so

<VirtualHost localhost:443>
    ServerAdmin deringo@github.com
    DocumentRoot "/usr/local/apache2/htdocs"
    ServerName localhost:443
    ## mod_auth_openidc
    ## https://github.com/zmartzone/mod_auth_openidc

    #this is required by mod_auth_openidc
    OIDCCryptoPassphrase <INSERT-HERE a-random-secret>

    OIDCProviderMetadataURL <INSERT-HERE>

    OIDCClientID <INSERT-HERE>
    OIDCClientSecret <INSERT-HERE>
    # OIDCRedirectURI is a vanity URL that must point to a path protected by this module but must NOT point to any content
    OIDCRedirectURI https://localhost/private/redirect_uri

    ## OIDCScope params
    ## to put params including roles into header
    OIDCScope "openid email profile groups params"


    <Location /private/>
        AuthType openid-connect
        Require valid-user
    </Location>

</VirtualHost>
Alle Seiten sind über https erreichbar.
Aber leider auch die Private Page OHNE dass vorher ein Login über OneLogin erfolgen musste.
Irgendwie klappt das nicht mit dem überschreiben/erweitern der default SSL Konfiguration. Also doch alles in eine Datei:
LoadModule proxy_module modules/mod_proxy.so
LoadModule xml2enc_module modules/mod_xml2enc.so
LoadModule proxy_html_module modules/mod_proxy_html.so
LoadModule proxy_connect_module modules/mod_proxy_connect.so
LoadModule proxy_http_module modules/mod_proxy_http.so

LoadModule auth_openidc_module modules/mod_auth_openidc.so


LoadModule socache_shmcb_module modules/mod_socache_shmcb.so
LoadModule ssl_module modules/mod_ssl.so

Listen 443

SSLCipherSuite HIGH:MEDIUM:!MD5:!RC4:!3DES
SSLProxyCipherSuite HIGH:MEDIUM:!MD5:!RC4:!3DES

SSLHonorCipherOrder on

SSLProtocol all -SSLv3
SSLProxyProtocol all -SSLv3

SSLPassPhraseDialog  builtin

SSLSessionCache        "shmcb:/usr/local/apache2/logs/ssl_scache(512000)"
SSLSessionCacheTimeout  300


##
## SSL Virtual Host Context
##

<VirtualHost _default_:443>

#   General setup for the virtual host
ServerName localhost:443
ServerAdmin deringo@github.com
DocumentRoot "/usr/local/apache2/htdocs"
ErrorLog /proc/self/fd/2
TransferLog /proc/self/fd/1

#   SSL Engine Switch:
#   Enable/Disable SSL for this virtual host.
SSLEngine on

SSLCertificateFile "/usr/local/apache2/conf/server.crt"
SSLCertificateKeyFile "/usr/local/apache2/conf/server.key"

<FilesMatch "\.(cgi|shtml|phtml|php)$">
    SSLOptions +StdEnvVars
</FilesMatch>
<Directory "/usr/local/apache2/cgi-bin">
    SSLOptions +StdEnvVars
</Directory>

BrowserMatch "MSIE [2-5]" \
         nokeepalive ssl-unclean-shutdown \
         downgrade-1.0 force-response-1.0

CustomLog /proc/self/fd/1 \
          "%t %h %{SSL_PROTOCOL}x %{SSL_CIPHER}x \"%r\" %b"


    ## mod_auth_openidc
    ## https://github.com/zmartzone/mod_auth_openidc

    #this is required by mod_auth_openidc
    OIDCCryptoPassphrase <INSERT-HERE a-random-secret>

    OIDCProviderMetadataURL <INSERT-HERE>

    OIDCClientID <INSERT-HERE>
    OIDCClientSecret <INSERT-HERE>
    # OIDCRedirectURI is a vanity URL that must point to a path protected by this module but must NOT point to any content
    OIDCRedirectURI https://localhost/private/redirect_uri

    ## OIDCScope params
    ## to put params including roles into header
    OIDCScope "openid email profile groups params"


    <Location /private/>
        AuthType openid-connect
        Require valid-user
    </Location>

</VirtualHost>
So funktioniert es wie gewünscht und die Private Page wird erst nach Login angezeigt.
Allerdings nur über localhost. Nicht über die IP.
Die OIDCRedirectURI wird von https://localhost/private/redirect_uri auf https://192.168.2.149/private/redirect_uri geändert und schon funktioniert es genau anders herum: Nur über die IP, nicht über localhost.
Das ist nicht ganz so, wie ich mir das vorgestellt habe, aber für den PoC sollte es ausreichend sein.
Schritt 5: Nur https
Alles was über http rein kommt, soll über https weitergeleitet werden:
Die Generierung der Zertifikate erfolgte im laufenden Container. Dieser Schritt soll schon beim Erzeugen des Images erfolgen.
Ein Problem war, dass dies interaktiv erfolgen musste. Mit dem Parameter -subj "/" können Key & Zertifikat ohne Interaktion generiert werden. Im Subject könnten Daten eingetragen werden, dies ist aber für den PoC gar nicht erforderlich.
Einmal der Befehl vollständig, wie er im Container ausgeführt werden könnte:
In my first post about Git I wrote about the problem with non-public CA signed certitificates and how to handle it. I did not mention the easierst (and unsecured) way to handle this, so I write this post to have all possibilities in one place.
Add certificate to truststore
I download the public certificate of the CA from webbrowser and add it to the truststore of Git.
To add the non-public CA cert to Git cert store just open ca-bundle.crt and the downloaded certificate with an text editor and copy the content of the certificate to the ca-bundle.
Use Windows Networking Layer
I configured the sslBackend to the Windows Networking Layer:
# use SChannel, the built-in Windows networking layer. This means that it will use the Windows certificate storage mechanism and you do not need to explicitly configure the curl CA storage mechanism.
git config --global http.sslBackend schannel
Disable SSL Verify
The easierst and unsecure way is to simply disable SSL validation:
git config --global http.sslVerify false
This also works with the system configuration (--system instead of --global). I did this an a project with a very short time budget, we had to configure Git on the Linux system and this Git installation was used by a Jenkins. Both servers, Git & Jenkins, are in the same corporate intranet.