Set up Quarkus in Codespace environment
Setup
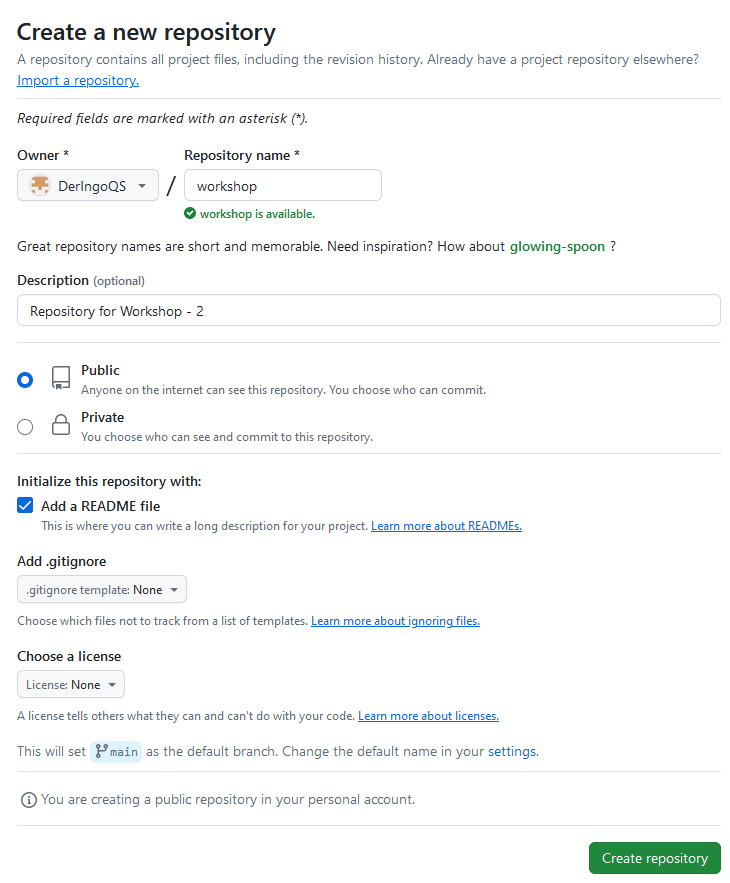
Create a repository “workshop”:
Open codespace and setup Linux in Terminal:
sudo apt update && \
sudo apt upgrade -y && \
sudo apt install httpie -y
Setup Quarkus Project
Getting started → 4. Bootstrapping the project → Maven
copy and change ArtifactId to workshop
cd ..
# pwd -> /workspaces
mvn io.quarkus.platform:quarkus-maven-plugin:3.10.2:create \
    -DprojectGroupId=org.acme \
    -DprojectArtifactId=workshop
We can not just delete the workshop folder, because GIT information are inside this folder.
Workaround:
cd /workspaces/workshop/
mvn io.quarkus.platform:quarkus-maven-plugin:3.10.2:create \
-DprojectGroupId=org.acme \
-DprojectArtifactId=workshop
mv workshop/* .
ls -lisah workshop/
# hidden files/directory still there
mv workshop/.* .
ls -lisah workshop/
# now everthing has moved
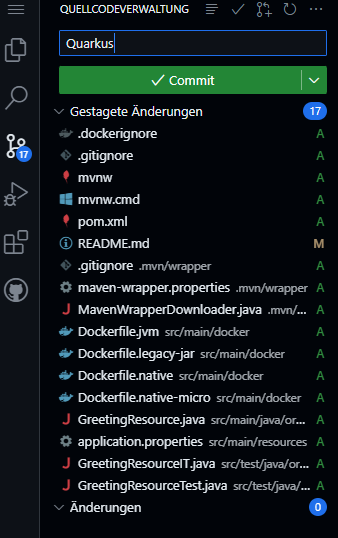
rmdir workshopStage, commit and push to repository:
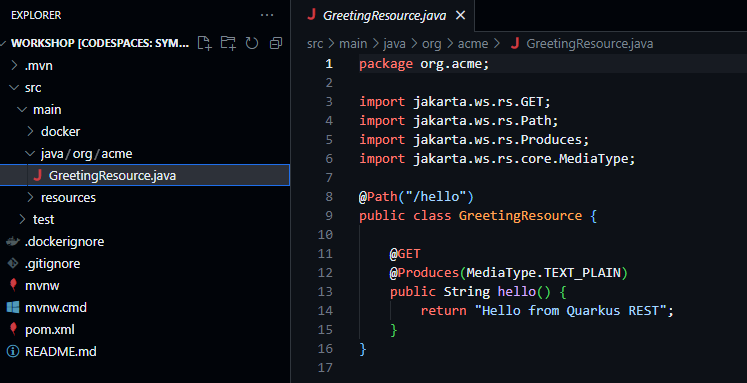
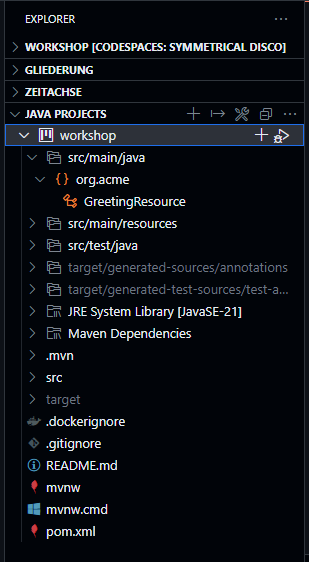
Open GreetingResource, this will force Visual Code to ask to install Extension Pack for Java:

Go to Explorer → Java Projects → Import Projects
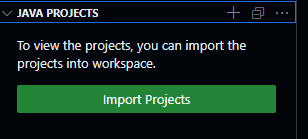
It takes a minute or two to show our workshop project:
Start Quarkus
./mvnw quarkus:dev

In Ports Port 5005 is automatically added, but not Port 8080.

We need to add Port 8080 manually.

Click on the Globus Icon and Quarkus welcome page opens:

Go to Visit the dev UI → Endpoints
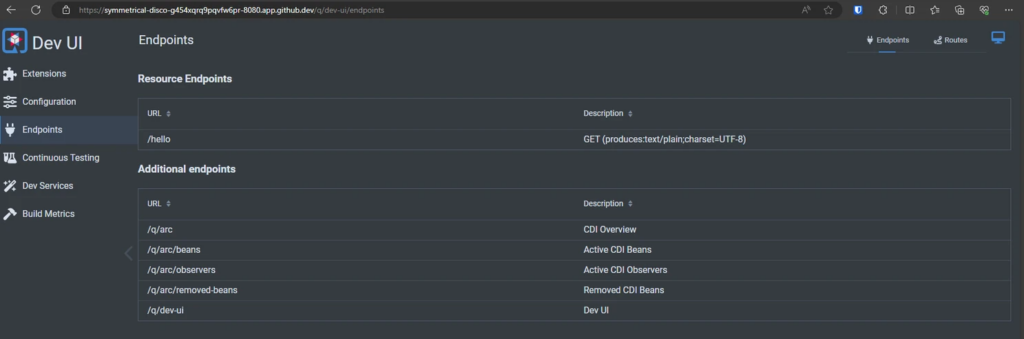
Click on /hello:

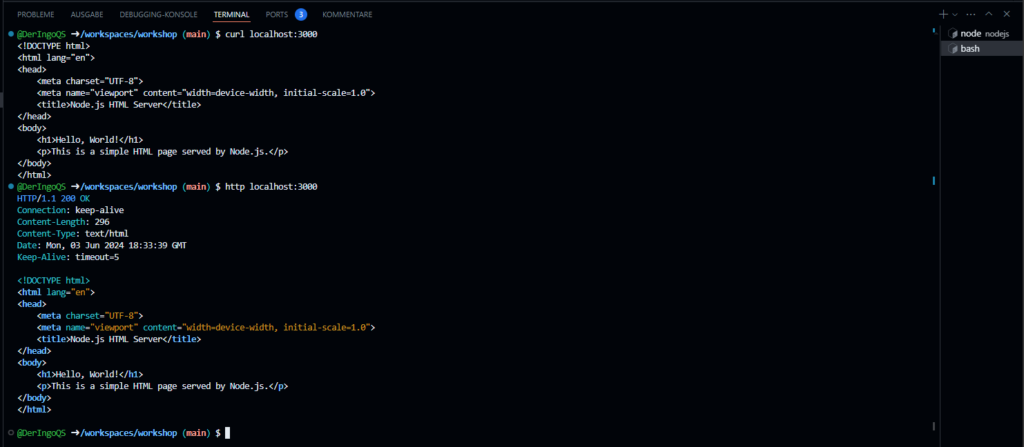
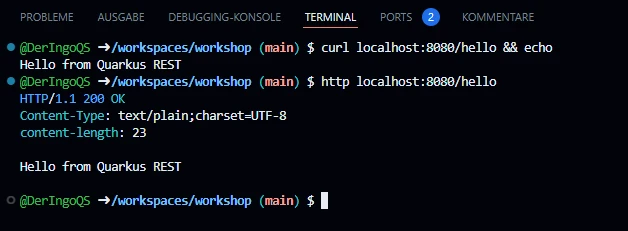
Test from terminal
Open new Terminal
## "&& echo" for additional linebreak
curl localhost:8080/hello && echo
http localhost:8080/hello
WebSockets with Quarkus
Quarkus Guide for using WebSockets
Setup ChatSocket
First we need to install extensions:
./mvnw quarkus:add-extension -Dextensions='websockets'
./mvnw quarkus:add-extension -Dextensions='websockets-next'
Create simple ChatSocket:
package org.acme;

import io.quarkus.websockets.next.OnTextMessage;
import io.quarkus.websockets.next.WebSocket;

@WebSocket(path = "/chatsocket")
public class ChatSocket {
    @OnTextMessage
    public String onMessage(String userMessage){
        return "You said: " + userMessage;
    }
}
Test from terminal
npm install -g wscat
wscat -c ws://localhost:8080/chatsocket

wscat -c ws://localhost:8080/chatsocket
> Hello World!
< You said: Hello World!
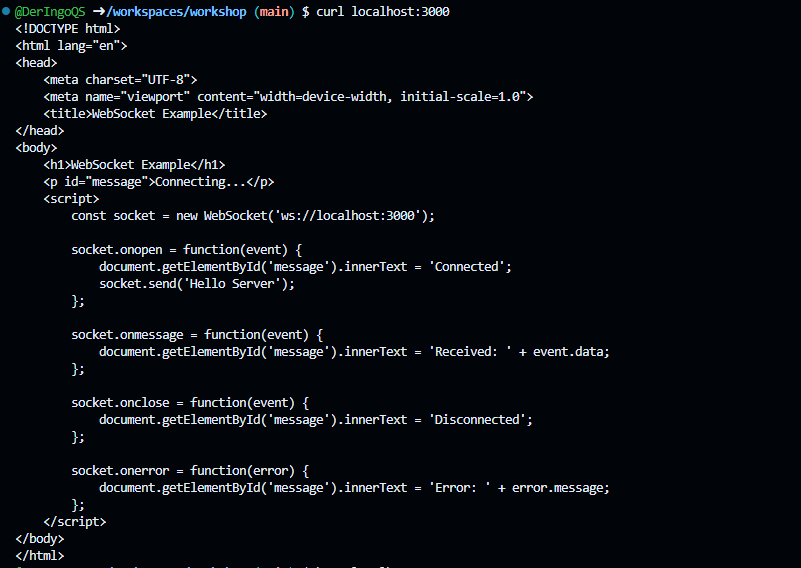
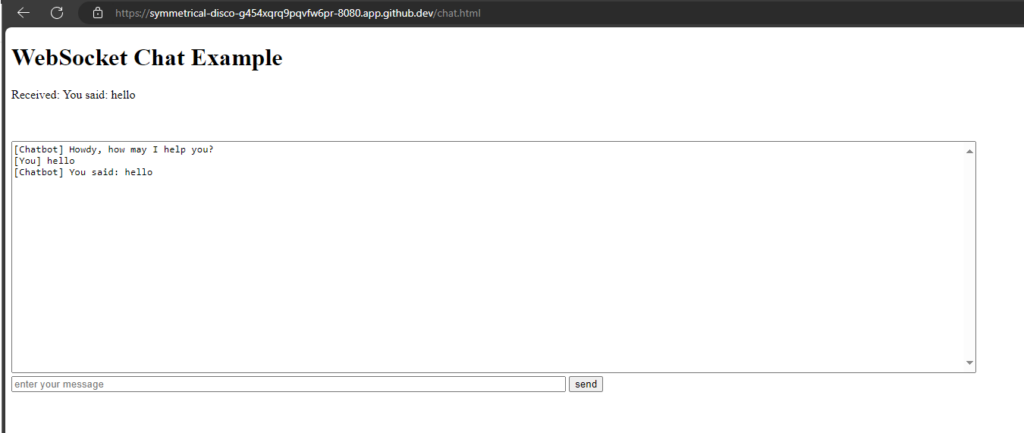
Build html client
mkdir -p src/main/resources/META-INF/resources
touch src/main/resources/META-INF/resources/chat.html
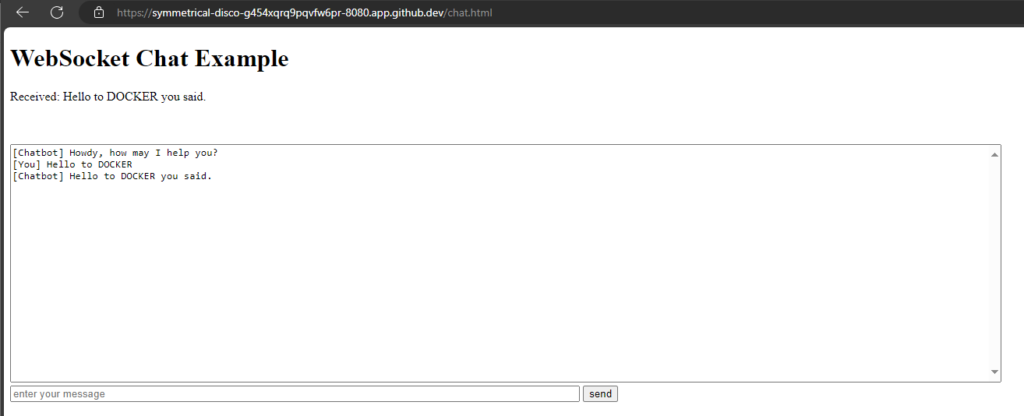
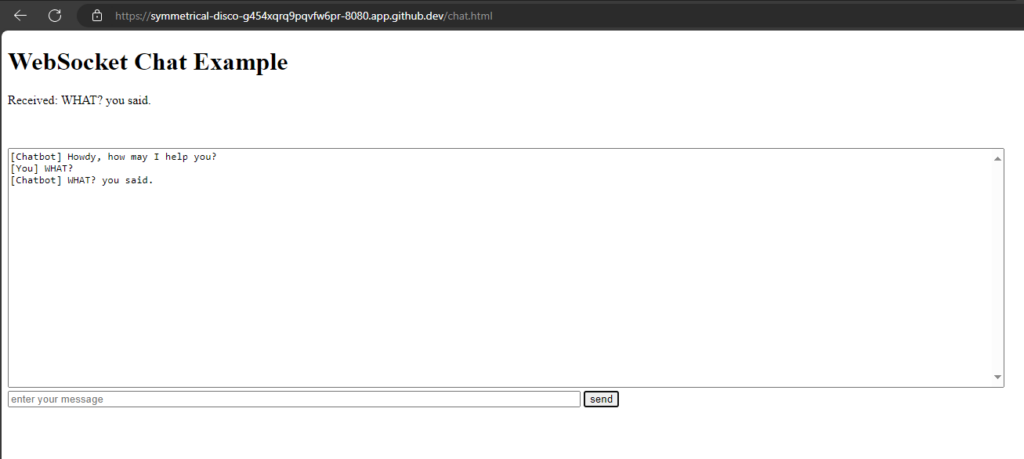
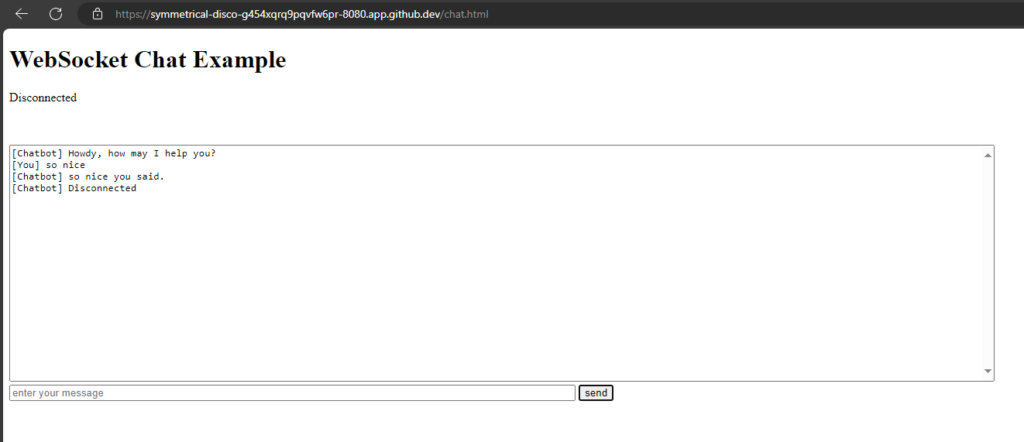
WebSocket Chat Example
WebSocket Chat Example
Connecting...
CONTEXTS AND DEPENDENCY INJECTION Example
Add a ChatService for the 'logic' and inject it into the Chat Socket:
package org.acme;

import io.quarkus.runtime.StartupEvent;
import jakarta.enterprise.context.ApplicationScoped;
import jakarta.enterprise.event.Observes;

@ApplicationScoped
public class ChatService {
    protected void startup(@Observes StartupEvent event) {
        System.out.println("Startuuuuuuuuuup event");
    }

    public String chat(String message) {
        return message + " you said.";
    }
}
package org.acme;
import io.quarkus.websockets.next.OnTextMessage;
import io.quarkus.websockets.next.WebSocket;
import jakarta.inject.Inject;
@WebSocket(path = "/chatsocket")
public class ChatSocket {
@Inject
ChatService chatService;
@OnTextMessage
public String onMessage(String userMessage){
return chatService.chat(userMessage);
}
}

Build and run native Image
Building a Native Executable - Quarkus
Build:
# Ich muss vermutlich nur den zweiten Befehl ausführen?
# ./mvnw install -Dnative
./mvnw package -Dnative -Dquarkus.native.container-build=true -Dquarkus.container-image.build=true
Open another terminal and see how much codespace machine is sweating:
htop
Run:
target/workshop-1.0.0-SNAPSHOT-runner
The project generation has provided a Dockerfile.native-micro in the src/main/docker directory.
# build
docker build -f src/main/docker/Dockerfile.native-micro -t deringo/workshop .

# run
docker run -i --rm -p 8080:8080 deringo/workshop